This Professional Sample Printer Test Page serves as a comprehensive diagnostic tool designed to evaluate your hardware's output precision. By analyzing the integrated CMYK color gradients, you can verify ink density and smooth halftone transitions across all four primary color channels. The document features a dedicated nozzle check pattern to detect printhead clogs or firing inconsistencies, alongside alignment diagnostics that calibrate bidirectional carriage movement and vertical registration. Utilizing these technical benchmarks helps resolve common issues like banding, ghosting, or color shifts. Whether you are performing routine maintenance or technical ICC profiling, this standardized test page ensures optimal color management and mechanical calibration for high-fidelity results.
Understanding Printer Test Pages
A printer test page serves as a fundamental diagnostic tool, bridging the gap between digital instructions and physical output. It is essentially a comprehensive report that displays the printer's current functional status, showcasing various elements such as color gradients, text samples, and alignment grids. When you initiate a test print, the system bypasses complex software layers to send raw data directly to the print spooler, ensuring that the hardware interprets the CMYK or RGB values accurately. This process helps technicians and home users alike determine if an issue resides within the driver, the firmware, or the physical mechanics of the printer itself.
By analyzing the output, you can observe how the device handles different resolutions and rendering intents. Most modern printers include a built-in utility to generate these pages, which provide essential metadata including the serial number, page count, and connection status. Understanding the components of a sample printer test page is the first step toward effective device management and ensuring that every document meets professional standards of quality and precision.
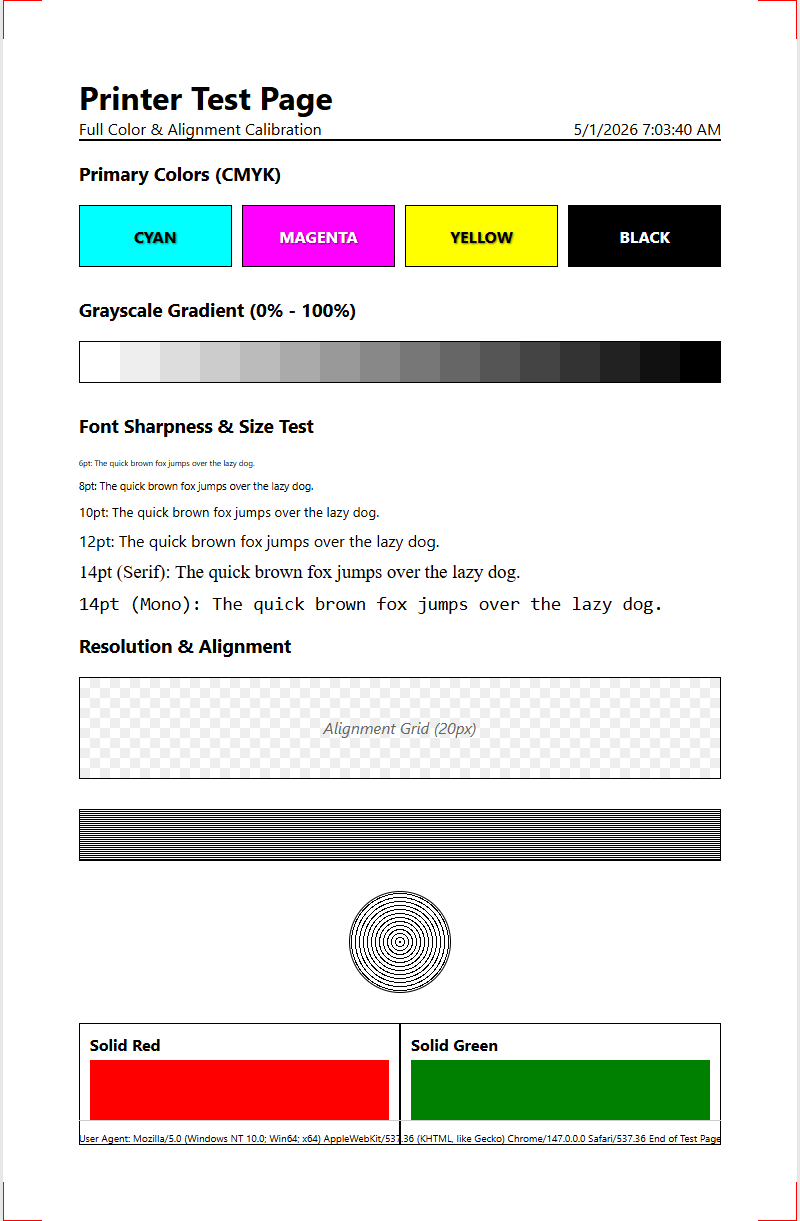
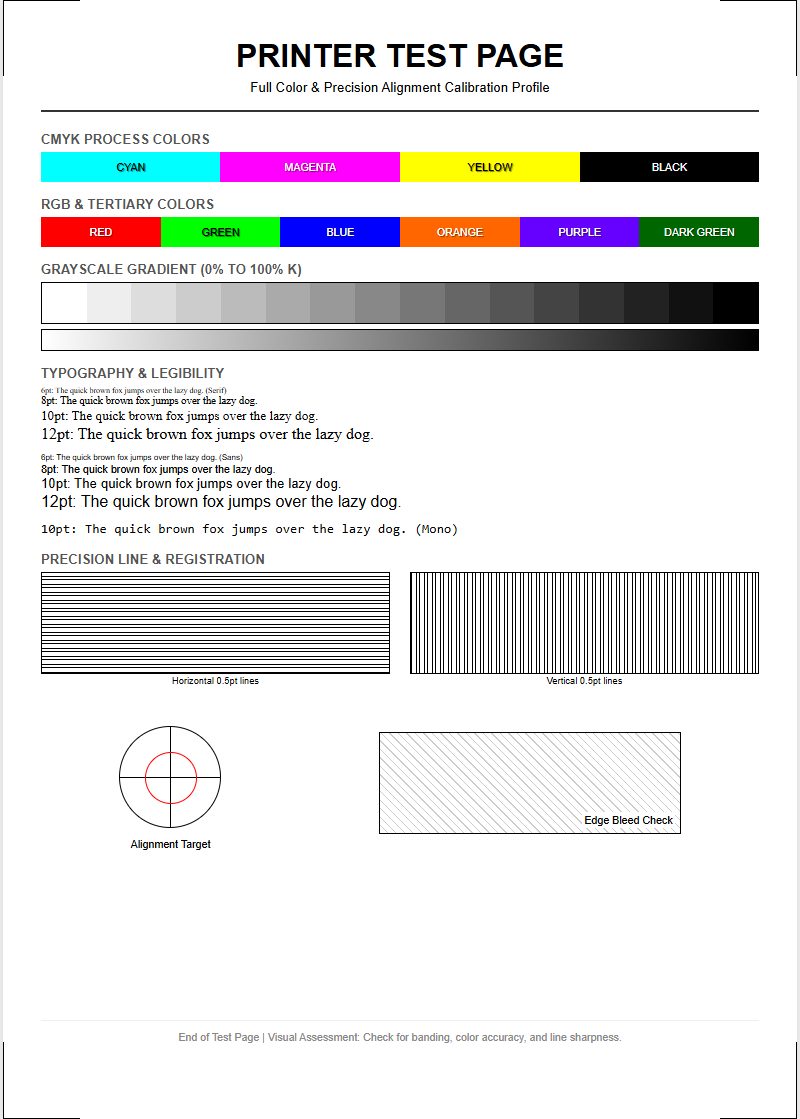
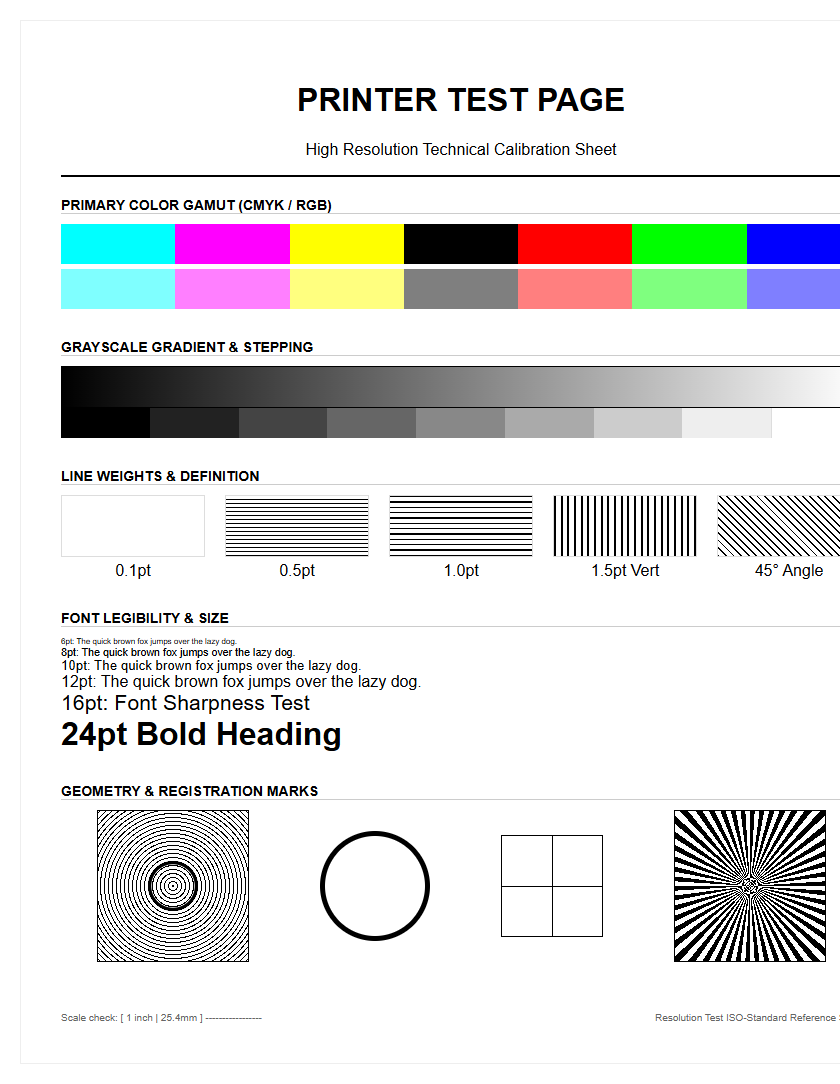
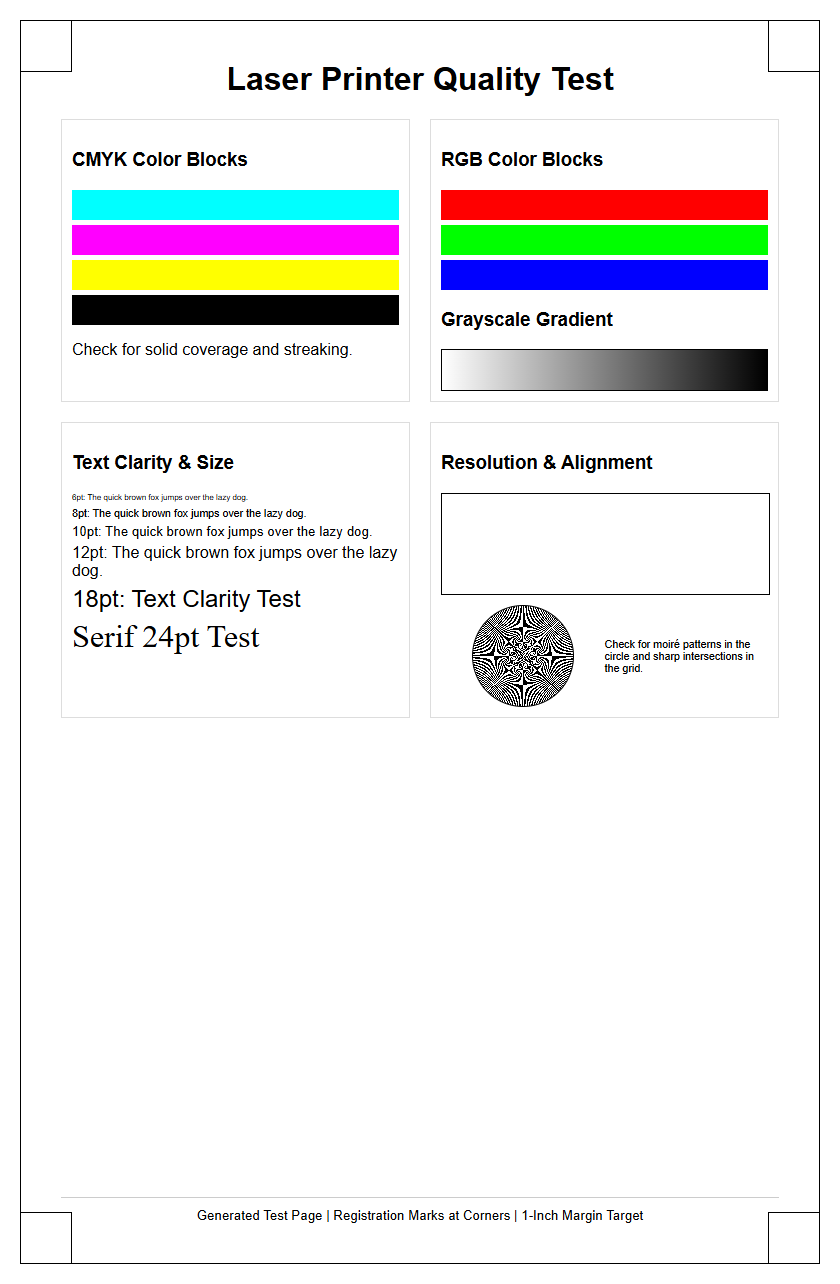
- CMYK Bars: Checks the health of primary ink or toner reservoirs.
- Text Strings: Evaluates the clarity of various font sizes and weights.
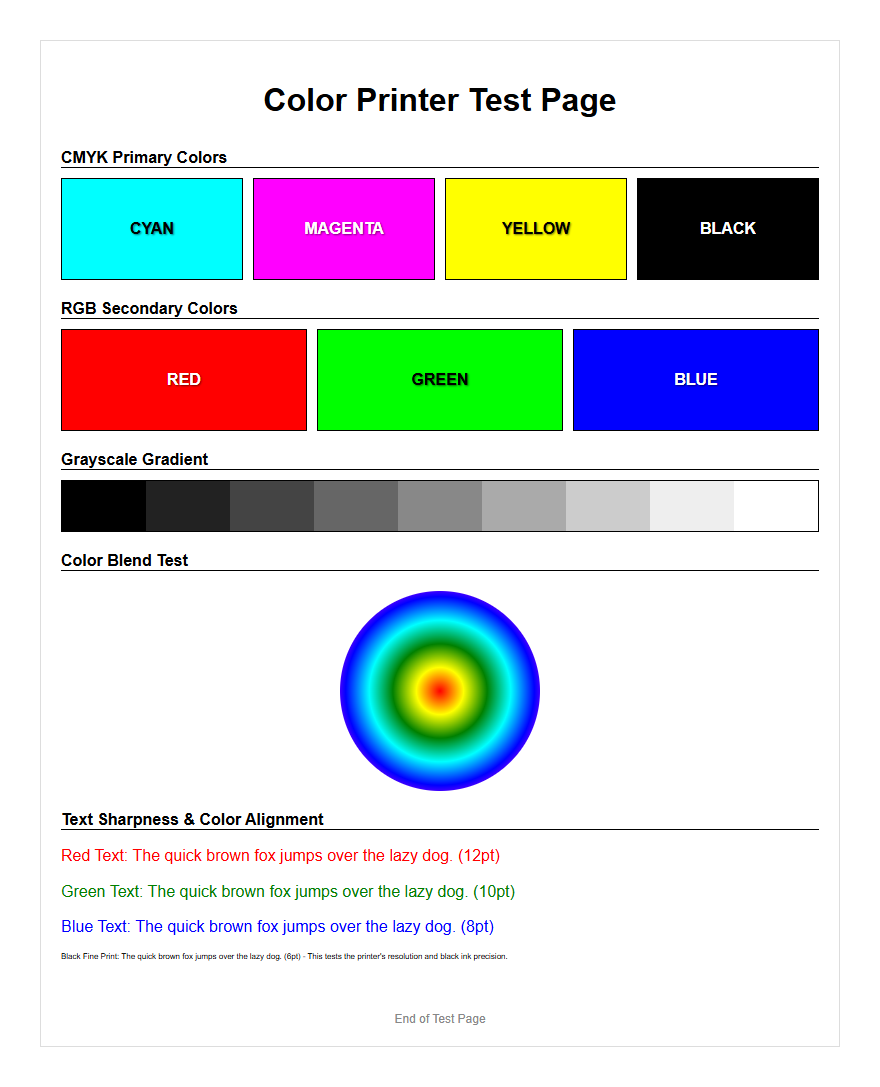
- Radial Patterns: Tests the printer's ability to render circular precision.
Benefits of Regular Print Testing
Conducting regular print tests is a cornerstone of preventive maintenance for both inkjet and laser printers. Frequent testing ensures that the mechanical components, such as the paper feed rollers and the carriage assembly, remain in fluid motion, preventing the build-up of dust or dried ink. For inkjet users, consistent testing is particularly vital to prevent the microscopic nozzles from clogging due to inactivity. In laser printers, a test page can reveal early signs of drum wear or fuser unit degradation before they cause significant project delays.
- Proactive identification of mechanical wear and tear.
- Reduction in wasted consumables by catching errors early.
- Optimization of the duty cycle for high-volume environments.
- Verification of driver updates and software compatibility.
By integrating a sample printer test page into your weekly workflow, you can extend the hardware's lifespan and maintain consistent output quality. This habit allows you to monitor the "health" of your device over time, creating a visual history of its performance. This data is invaluable when performing advanced troubleshooting or deciding when a specific component requires professional servicing.
Evaluating Color Accuracy and Saturation
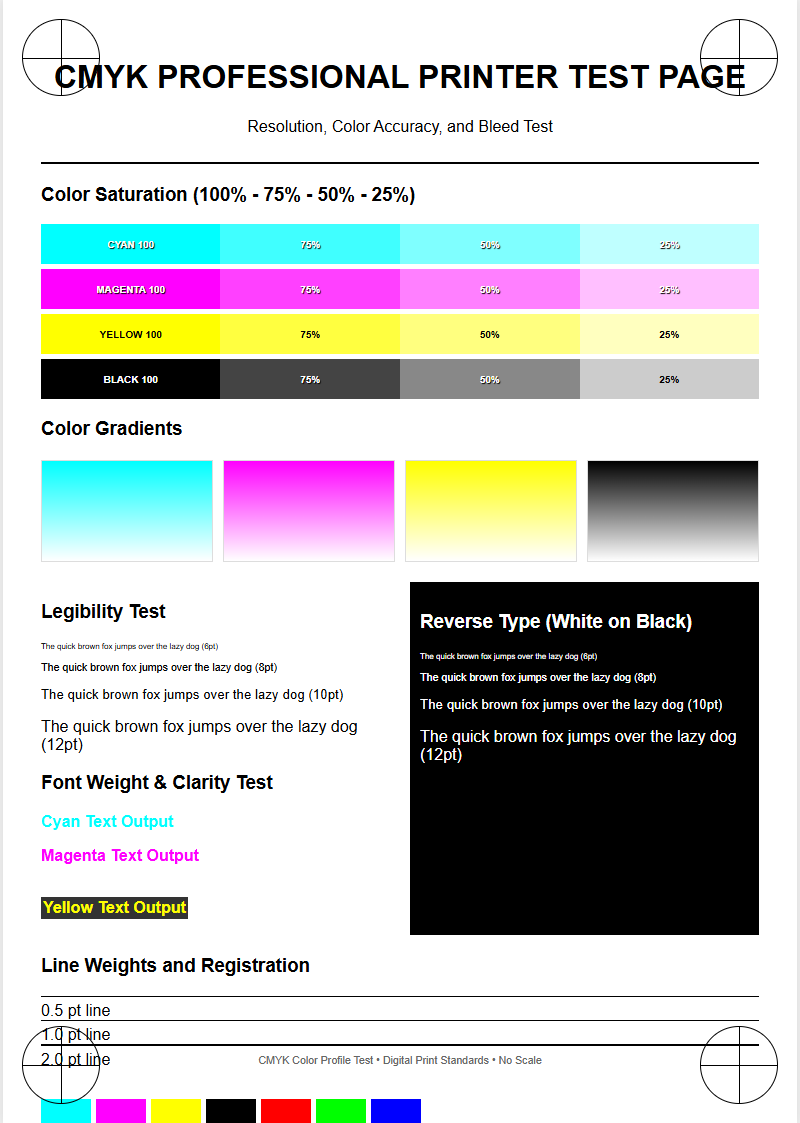
Evaluating color accuracy and saturation is critical for professionals relying on precise visual output. A sample test page typically features primary and secondary color blocks, allowing you to observe how the printer handles subtractive color mixing. High saturation levels should appear vibrant without excessive bleeding or "cockling" of the paper. This section of the test page helps in verifying the ICC profile synchronization between your monitor and the printer hardware. If the cyan, magenta, yellow, and black (CMYK) bars show inconsistencies, it might indicate an issue with color management or depleted cartridges.
| Color Channel | Evaluation Criteria | Potential Issue |
|---|---|---|
| Cyan | Smooth gradient transition | Air bubbles in printhead |
| Magenta | Vibrancy and depth | Expired ink chemistry |
| Yellow | Visibility and brightness | Clogged nozzles |
| Black | Solid density without graying | Low toner or drum fatigue |
Analyzing these blocks ensures that your printer's gamut-the range of colors it can produce-is fully utilized. Inaccuracies often stem from incorrect rendering intents or outdated firmware that fails to interpret color data correctly.
Troubleshooting Common Printing Issues
The sample printer test page is an indispensable asset for troubleshooting common printing issues like banding, ghosting, and streaking. Banding appears as horizontal or vertical lines across the page, often suggesting a problem with the printhead's movement or a clogged nozzle. Ghosting, frequently seen in laser printers, involves a faint duplicate image appearing elsewhere on the page, which typically indicates a faulty drum or an overheated fuser unit. By examining the test page, you can isolate these artifacts and determine their root cause.
- Vertical Streaks: Often caused by a scratched drum or dirty corona wire.
- Horizontal Banding: Indicates printhead misalignment or feed roller slips.
- Smudging: Points to issues with ink drying time or fuser temperature.
- Missing Colors: Signals an empty cartridge or a completely blocked nozzle.
Technical troubleshooting begins by identifying these visual cues on the test output. This targeted approach saves time and prevents the unnecessary replacement of functional parts. Once the pattern is identified, users can perform specific cleaning cycles or mechanical adjustments to restore the device to its factory-rated performance levels.
Checking Ink and Toner Levels
While software-based level indicators provide a digital estimate of remaining supplies, a physical test page offers a more accurate assessment of actual ink or toner availability. As cartridges reach the end of their yield, the test page will display "fading" or light patches where the density should be uniform. In inkjet systems, this may manifest as broken lines in the nozzle check pattern, while laser printers may produce documents with uneven gray scales across the page width. This physical verification is essential for high-stakes printing tasks where a mid-job depletion could be catastrophic.
- Density Gradients: Show if the printer can still achieve deep blacks.
- Solid Blocks: Reveal if the toner is being distributed evenly across the page.
- Warning Indicators: Many test pages print a percentage of remaining life.
Monitoring these levels through test pages ensures that you are not replacing cartridges prematurely based on conservative software estimates. It also helps identify "clogged" cartridges that may report as full but fail to deliver ink due to dried residue in the manifold or the vent holes.
Verifying Print Head Alignment
Print head alignment is vital for ensuring that the various colors and text characters overlap perfectly on the media. Over time, the vibration and mechanical movement of the printer carriage can cause the heads to shift by fractions of a millimeter. A sample printer test page includes registration marks-often a series of overlapping lines or boxes-that allow you to verify both horizontal and vertical alignment. If these marks appear blurry or show "steps" instead of straight lines, your printer is out of calibration, leading to fuzzy text and distorted images.
- Print the alignment test page from the maintenance menu.
- Examine the patterns for the straightest lines.
- Input the corresponding values into the printer's interface.
- Re-test to ensure the bi-directional printing is synchronized.
Accurate calibration is especially important for high-resolution photo printing and detailed technical drafting. Proper alignment ensures that the stepping motor and the encoder strip are working in perfect harmony, delivering ink droplets precisely where the raster image processor (RIP) intended them to land.
Analyzing Grayscale Performance
Grayscale performance is often the ultimate test of a printer's precision and color neutrality. A high-quality test page includes gray ramps that transition smoothly from absolute white to 100% black. Analyzing these ramps allows you to detect "color casting," where the gray tones accidentally lean toward green, pink, or blue. This is a common issue in printers that mix CMYK to create gray rather than using a dedicated pigment-based black ink. Smooth transitions without visible "stepping" or "dithering" artifacts indicate a high-functioning halftone engine.
- Neutrality: Ensuring grays stay gray under different lighting.
- Dithering: Evaluating the pattern of dots used to create shades.
- Black Point: Testing the maximum density the printer can achieve.
For monochromatic laser printers, the grayscale test highlights the drum's ability to hold varying electrostatic charges. Any splotchiness in the gray blocks suggests a dirty transfer belt or a worn-out developer unit. Maintaining neutral, smooth grays is essential for professional-looking documents and realistic photographic prints, making this a key section of any diagnostic page.
Improving Text Sharpness and Clarity
Text sharpness is largely determined by the printer's ability to manage edge definition and dot gain. A sample test page typically includes text samples in varying sizes, ranging from 4pt to 12pt, using both serif and sans-serif fonts. This allows you to evaluate the "kerning" and "leading" as interpreted by the printer driver. If the characters appear thick or "fuzzy," it may be a sign that the paper's absorbency is too high for the ink type or that the print resolution (DPI) is set incorrectly. Sharp, crisp edges are the hallmark of a well-calibrated laser or inkjet system.
- DPI Settings: Higher dots-per-inch improve character curvature.
- Media Compatibility: Matching the driver settings to the paper type.
- Anti-aliasing: How the printer software smooths out jagged edges.
By reviewing these text blocks, you can decide if the printer requires a "clean printhead" cycle or if the fuser temperature needs adjustment to better bond the toner to the fibers. Clarity is paramount for legal documents and barcodes, where even minor bleeding can lead to legibility or scanning failures.
Identifying Clogged Nozzle Patterns
For inkjet technology, the nozzle check pattern is the most critical part of a sample printer test page. This pattern consists of a grid of tiny lines for each color channel. If any lines are missing or displaced, it indicates a clogged nozzle or an air bubble within the printhead manifold. Identifying these patterns early prevents "streaking" in your final prints and saves you from wasting expensive photo paper on a failed job. Clogs are often caused by the evaporation of the ink's solvent base during periods of inactivity.
- Print the nozzle check pattern.
- Identify which color grid has missing segments.
- Run a "Head Cleaning" cycle for that specific color.
- Wait 30 minutes for ink to settle and re-print the test.
Consistent patterns across all colors signify a healthy flow of ink through the micro-piezo or thermal inkjet elements. If repeated cleaning cycles do not resolve the missing lines, it may indicate a "stubborn clog" that requires a deeper power flush or manual intervention with a specialized cleaning solution.
Maintaining Optimal Hardware Performance
Sustaining optimal hardware performance requires a holistic approach to printer care, of which the test page is the central diagnostic. Beyond just checking ink, these pages help you monitor the "pick-up rollers" and "separation pads." If the test page is skewed or has "dog-eared" corners, the paper path likely needs cleaning. Furthermore, the information printed on the test page, such as the current firmware version, can alert you to the need for software updates that improve rendering algorithms or fix known bugs in the printing process.
- Environmental Factors: Humidity and temperature affecting toner adhesion.
- Firmware Updates: Enhancing the communication between OS and hardware.
- Encoder Strip Cleaning: Ensuring the carriage knows its exact position.
A sample printer test page is more than just a piece of paper; it is a snapshot of the machine's internal health. By paying attention to the technical details provided in these reports, you can ensure your equipment operates at peak efficiency, delivering high-quality results throughout its entire service life. Regular maintenance, informed by data-driven testing, is the best way to protect your investment.

Comments