Using a comprehensive Color Printer Test Page Guide is essential for maintaining professional output and hardware longevity. By running a standard diagnostic sheet, you can accurately calibrate the CMYK gamut, ensuring that cyan, magenta, yellow, and black levels correspond precisely with your digital color profiles. This routine evaluation identifies issues like banding or color shifts by verifying nozzle alignment and print head integrity. Precise alignment prevents ghosting and ensures sharp text resolution, while integrity checks detect clogged nozzles or mechanical obstructions early. Regular testing optimizes ink saturation and prevents bleeding, helping your inkjet or laser hardware produce consistent, high-fidelity results across all media.
Color Printer Test Page Essentials
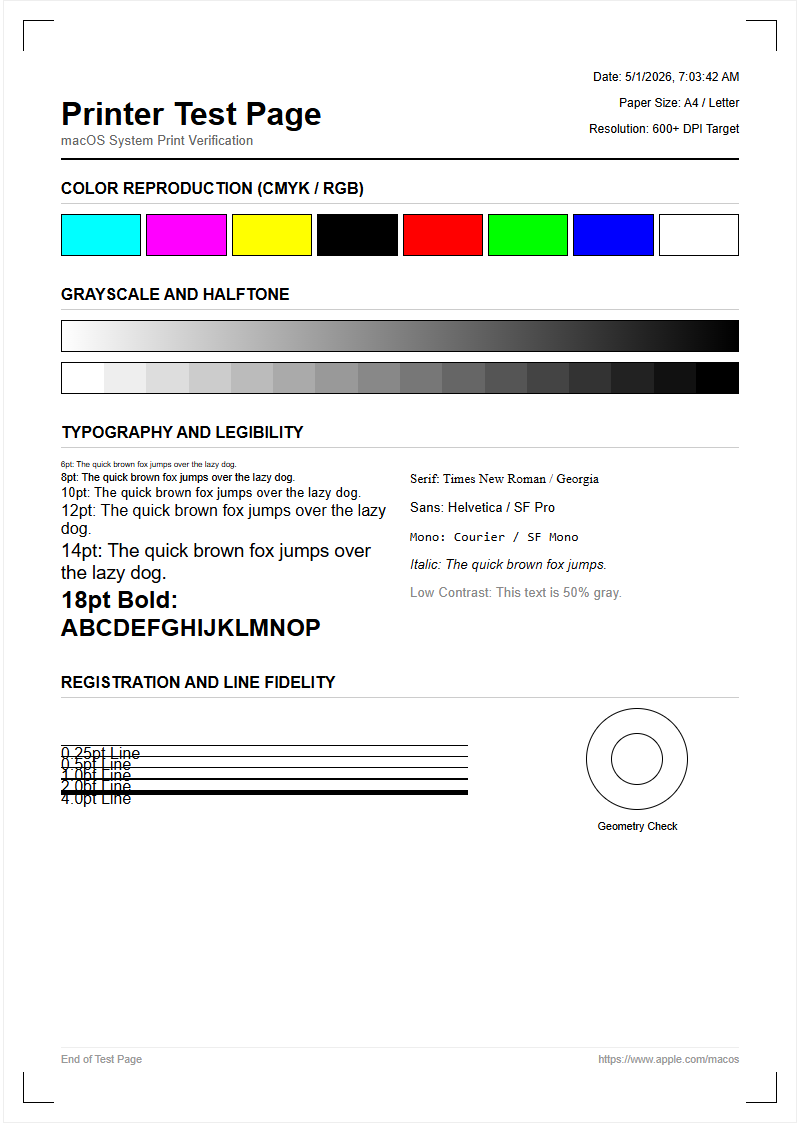
A color printer test page serves as the primary diagnostic tool for assessing the health of your inkjet or laser printer. This document is specifically engineered to exercise every component of the imaging system, from the digital raster image processor (RIP) to the physical application of pigment or toner. By initiating a test print, you trigger a comprehensive evaluation of the printer's internal firmware and its ability to translate digital color values into physical output. These pages are essential for identifying issues before they ruin high-volume jobs or expensive photo paper.
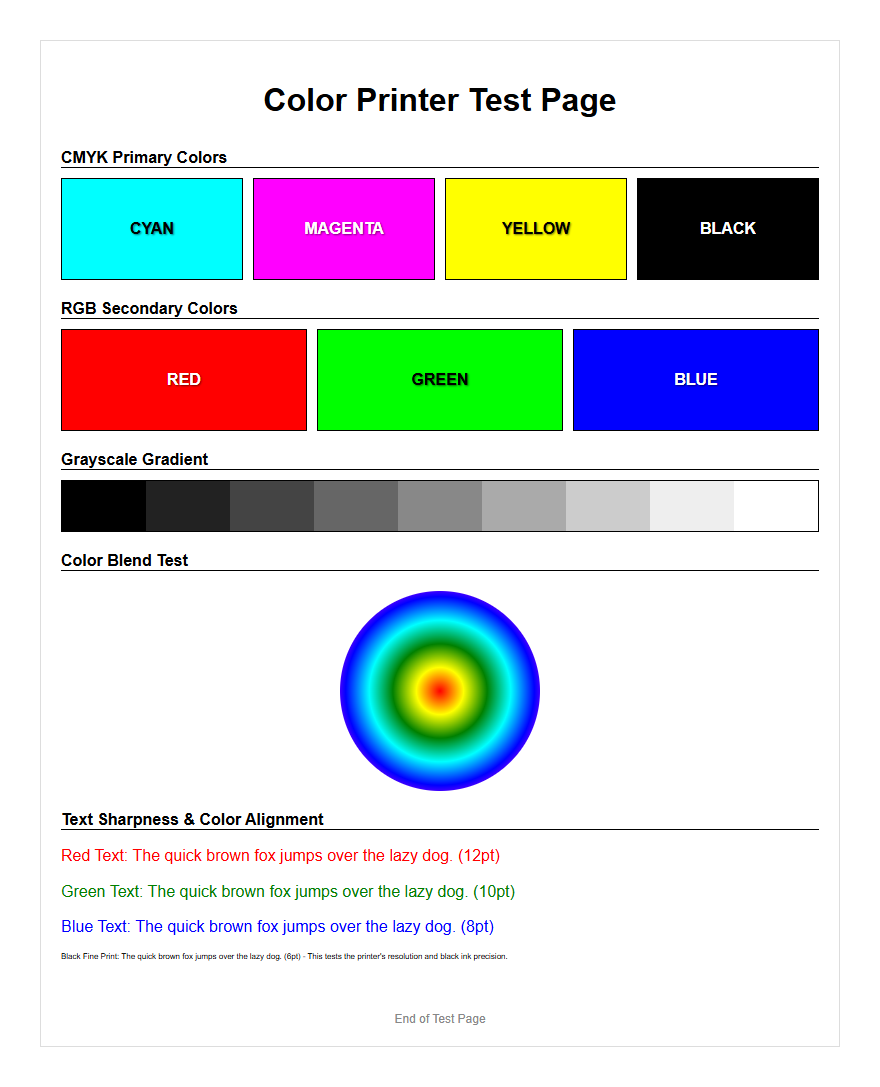
The essentials of a robust test page include color blocks, radial gradients, and fine-line patterns. These elements work together to reveal whether the printer is operating within its specified gamut. Without a standardized reference, it is nearly impossible to determine if a color cast is the result of a corrupt ICC profile, a clogged print head, or an empty cartridge. Regular use of these pages ensures that your hardware maintains consistent color reproduction and mechanical reliability over its operational lifespan.
CMYK Color Grid Evaluation
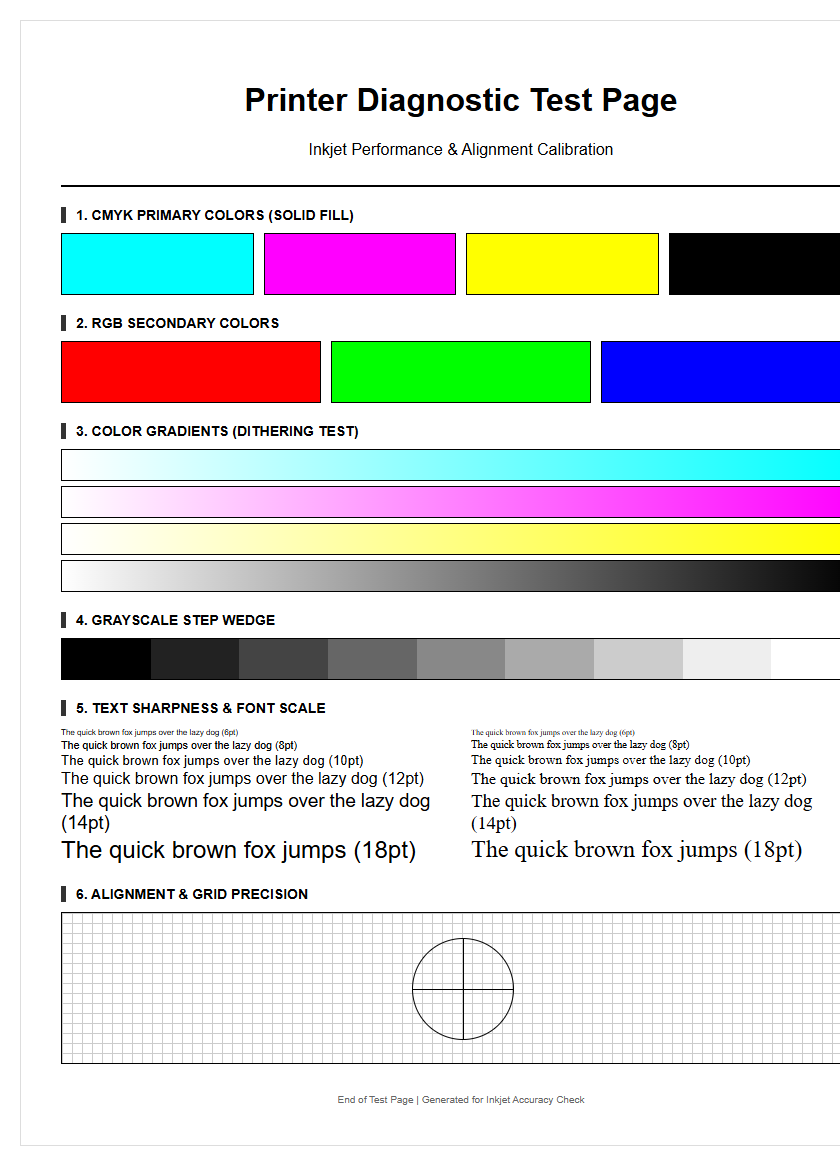
Modern color printing relies on the subtractive color model, utilizing Cyan, Magenta, Yellow, and Key (Black) inks. The CMYK color grid is a specialized section of the test page designed to isolate these process colors. Each square in the grid represents a specific percentage of ink coverage, allowing you to see how the printer handles different saturation levels. When evaluating these grids, you should look for uniform color distribution and the absence of unwanted white space or "holidays" within the blocks.
- Cyan: Check for consistent sky-blue tones without greenish shifts.
- Magenta: Ensure a vibrant pinkish-red that lacks orange contamination.
- Yellow: Look for a bright, clean hue that is easily visible against the paper.
- Black (Key): Verify a deep, neutral Dmax without graying or "muddy" undertones.
This grid evaluation is crucial for identifying which specific cartridge may be failing. If the Cyan block shows horizontal lines but the Magenta block is perfect, you can pinpoint the issue to the Cyan delivery system rather than a general mechanical failure. This targeted approach saves time and prevents the unnecessary replacement of functional consumables.
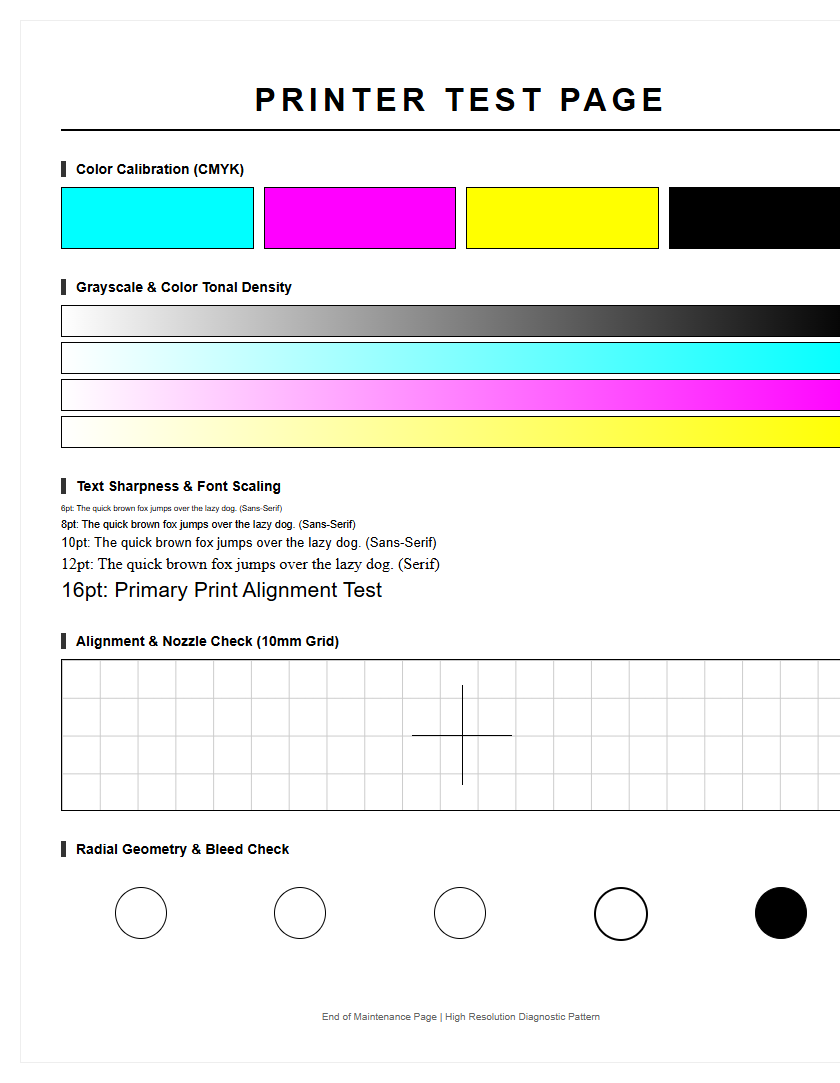
Nozzle Check and Print Head Alignment
The nozzle check is the most granular aspect of printer maintenance, specifically for piezoelectric or thermal inkjet systems. This portion of the test page usually consists of a series of staggered, fine lines for each color channel. If any of these lines are missing or broken, it indicates a clogged nozzle caused by dried ink or air bubbles. Continuous failure in this area leads to "banding," where visible streaks appear across your images, compromising the professional quality of the output.
Print head alignment is equally critical, focusing on the precision of the carriage movement. If the print heads are not perfectly synchronized with the paper feed mechanism, you will notice "ghosting" or blurred edges. The alignment test provides a series of numbered patterns where you must identify the cleanest, most centered block. By calibrating these coordinates, you ensure that the drops of ink land with micrometer precision, resulting in sharp text and crisp photographic details. Neglecting this alignment often leads to a subtle loss of focus that software sharpening cannot fix.
Ink Density and Saturation Analysis
Ink density refers to the thickness and opacity of the pigment applied to the substrate, while saturation dictates the intensity of the hues. A test page evaluates these factors using a step-wedge pattern, which transitions from 0% to 100% ink coverage. This analysis helps determine if the printer's driver is correctly managing the "ink limit"-the maximum amount of liquid the paper can absorb before bleeding or cockling occurs. Proper density is vital for achieving a high dynamic range in printed photos.
| Density Level | Visual Characteristic | Technical Significance |
|---|---|---|
| Low (10-30%) | Pastel/Light Tones | Checks highlight detail and dot gain. |
| Medium (40-70%) | Balanced Midtones | Evaluates color balance and linearity. |
| High (80-100%) | Deep Saturation | Measures Dmax and ink absorption limits. |
By reviewing these levels, you can identify if the printer is "over-inking," which causes loss of detail in shadows, or "under-inking," which results in a washed-out, desaturated appearance. This analysis is the first step in creating a custom media profile for specific paper types.
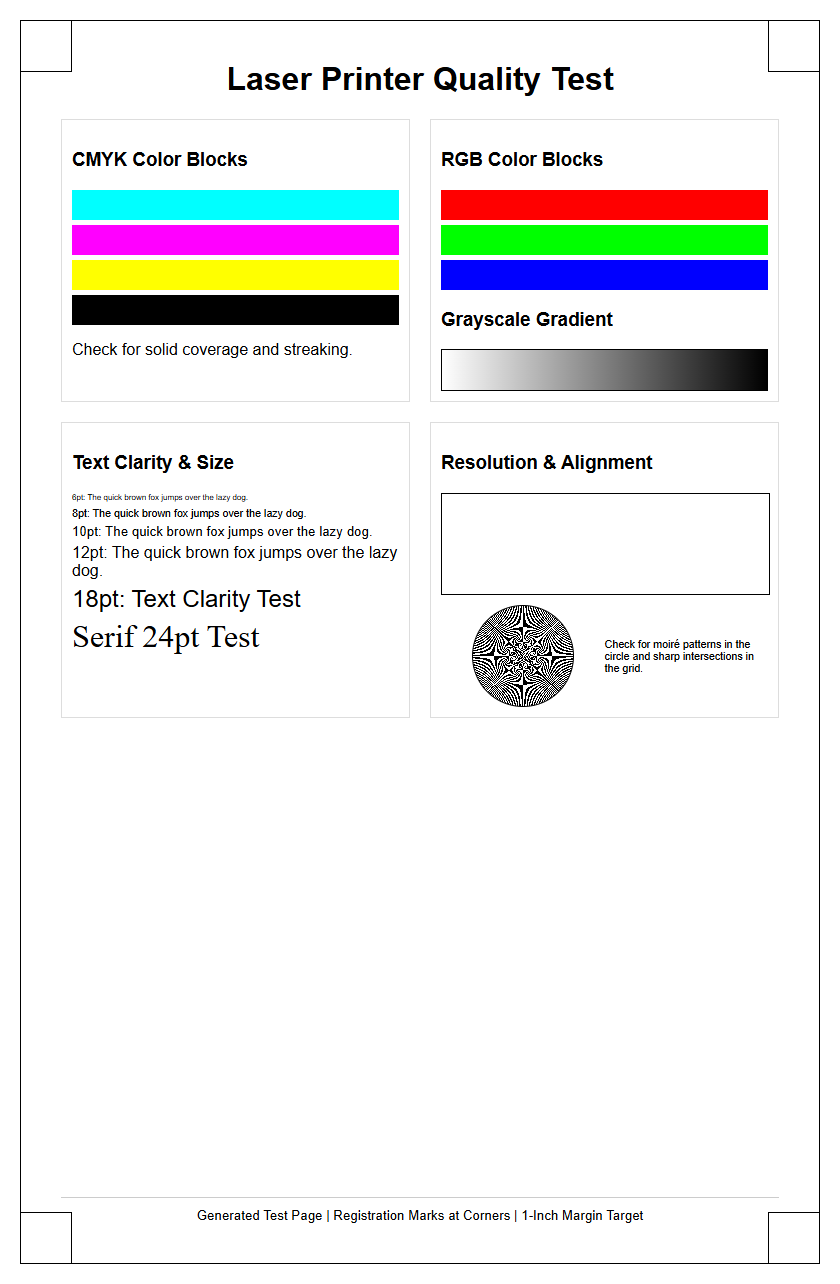
Primary Color Accuracy Verification
Primary color accuracy ensures that the printer correctly interprets standard RGB or CMYK values to produce the intended "true" colors. While printers use CMYK, most digital files are sent in an RGB workspace. The test page includes blocks of primary Red, Green, and Blue to verify the conversion process. If the Red block appears too orange or the Blue looks purple, there is likely a mismatch in the color management workflow or a shift in the chemical composition of the toner or ink.
Verification involves comparing the printed output against a calibrated monitor or a physical Pantone swatch book. Accuracy is measured using Delta E values; a lower Delta E indicates that the printed color is closer to the mathematical ideal. This section of the test is particularly important for branding and marketing materials where specific corporate colors must be reproduced faithfully across different devices. Inconsistent primary colors often signal that the printer's internal sensors require recalibration or that the environmental conditions, such as humidity, are affecting the paper's receptivity to the colorant.
Gradient Smoothness and Transition Test
A gradient test involves a continuous ramp of color, transitioning smoothly from one hue to another or from white to a solid tone. This is the ultimate test for the printer's bit-depth and dither patterns. In a high-quality print, these transitions should appear seamless to the naked eye. If the printer struggles with complex math or has mechanical stepping issues, you will see "banding," which appears as distinct stripes or jumps in color rather than a smooth flow.
This test also reveals "posterization," where the printer fails to render the subtle intermediate shades, collapsing them into a single flat color. This is often caused by a low-quality printer driver or an insufficient memory buffer during the spooling process. By examining the radial and linear gradients on a test page, you can judge the effectiveness of the halftoning algorithm. A successful transition test confirms that the printer can handle high-fidelity photographic work, including delicate skin tones and soft sky gradients, without introducing artificial artifacts that distract the viewer.
High Resolution Detail Assessment
Resolution in printing is measured in dots per inch (DPI), and the high-resolution assessment focuses on the printer's ability to render microscopic details. This section of the test page typically features "line pairs," concentric circles, and text in decreasing font sizes, sometimes down to 2-point type. The goal is to see at what point the lines begin to blur together or disappear. This determines the effective resolution of the device, which may differ from the "interpolated" resolution advertised by the manufacturer.
Another key element is the Moiré pattern test, which uses closely spaced parallel lines to detect interference patterns. If the printer's resolution is inconsistent, these lines will appear to wave or vibrate. Sharpness in this area is vital for printing blueprints, technical diagrams, and fine typography. If the fine lines appear "fuzzy" or have "satellite drops" (small unintended dots around the main image), it may indicate that the print head height needs adjustment or that the paper being used has too much "tooth" and is causing the ink to wick and spread excessively.
Diagnosing Common Print Quality Issues
The test page is an objective witness to the mechanical and chemical state of your printer. By carefully inspecting the output, you can diagnose issues that are not immediately obvious in standard documents. Common problems often manifest as visual anomalies that correspond to specific hardware failures. Recognizing these patterns allows for rapid troubleshooting and minimizes the waste of expensive consumables like high-gloss photo paper or wide-format rolls.
- Horizontal Banding: Usually indicates a clogged nozzle or an incorrect paper feed calibration.
- Vertical Streaking: Often caused by a dirty "wiper blade" in laser printers or a scratched drum.
- Color Shifting: Suggests an empty ink tank or an incorrect ICC profile selection in the print dialog.
- Ghosting: Occurs when the fuser unit (in lasers) fails to heat properly or the print head is misaligned.
- Speckling: Often the result of "over-spray" or accumulated dust inside the printer chassis.
Identifying these issues early prevents long-term damage to the internal components. For example, ignoring a clogged nozzle can eventually lead to permanent print head failure due to heat buildup in the firing chamber of the inkjet nozzle.
Color Calibration and Maintenance
Color calibration is the process of adjusting the printer's output to meet a known standard, ensuring "what you see is what you get" (WYSIWYG). Maintenance begins with the test page, but it extends to using spectrophotometers to read the printed color patches. This data is used to create a custom Look-Up Table (LUT) that compensates for the specific characteristics of your ink and paper combination. Because ink batches and paper coatings can vary, periodic calibration is necessary for professional-grade color accuracy.
General maintenance should be performed whenever the test page reveals degradation. This includes running the "Deep Cleaning" cycle for inkjets or the "Drum Refresh" for laser printers. It is also important to check the firmware version; manufacturers often release updates that improve the dither patterns and color processing logic. Keeping the printer in a temperature-controlled, low-dust environment also plays a critical role in maintaining the results seen on your test sheets. Regular maintenance not only preserves image quality but also extends the mechanical life of the rollers and drive belts.
Interpreting Your Results
The final step in utilizing a color printer test page is the objective interpretation of the data. You must distinguish between software-based errors and hardware-based failures. If the test page looks perfect but your photos from a specific application look poor, the issue lies in your software settings, such as the rendering intent or the color space (sRGB vs. Adobe RGB). Conversely, if the test page itself shows flaws, the problem is localized to the printer hardware or the driver.
Interpreting results involves a systematic approach: first, check for mechanical integrity (nozzles and alignment), then evaluate color fidelity (CMYK blocks and primaries), and finally assess the processing power (gradients and fine details). If the results are unsatisfactory, use the test page as a "before and after" record when performing cleaning cycles or changing settings. Keeping a log of these test pages allows you to track the gradual decline of components like the fuser or the print head, enabling you to order replacement parts before a total system failure occurs. This proactive strategy ensures consistent, high-quality output for every project.


Comments