The Maintenance Test Page Guide offers a practical approach to diagnostic calibration for optimizing printheads and ink nozzles. By generating a standardized nozzle check pattern, users can accurately identify firing issues, such as clogging or air ingestion within the ink delivery system. This guide simplifies essential calibration routines, including bi-directional alignment and voltage adjustments, to ensure precise micro-droplet placement across various substrates. Utilizing these system utilities helps maintain color consistency and eliminates banding by synchronizing piezoelectric or thermal firing pulses. Regular diagnostic testing via this guide extends hardware longevity and ensures high-fidelity output for all inkjet printing requirements.
Importance of Regular Test Page Printing
Maintaining a consistent schedule for printing test pages is a critical component of printer longevity. For both inkjet and laser printers, inactivity is often the primary cause of mechanical failure. In inkjet systems, the liquid ink within the print head nozzles can dehydrate, leading to coagulation and permanent blockage of the microscopic apertures. Regular diagnostic sheets ensure that the piezoelectric or thermal elements fire frequently, maintaining optimal fluid dynamics and preventing air bubbles from entering the ink delivery system.
Beyond hardware preservation, these pages serve as a historical record of the device's duty cycle. By analyzing periodic outputs, users can detect subtle shifts in output quality before they manifest into costly repairs. This proactive approach allows for the identification of gradual wear on components like the fuser unit in laser printers or the capping station in inkjets. Consistent testing mitigates the risk of sudden downtime during high-stakes printing tasks.
- Prevents ink sedimentation in high-capacity tanks.
- Maintains the elasticity of rubber pickup rollers.
- Clears residual toner buildup on the drum assembly.
- Validates communication between the driver and hardware.
Identifying Print Head Clogs
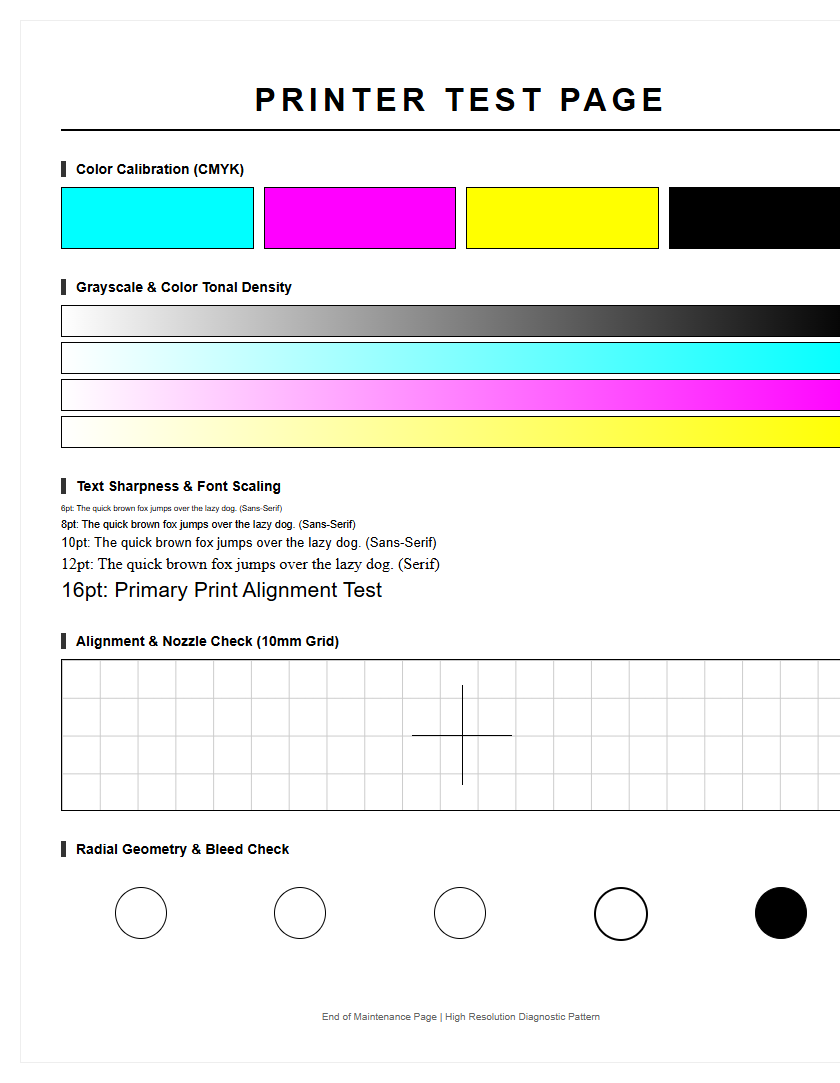
The print head is the most sensitive component of an inkjet printer, and a maintenance test page is the most effective tool for diagnosing its health. When a test page displays broken lines or missing segments in the nozzle check pattern, it indicates a partial or total clog. These obstructions often occur due to dried pigment or dust particles interfering with the ink trajectory. Analyzing the grid pattern allows the user to pinpoint exactly which color channel is failing, preventing unnecessary cleaning cycles on healthy nozzles.
Identifying the type of clog is essential for applying the correct maintenance procedure. A "soft clog" can usually be resolved through the printer's utility software, while a "hard clog" might require manual intervention with specialized cleaning solutions. Using a test page helps determine if the issue is a simple blockage or a hardware failure within the print head's electrical circuit. If the pattern is consistently missing the same section despite multiple cleaning attempts, it suggests a "burnt-out" nozzle rather than a debris-related clog.
- Run a standard nozzle check to isolate the affected color.
- Initiate a head cleaning cycle if gaps are detected.
- Print a follow-up test page to verify resolution.
- Perform a deep clean only if the standard cycle fails.
Color Accuracy and Saturation Checks
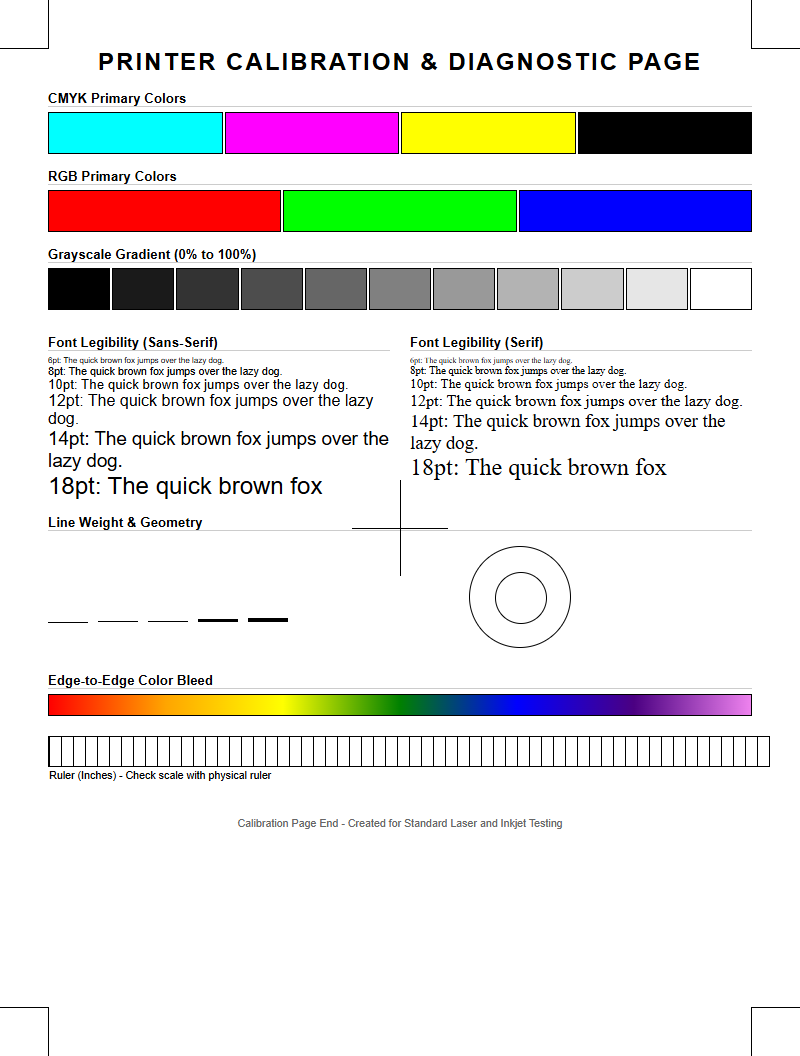
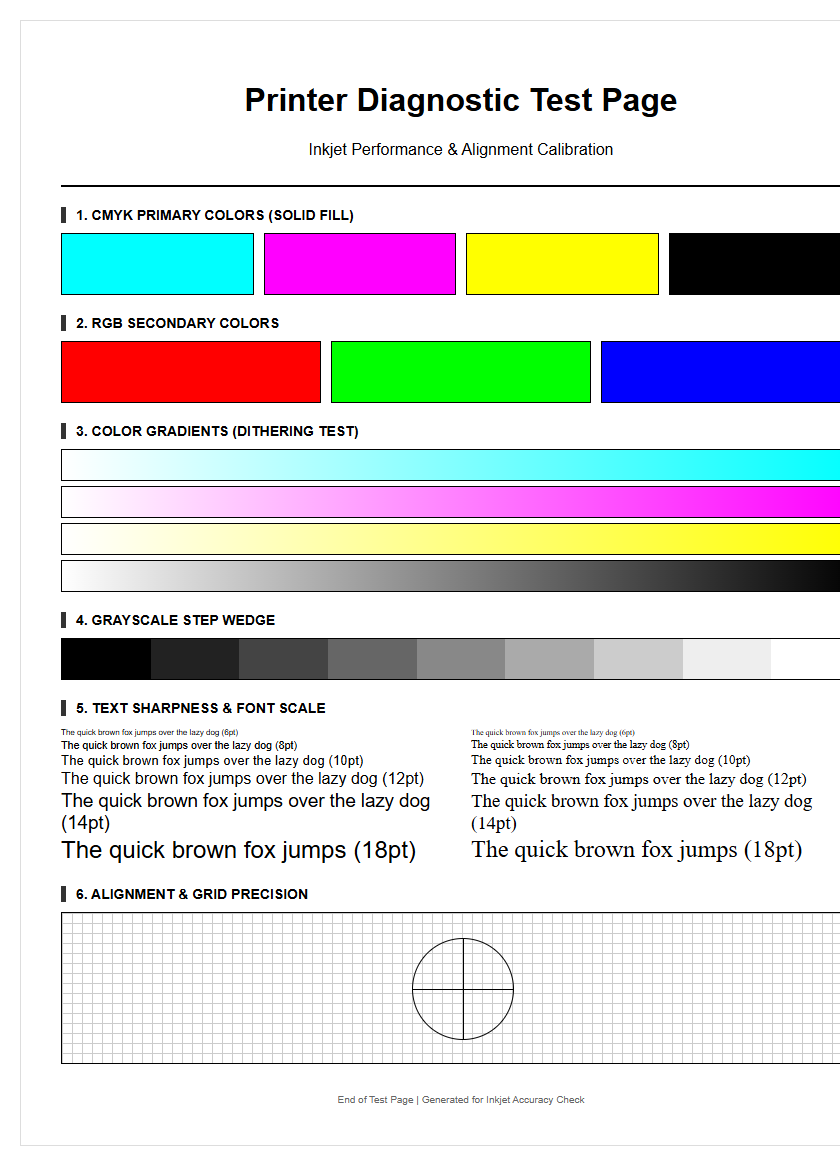
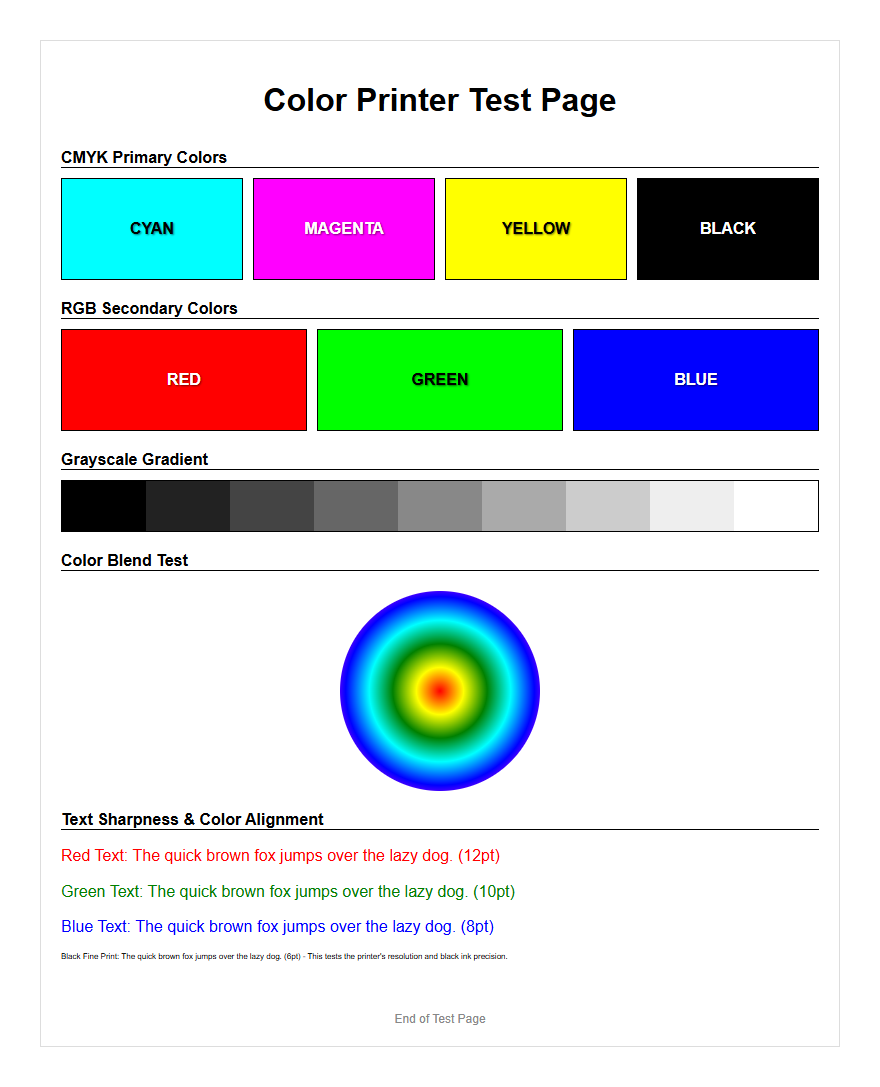
Color fidelity is paramount for professional documentation and photography. A maintenance test page includes specific CMYK (Cyan, Magenta, Yellow, and Key/Black) blocks designed to evaluate the printer's ability to reproduce accurate hues and saturation levels. Discrepancies in these blocks often indicate a shift in the ICC profile settings or a depletion of a specific ink or toner reservoir. By comparing the printed output against a calibrated monitor, users can identify if the printer is leaning too warm or too cool in its color temperature.
Saturation checks are equally important for ensuring that the ink density is sufficient to prevent washed-out images. If the primary colors appear dull, it may be a sign of poor media selection or an aging imaging drum. The table below outlines common color-related symptoms and their technical causes:
| Symptom | Possible Technical Cause |
|---|---|
| Color Shifting | Incorrect ICC Profile or Driver Setting |
| Faded Saturation | Low Ink Pressure or Expired Cartridges |
| Color Bleeding | Incompatible Media Type or High Humidity |
| Muddied Tones | Cross-contamination in the Print Head |
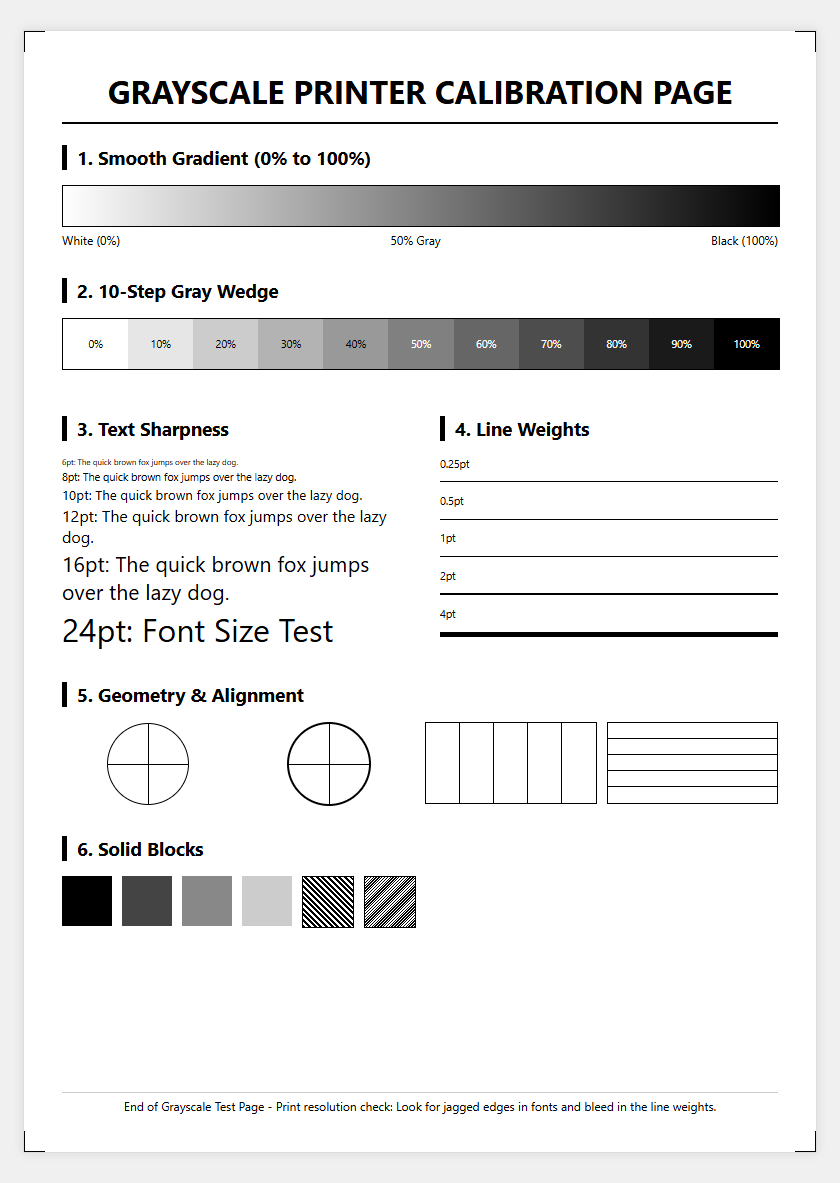
Verifying Grayscale Gradient Transitions
A high-quality maintenance test page features a grayscale ramp, moving from 0% black to 100% solid black. This section is designed to test the printer's halftone capabilities and its ability to render smooth transitions without stepping or "banding." In laser printers, poor grayscale performance often points toward an aging developer unit or a failing corona wire. For inkjet users, it reveals whether the printer is properly mixing colors to create "composite black" or if the dedicated black nozzle is functioning correctly.
Neutral density is the goal when evaluating these gradients. If the grayscale bar shows a green or magenta tint, the printer's color balancing is misconfigured, often due to a clogged color nozzle contributing to the composite mix. Monitoring the dither patterns within these gradients can also reveal resolution issues. If the dots appear irregular or clustered, the printer may be struggling with its native resolution settings, necessitating a driver update or a reset of the print quality parameters to ensure professional-grade monochrome output.
Resolving Vertical and Horizontal Banding
Banding manifests as unwanted lines running across or down the page, and the maintenance test page is the primary tool for distinguishing between the two. Horizontal banding is typically related to the print head's movement or the paper feed mechanism. If the bands occur at regular intervals, it often points to a "step" issue where the PF (Paper Feed) motor is not advancing the media accurately. Vertical banding, conversely, is usually caused by a dirty encoder strip or a physical obstruction in the print head's path.
To resolve these issues, the test page acts as a visual map. Vertical streaks on a laser printer test page might indicate a scratched drum or a dirty scanner glass. On an inkjet, it could mean the wiper blade is spreading excess ink across the nozzle plate. By analyzing the frequency and direction of the bands, users can decide whether to clean the internal components or recalibrate the feed synchronization. High-density solid color blocks on the test sheet make these imperfections much easier to spot than standard text documents.
Mechanical Hardware Performance Evaluation
Beyond the ink and toner, a printer is a complex mechanical system of gears, rollers, and belts. A maintenance test page provides an opportunity to evaluate the physical performance of these components. Strange noises during the printing process, such as grinding or squeaking, can be correlated with visual defects on the page. For instance, repetitive spots at specific intervals usually correspond to the circumference of a dirty or damaged roller. This is known as a "repetitive defect ruler" check.
The test page also evaluates the pickup roller's ability to pull paper from the tray without skewing. If the test pattern is slanted, the friction pads may be worn or the paper guides may be improperly set. For printers with duplexing units, a double-sided test page is essential to check the timing of the flip mechanism. Monitoring the paper's exit path for crinkling or "dog-ears" can prevent future paper jams. Regular evaluation of these mechanical factors ensures that the hardware remains robust enough to handle high-volume print jobs without catastrophic failure.
Cartridge Health and Ink Flow Analysis
Cartridge health goes beyond just the remaining ink level; it involves the integrity of the microchip, the venting system, and the internal pressure. A maintenance test page helps diagnose if a cartridge is struggling to maintain a consistent ink flow. If the first half of a test page looks perfect but the bottom half shows fading, it indicates a "starvation" issue where the ink cannot flow fast enough to keep up with the print head's demands. This is often caused by a blocked air vent on the cartridge.
In laser printers, the test page reveals the health of the toner's magnetic properties. If the toner isn't adhering correctly to the paper, the fuser may not be reaching the necessary temperature, or the toner itself may have become clumped due to humidity. Diagnostic sheets often include a "toner low" override check to see if the cartridge can still produce a viable image even when sensors report low levels. This analysis prevents the premature disposal of cartridges while ensuring that output quality remains within acceptable professional tolerances.
Fine Detail and Text Sharpness Testing
The hallmark of a well-maintained printer is its ability to render crisp text and fine lines. Maintenance test pages often include font samples ranging from 2pt to 12pt, along with concentric circles and fine-grid patterns. These elements test the printer's "dot gain"-the tendency of ink to spread on the paper fibers. High dot gain leads to blurry text and loss of detail in complex graphics. Sharpness testing determines if the print head is firing with precision or if the "satellite drops" are causing a fuzzy appearance around characters.
In laser printers, text sharpness is influenced by the laser's focus and the drum's ability to hold a precise static charge. If small fonts appear "hollow" or broken, it may be time to replace the imaging unit. For inkjets, sharpness is often a matter of aligning the print head to ensure that droplets from different nozzles land in the exact same spot. A test page helps you verify:
- Edge definition on serif and sans-serif fonts.
- The clarity of micro-text for security features.
- The absence of "ghosting" or double-images.
- Line weight consistency across the entire printable area.
Alignment and Margin Precision Calibration
Misalignment is a common issue that occurs after a paper jam or when moving the printer. A maintenance test page includes alignment patterns, usually consisting of overlapping vertical and horizontal lines. If these lines do not meet perfectly, the printer's "bidirectional" alignment is off, meaning the print head is firing at different times depending on which direction it is traveling. This results in jagged vertical lines and blurry images. Calibration pages allow the user to select the most "aligned" pattern to sync the carriage motor with the firing timing.
Margin precision is also checked to ensure that the "printable area" matches the software settings. If the margins are uneven, the paper centering mechanism or the "home position" sensor may need adjustment. This is particularly important for borderless printing or when creating brochures that require precise folding. By using the numbered scales on a calibration sheet, users can input corrective values into the printer's firmware, ensuring that every subsequent page is centered and squared relative to the media edges.
Preventative Maintenance Through Diagnostic Sheets
The ultimate goal of using maintenance test pages is to transition from reactive repairs to preventative care. These diagnostic sheets provide a comprehensive snapshot of the printer's current state, including firmware versions, total page counts, and error logs. Analyzing the "event log" section of a diagnostic page can reveal recurring minor errors that haven't yet caused a full system halt. This allows for scheduled maintenance, such as cleaning the waste ink pad or replacing the fuser kit, during non-critical hours.
Furthermore, these sheets help in validating the quality of third-party consumables. If a new brand of ink or toner consistently produces poor results on a test page, it serves as immediate evidence of incompatibility. By keeping a folder of periodic test pages, you create a "health chart" for your device. This practice not only extends the life of the machine but also ensures that every document produced meets the highest possible standards of clarity, color, and professional presentation, maximizing the return on your hardware investment.


Comments