A laser printer test page serves as an essential diagnostic tool for maintaining peak hardware performance and output consistency. By utilizing a standardized target, you can precisely evaluate CMYK color accuracy and ensure proper toner adhesion across all color channels. This guide focuses on analyzing grayscale gradients to detect issues with halftone rendering and engine dithering. Furthermore, the test patterns help identify mechanical defects, such as scratches on the OPC drum or fuser assembly malfunctions, by highlighting repetitive artifacts like banding or ghosting. Regular calibration using these technical sheets ensures optimal dpi density and reliable troubleshooting for all laser printing components.
Laser Printer Color Calibration Essentials
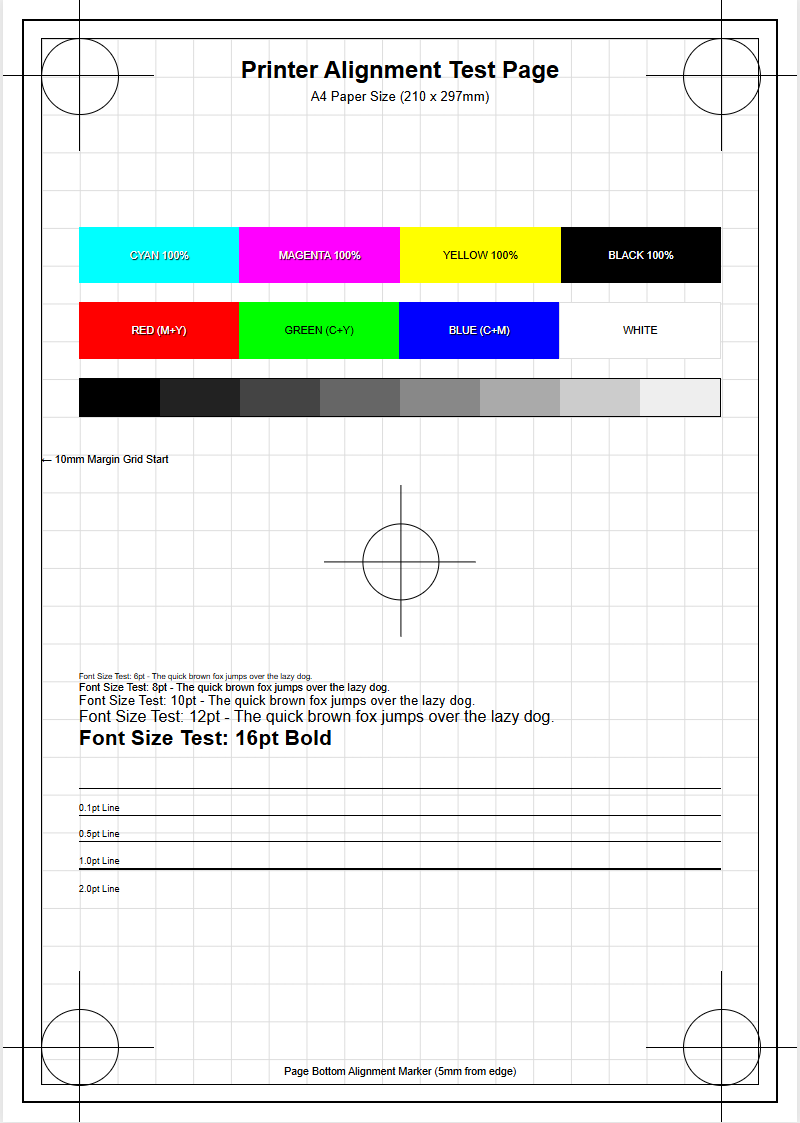
Maintaining color accuracy in laser printing requires a precise synergy between software instructions and hardware execution. Calibration ensures that the output matches the intended ICC profiles, preventing shifts in hue or saturation. On a standard test page, color calibration targets allow users to verify that Cyan, Magenta, Yellow, and Black (CMYK) are blending correctly to produce secondary colors and neutral tones. Without proper alignment, colors may appear washed out or overly dark, a phenomenon often linked to improper laser intensity or aging consumables.
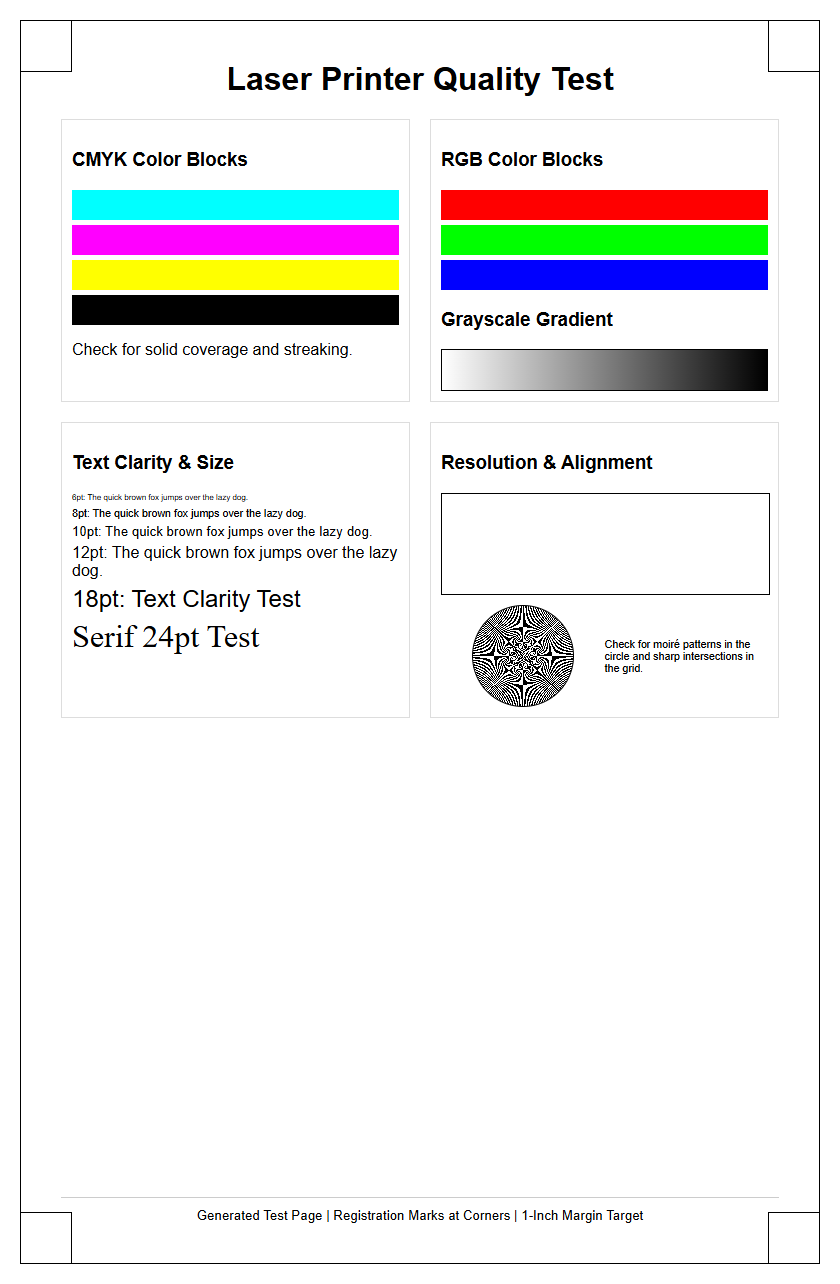
- Check registration marks to ensure the four color layers align perfectly without "haloing."
- Evaluate primary color patches for vibrancy and lack of contamination.
- Review neutral gray patches to detect unwanted color casts like pink or green tints.
By regularly running these calibration routines, you ensure that the printer's internal lookup tables (LUTs) are updated to compensate for environmental factors such as humidity and temperature, which can affect how toner adheres to the paper substrate during the electrophotographic process.
Analyzing Toner Distribution Consistency
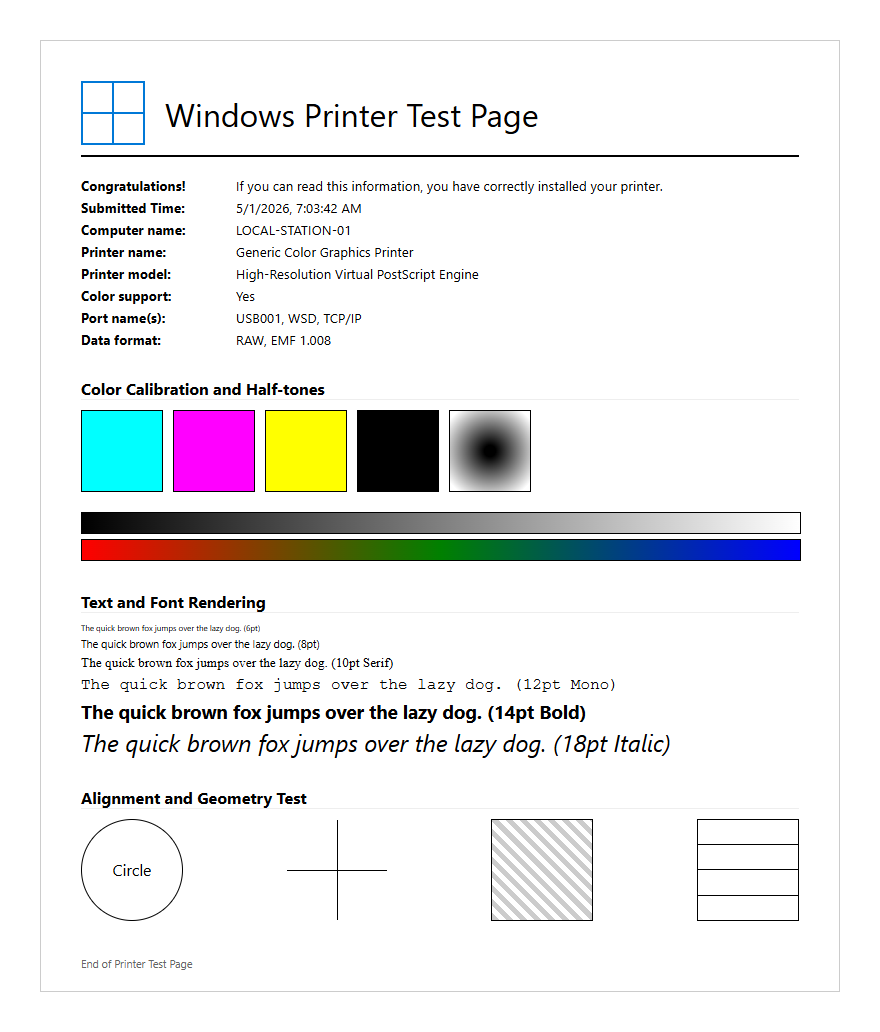
Consistent toner distribution is the hallmark of a healthy laser engine. When examining a test page, look for large solid-fill blocks to identify irregularities in density. If the toner appears mottled or displays "white spots," it often indicates an issue with the developer unit or a depleted toner cartridge. Uniformity across the entire width of the page is critical; any fading toward the edges suggests that the doctor blade or the magnetic roller is not distributing the powder evenly.
- Inspect solid black bars for deep, rich density without streaking.
- Identify "voids" where the toner failed to transfer to the media.
- Check for vertical lines which may indicate a dirty corona wire or a scratched developer roller.
Technical performance relies on the charge roller maintaining a uniform electrostatic field on the drum. Fluctuations in this charge lead to "clouding" effects or uneven shading. Monitoring these patterns allows technicians to determine if the cartridge needs replacement or if the internal optics require cleaning to ensure the laser beam reaches the drum without obstruction.
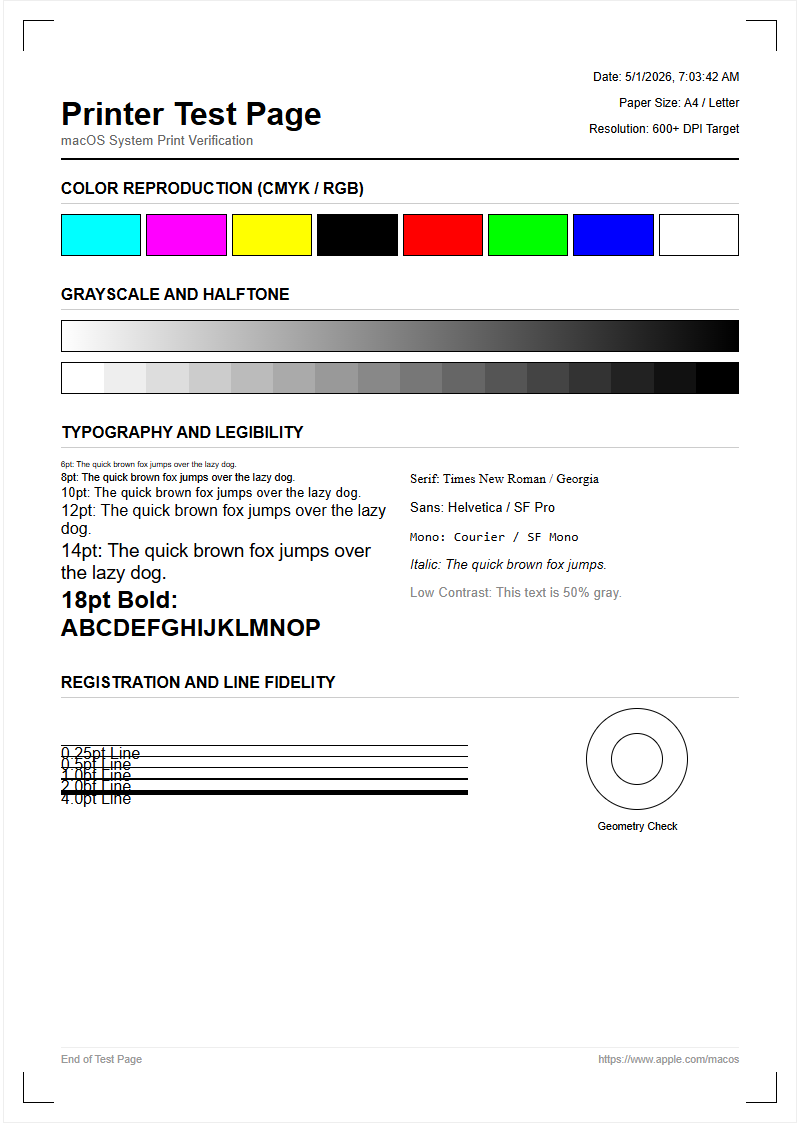
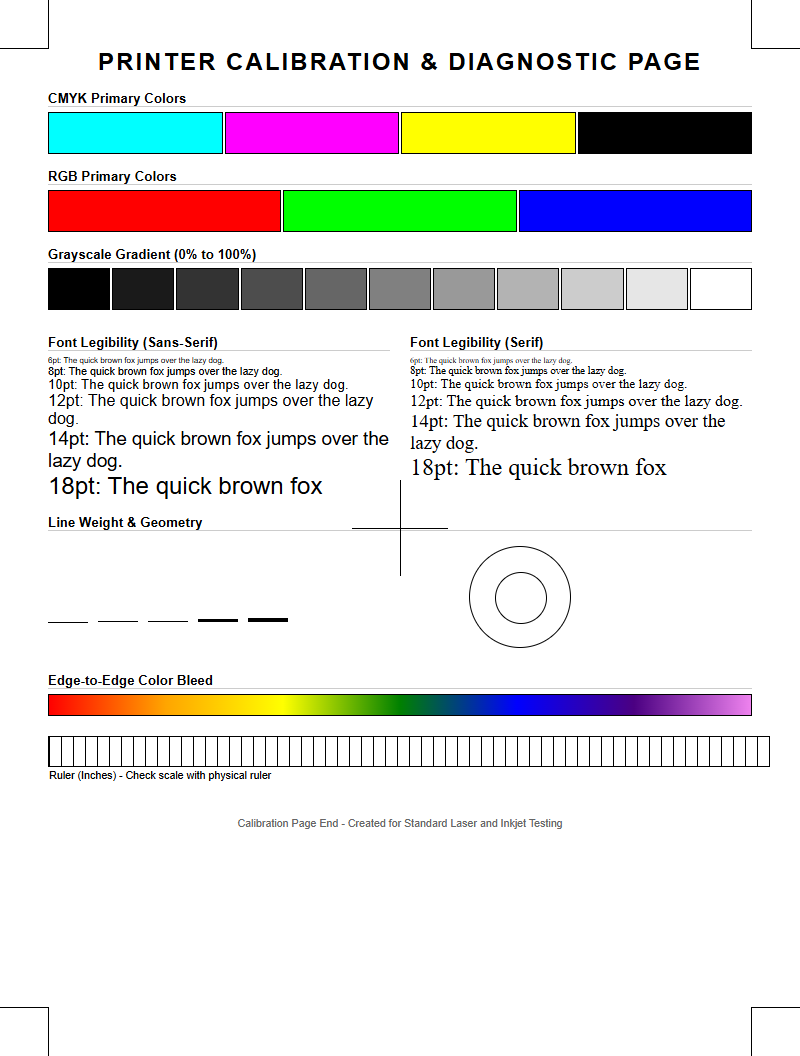
Interpreting CMYK Density Scales
The CMYK density scale on a printer test page provides a visual representation of the printer's ability to render various gradations of color. Each color strip typically moves from 0% to 100% saturation in incremental steps. This helps in identifying the "Dmax" or the maximum density the printer can achieve. If the transitions between blocks are not distinct, the printer might be suffering from "crushed blacks" or lost highlight detail, which compromises the depth of printed images.
| Scale Range | Key Technical Focus |
|---|---|
| 0% - 25% | Highlight retention and dithering precision. |
| 40% - 70% | Mid-tone balance and halftone screen consistency. |
| 80% - 100% | Shadow detail and maximum toner saturation levels. |
Advanced users utilize these scales to detect linearities in the printing process. If the 50% patch looks more like a 70% patch, the printer is likely over-applying toner, which can be corrected through driver-level density adjustments or by recalibrating the transfer belt voltage levels.
Diagnosing Fuser Unit Performance Issues
The fuser unit is responsible for melting the toner resin into the paper fibers using a combination of heat and pressure. Testing this component involves more than just a visual check; it requires a physical assessment of the output. If the toner smears when you rub your finger across a solid area, the fuser is likely failing to reach the required temperature. This "cold fusing" can lead to messy documents and internal printer contamination as loose toner particles migrate through the chassis.
On a test page, look for "picking," where small bits of toner are pulled off the page by the fuser rollers, leaving tiny white specks. Conversely, "fuser wrap" or "offsetting" occurs when the toner sticks to the roller and repeats a faint image further down the page. Maintaining the fuser's thermistor and heating lamp is essential for high-speed printing environments where thermal recovery time must be minimal to avoid throughput delays. Consistent texture across the page indicates even pressure from the fuser's pressure roller.
Evaluating Font Sharpness and Clarity
Laser printers are renowned for their ability to produce crisp text, and the test page is the ultimate benchmark for this capability. The font test section usually displays various typefaces in sizes ranging from 2pt to 24pt. Sharpness is determined by the printer's native resolution, measured in dots per inch (DPI), and the precision of the laser scanning assembly. Any blurring or "fuzziness" around the edges of letters, known as "satellite toner," suggests an issue with the static charge or low-quality toner particles.
- Examine 4pt text to ensure legibility without "filling in" the counters of letters like 'e' or 'a'.
- Look for jagged edges on curved characters, which can indicate poor anti-aliasing.
- Verify that fine horizontal and vertical lines do not "break" or vary in thickness.
Professional documents rely on high-contrast edges and perfect kerning. If the text appears gray instead of black, or if there is visible "fringing," the printer's engine may need a firmware update or a mechanical adjustment to the scan line timing.
Identifying Drum Unit Surface Defects
The Organic Photo-Conductor (OPC) drum is the heart of the laser printing process. Because it is light-sensitive and physically contacts the paper, it is prone to surface damage. Defects on the drum manifest as repetitive marks on the test page. A tiny scratch on the drum coating will result in a black spot or line that repeats at a specific mathematical interval, corresponding to the drum's circumference. Identifying these patterns is the fastest way to diagnose a failing drum unit.
- Measure the distance between repeating spots to calculate the diameter of the faulty roller.
- Look for vertical white streaks, which indicate that a portion of the drum cannot hold a charge.
- Identify broad bands of "backgrounding" where the drum is attracting toner in non-image areas.
Physical contaminants like paper dust or leaked toner can also scar the drum surface. Regular inspection of the test page helps in catching these issues before they escalate into complete component failure, ensuring that the electrostatic latent image remains untainted during the development phase.
Verifying Grayscale Gradient Transitions
A grayscale gradient test is essential for evaluating the halftone capabilities of a laser printer. Unlike inkjet printers that use variable droplet sizes, laser printers create the illusion of gray by varying the density of black dots. A high-quality test page should show a smooth transition from pure white to deep black without "banding" or visible "stepping." Banding appears as distinct lines within the gradient, often caused by fluctuations in the laser's intensity or gear jitter in the paper transport system.
Technical issues like "moiré patterns" can occur if the halftone screen frequency interferes with the printer's resolution. On a test page, these look like strange wavy textures within the gray areas. Ensuring a neutral grayscale is also vital for color printers, as it proves that the CMY toners are perfectly balanced to create a composite black. If the gradient shifts toward a specific hue, it indicates that the color registration and density balance need immediate attention through the printer's internal calibration menu.
Assessing Paper Feed Alignment
Mechanical precision in the paper path is vital for professional output, especially for double-sided documents. Alignment grids on a test page help users verify that the image is centered and square to the page. If the grid appears tilted, the printer is "skewing" the paper, which is usually a sign of worn pickup rollers or a misaligned registration assembly. Accurate margins are necessary for "full-bleed" layouts and to ensure that text doesn't get cut off during the finishing or binding process.
| Alignment Check | Acceptable Tolerance |
|---|---|
| Leading Edge Offset | +/- 1.5mm from the paper edge. |
| Side-to-Side Skew | Less than 1% variance across the width. |
| Duplex Registration | Back-to-front alignment within 2mm. |
By checking the "crop marks" at the corners of the test page, you can determine if the printer's internal timing for paper entry is synchronized with the laser's start-of-scan sensor. Frequent alignment issues often point to debris in the paper path or a tray guide that hasn't been locked into the correct position.
Detecting Ghosting and Repetitive Defects
Ghosting is a common laser printing defect where a faint "ghost" image of a previously printed element repeats further down the page. This typically occurs because the drum or the fuser roller has not been properly cleared of its previous charge or toner residue. A test page with high-contrast shapes is the best tool to reveal this. If the ghost image is the same color as the original, the issue likely resides in the drum's cleaning blade; if it is a smear of multiple colors, the fuser is the culprit.
- Identify "Positive Ghosting" where extra toner is applied in the repeated image.
- Identify "Negative Ghosting" where the repeated image appears lighter than the background.
- Use the repeating defect ruler (usually found in the service manual) to match the ghosting interval to a specific part.
Understanding the circumference of internal rollers allows for pinpoint accuracy in hardware diagnostics. For instance, a repeat every 95mm might indicate a fuser issue, while a 30mm repeat points to the developer roller. Regular testing prevents these artifacts from ruining high-volume print runs.
Maintaining Professional Document Resolution
The final section of a comprehensive laser printer test page focuses on overall document resolution and fine detail rendering. This is where the printer's ability to handle complex vector graphics and high-resolution bitmaps is put to the test. Patterns of concentric circles and intersecting thin lines (radial targets) are used to check for "aliasing" or moiré. If the circles look jagged or if the lines bleed into one another, the printer's resolution enhancement technology (RET) may not be functioning optimally.
Achieving professional-grade output requires the printer to maintain its rated DPI without "dot gain," which is the tendency of toner to spread beyond its intended boundary. A clean test page should show distinct separation between lines even at 1200 DPI settings. To maintain this level of quality, ensure the printer's firmware is updated and that the "Toner Save" mode is disabled during critical print jobs. High-resolution output is the result of perfect synchronization between the polygon mirror motor, the laser diode, and the high-voltage power supply, all of which should be monitored through periodic test page analysis.


Comments