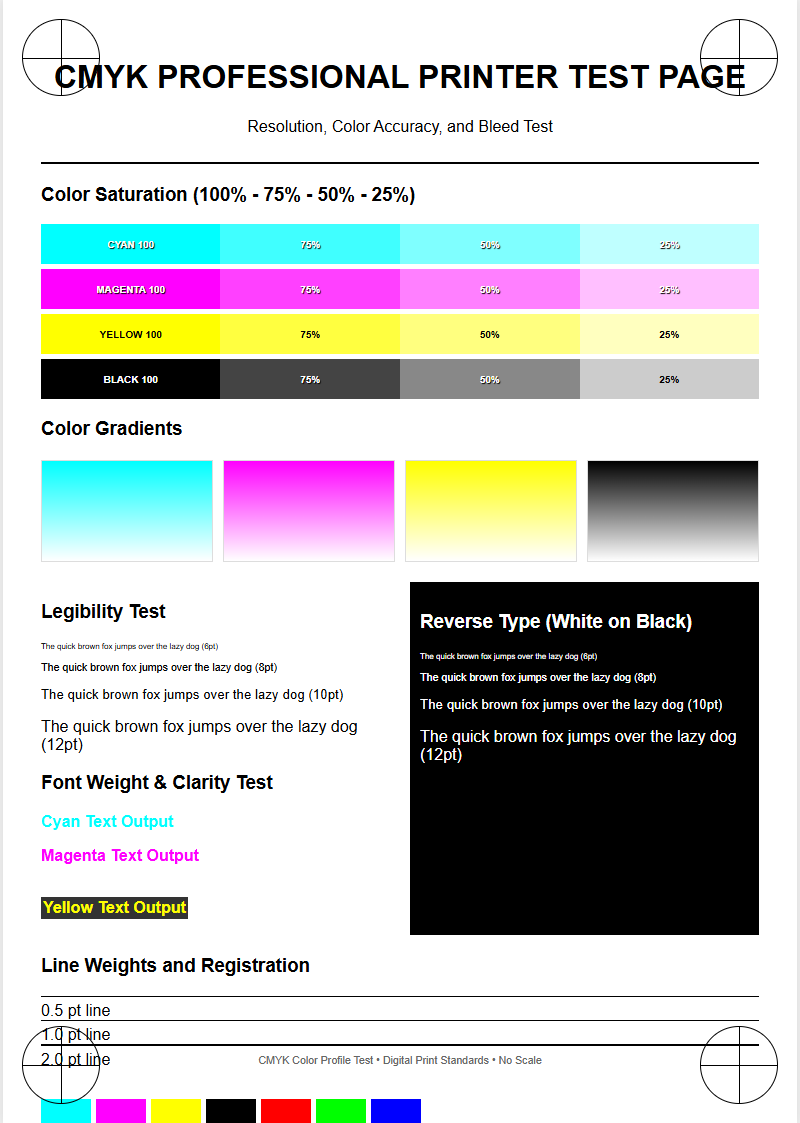
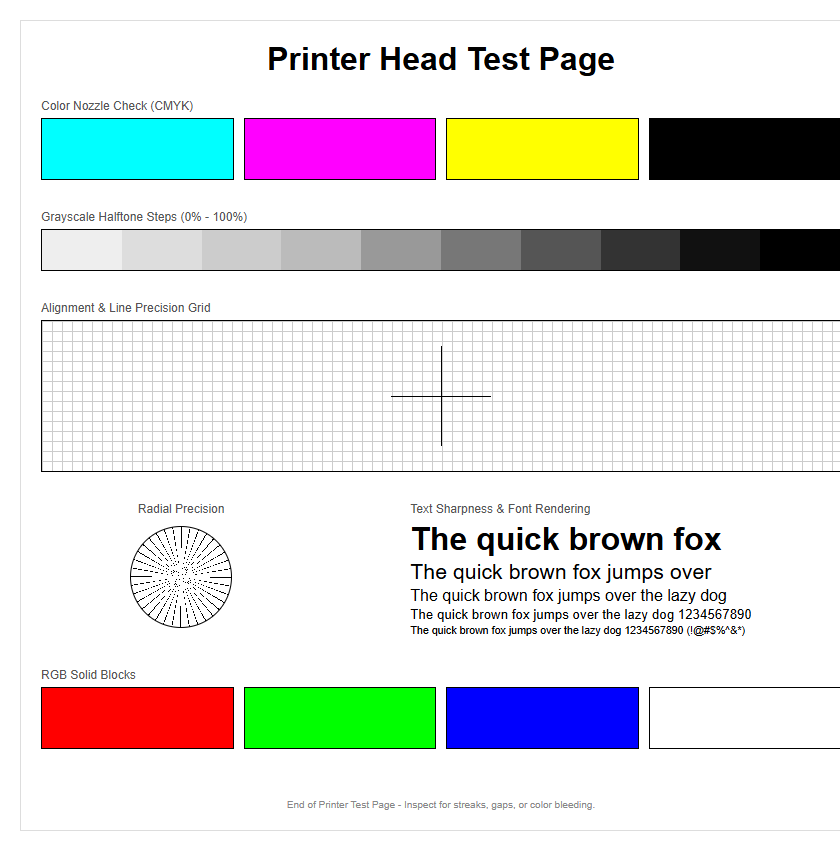
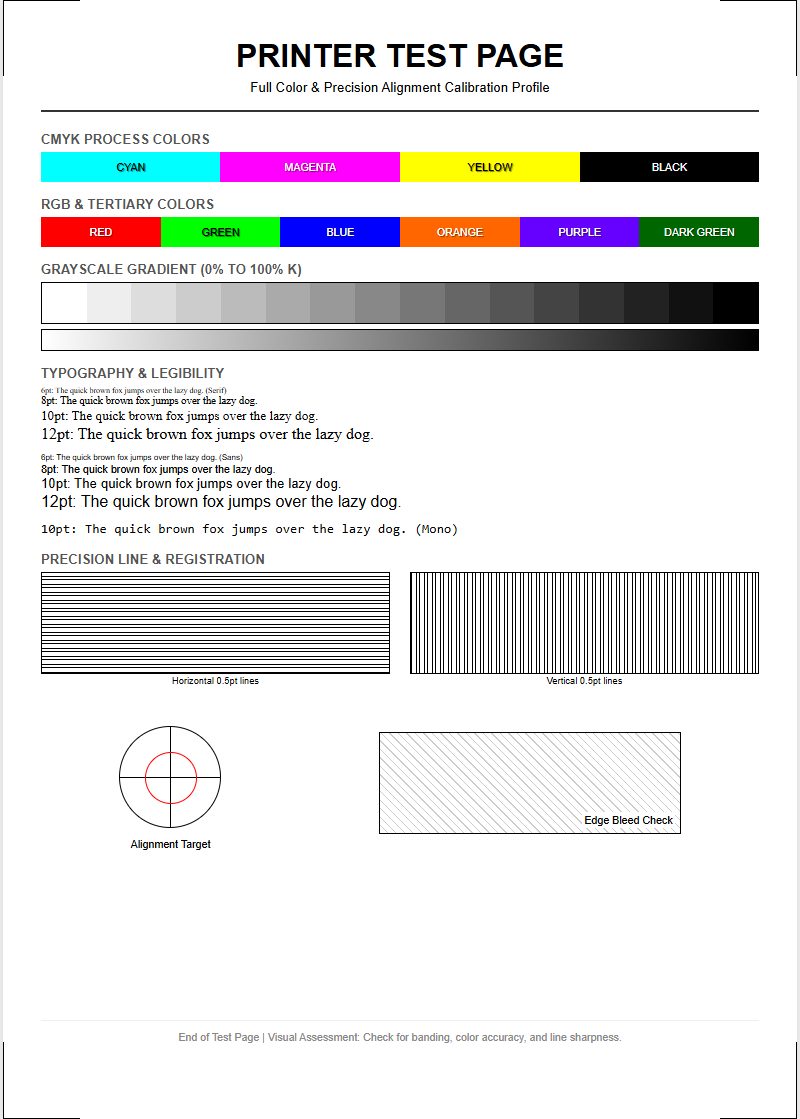
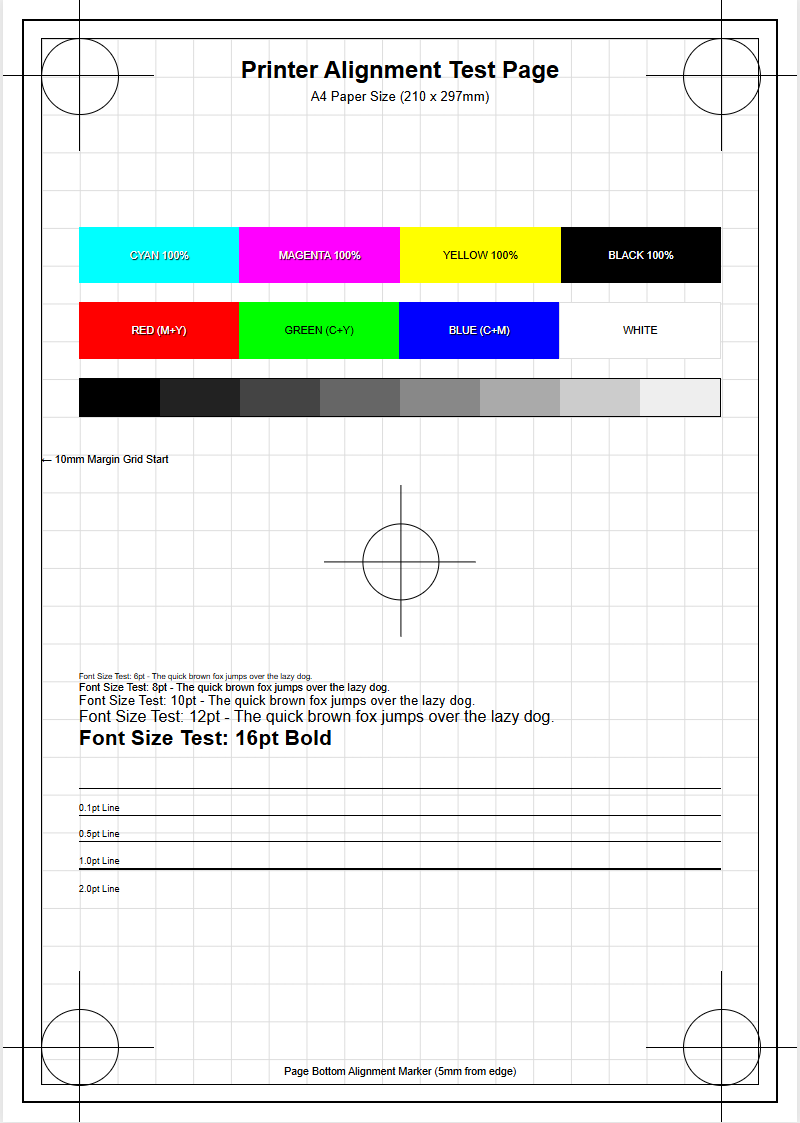
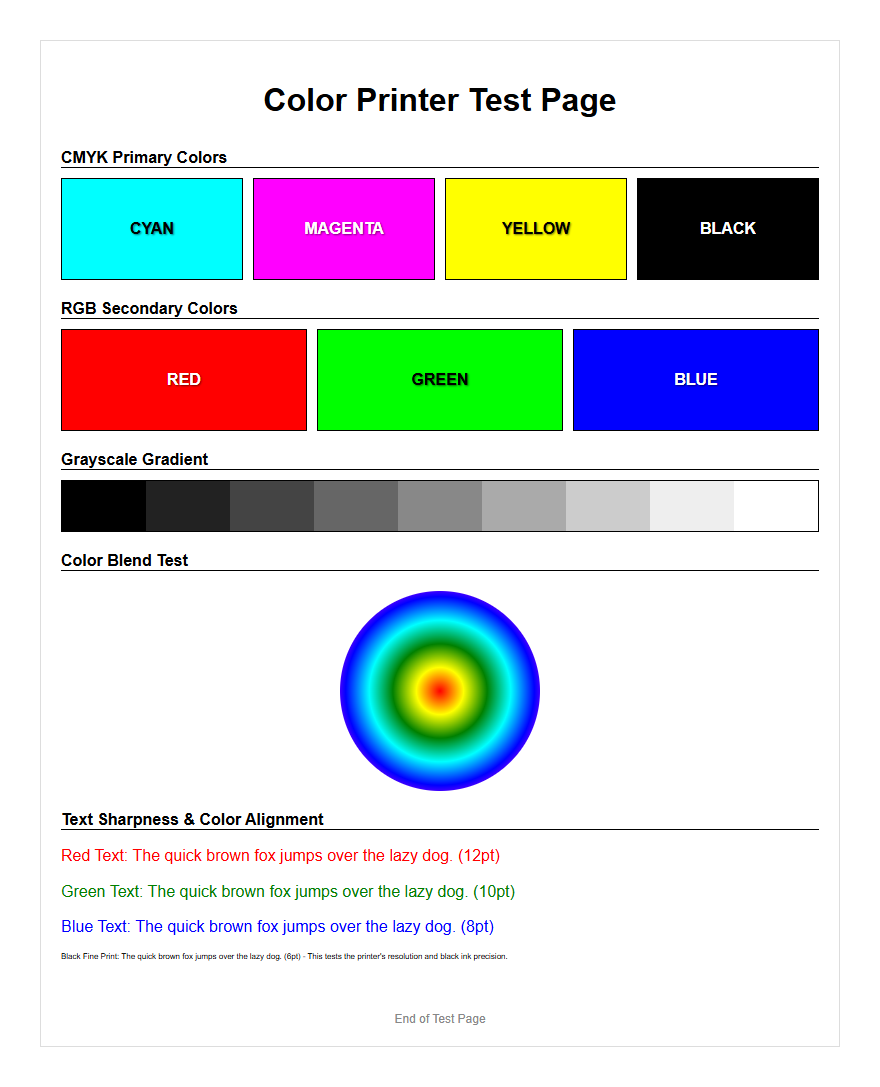
A CMYK Printer Test Page serves as a critical diagnostic tool for ensuring output precision through systematic color calibration and hardware evaluation. By utilizing specialized patterns of Cyan, Magenta, Yellow, and Key, this technical guide facilitates comprehensive nozzle checks to identify firing inconsistencies or clogging within the printhead. It evaluates halftone reproduction and ink density, allowing users to verify that the physical output aligns with specific ICC profiles for accurate color gamut representation. This diagnostic process is essential for detecting mechanical banding, registration errors, and shifts in color balance, providing a reliable baseline for professional-grade print quality and long-term hardware maintenance.
Understanding CMYK Color Calibration
CMYK color calibration is the process of adjusting the subtractive color model-Cyan, Magenta, Yellow, and Key (Black)-to ensure that the digital output matches the physical print. Unlike RGB, which is an additive model used for screens, CMYK relies on the reflection of light off paper. Calibration involves fine-tuning the ink density and dot gain to achieve a balanced color gamut. When a printer is out of sync, colors may appear muddy or shift toward a specific hue, such as a green tint in neutral grays.
To achieve professional results, users must consider the following technical factors during calibration:
- ICC Profiles: These files tell your printer how to interpret specific colors based on the paper type and ink brand.
- Rendering Intents: These determine how colors outside the printable gamut are handled during conversion.
- Total Ink Limit: This prevents over-saturation, which can lead to bleeding or long drying times on porous media.
Regular calibration ensures that the specific wavelengths of light absorbed by the pigments remain consistent across various print jobs, maintaining brand integrity and visual fidelity.
Benefits of Regular Printer Diagnostics
Running a CMYK printer test page regularly serves as a preventive maintenance strategy that extends the lifespan of your hardware. Diagnostic sheets provide a visual representation of the mechanical health of the device, highlighting issues before they result in wasted consumables. By analyzing the solid color blocks and radial gradients on a test page, users can detect fluctuations in ink delivery and carriage synchronization. This proactive approach reduces the "Total Cost of Ownership" (TCO) by minimizing the need for deep cleaning cycles, which consume a significant amount of ink.
- Nozzle Health Check: Identifies blocked apertures in the print head that prevent ink flow.
- Substrate Compatibility: Verifies how well a specific paper stock absorbs the toner or ink.
- Firmware Verification: Ensures that the internal software is processing the CMYK color lookup tables correctly.
- Mechanical Alignment: Detects if the paper feed rollers or timing belts are slipping during the print process.
Consistent diagnostics are essential for high-volume environments where output consistency is critical for client satisfaction and operational efficiency.
Identifying Ink Clogs and Streaks
Ink clogs and streaks are the most common inhibitors of high-quality CMYK output. These issues typically manifest as horizontal or vertical lines running through the document. In inkjet systems, clogs are often caused by dried pigment or air bubbles trapped within the piezoelectric or thermal print head. When a nozzle fails to fire, it leaves a void in the specific color channel, leading to inaccurate color mixing. For instance, a clogged cyan nozzle will make blues look purple and greens look yellow.
To effectively troubleshoot these artifacts, look for the following symptoms on your test page:
- Banding: Regular, repeating lines caused by uneven ink distribution or poor print head stepping.
- Nozzle Deflection: Ink droplets landing in the wrong position, causing a blurry or "ghosted" appearance.
- Starvation: A gradual fading of color across the page, indicating a failure in the ink delivery system or a vacuum leak.
Identifying these patterns allows for targeted cleaning of the specific CMYK channel affected, rather than wasting resources on a full system flush.
Analyzing Cyan Magenta Yellow Black Performance
An effective CMYK test page breaks down the performance of each primary ink channel to evaluate purity and saturation levels. By examining the 100% solid patches, you can determine if the ink density meets the required optical specifications. Furthermore, halftone screens-composed of tiny dots-allow you to check the precision of the screening algorithm. If the yellow channel is weak, the resulting blacks may appear too cool, whereas a weak magenta channel results in a greenish cast in skin tones.
| Color Channel | Key Performance Indicator | Common Issue |
|---|---|---|
| Cyan | Pure Blue-Green Hue | Reddish shifting |
| Magenta | Vivid Purplish-Red | Yellow contamination |
| Yellow | Bright Lemon Yellow | Low visibility/fading |
| Black (Key) | Deep Neutral Density | Grey/Washer-out appearance |
Evaluating these channels individually ensures that the overprinting process-where colors are layered to create the full spectrum-functions correctly without unwanted moiré patterns or color bleed.
Improving Color Accuracy for Graphic Prints
Achieving color accuracy for graphic-heavy prints requires more than just functional nozzles; it requires a sophisticated understanding of Delta-E values and color space mapping. A CMYK test page for graphics often includes "neutral gray ramps" which are the ultimate test for color balance. If a printer can produce a neutral gray using only Cyan, Magenta, and Yellow, it demonstrates excellent gray balance. Graphic professionals use these test pages to adjust the "UCR" (Under Color Removal) and "GCR" (Gray Component Replacement) settings within their Raster Image Processor (RIP) software.
To improve accuracy, ensure your environment utilizes controlled lighting (D50 standard) when viewing the test sheets. Small adjustments to the gamma curves for each CMYK channel can dramatically enhance the depth of shadows and the clarity of highlights. By comparing the printed output against a calibrated monitor, you can bridge the gap between digital design and physical reality, ensuring that the brand colors and photographic gradients are reproduced with high chromatic precision and minimal metamerism.
Comparing Laser and Inkjet Test Results
The mechanics of color reproduction vary significantly between laser and inkjet technologies, which is reflected in their respective test pages. Inkjet printers rely on fluid dynamics and picoliter-sized droplets, while laser printers utilize electrostatics and thermoplastic resin (toner). A test page for an inkjet will focus on nozzle integrity and saturation, whereas a laser test page will emphasize fuser temperature and drum consistency. Understanding these differences is vital for diagnosing quality drops.
| Feature | Inkjet Evaluation | Laser Evaluation |
|---|---|---|
| Primary Component | Print Head Nozzles | OPC Drum / Transfer Belt |
| Color Application | Liquid Droplets | Static Charge / Heat |
| Common Defect | Clogging/Banding | Repetitive Spots/Streaks |
| Gradation | Dithering Patterns | Halftone Screening |
When reviewing a laser test page, focus on the "backgrounding" or "toner scatter," which indicates a failure in the charging corona or a worn-out developer unit. Inkjet tests should focus on the "inter-color bleed" to check if the ink is drying fast enough on the substrate.
Resolving Faded Print Quality Issues
Faded prints in a CMYK system usually point to a depletion of consumables or a failure in the transfer process. In inkjet systems, this is often "ink starvation," where the cartridge is nearly empty or the air vent is blocked, preventing the ink from flowing freely to the reservoir. In laser systems, fading is typically caused by a depleted toner supply or a dirty optical path (the laser scanner unit). If only one color is faded, the issue is localized to that specific CMYK cartridge or drum unit.
To resolve fading, follow these diagnostic steps:
- Check Ink/Toner Levels: Ensure the software reports sufficient levels for all CMYK channels.
- Inspect the Media: Ensure the paper setting matches the actual substrate; using heavy cardstock on a "plain paper" setting can cause light prints.
- Clean Optical Components: For lasers, wipe the LED heads or laser glass; for inkjets, run a print head cleaning cycle.
- Check Shelf Life: Expired ink or damp toner can lose its ability to adhere to the paper correctly.
Systematically checking these components will restore the vibrance and contrast required for high-quality documentation.
Mastering Print Head Alignment
Print head alignment is a critical calibration step that ensures the CMYK droplets land exactly where they are intended. Modern printers often use bi-directional printing, where the head fires ink while moving both left and right. If the timing is slightly off, vertical lines will appear jagged and text will look blurry. An alignment test page consists of a series of numbered patterns where the user (or an internal sensor) selects the most solid block to calibrate the micro-stepping motor of the carriage.
The alignment process generally addresses two axes:
- Horizontal Alignment: Corrects the timing of ink ejection during the carriage sweep to prevent "ghosting."
- Vertical Alignment: Ensures that the paper advance mechanism moves the sheet the precise distance required for the next pass of the print head.
- Bi-Directional Offset: Synchronizes the droplets from the "left-to-right" pass with the "right-to-left" pass.
Mastering this alignment ensures that fine details and thin lines in technical drawings or high-resolution photos remain crisp and free from registration errors.
Professional Standard Color Evaluation
For industries like publishing and advertising, "good enough" color is not acceptable. Professional color evaluation involves using standardized CMYK test targets such as the IT8.7/4 or the ECI2002. These targets contain thousands of color patches that allow for the creation of high-precision ICC profiles. When evaluating these pages, professionals use a spectrophotometer to measure the spectral reflectance of each patch. This data is then compared against a reference file to calculate the accuracy of the print engine.
Key elements of a professional evaluation include:
- Gray Balance: Ensuring that equal parts of C, M, and Y produce a neutral gray without a color cast.
- Dmax: Measuring the maximum density of the black ink to ensure deep, rich shadows.
- Primary Hue Accuracy: Verifying that the cyan, magenta, and yellow pigments meet ISO standards.
By adhering to these rigorous standards, print shops can guarantee that their output will be consistent across different machines and over long periods, maintaining the highest levels of professional quality.
Maintaining Peak Hardware Efficiency
To maintain peak efficiency, a CMYK printer requires more than just occasional ink changes; it needs a comprehensive maintenance routine. This includes cleaning the encoder strip-the thin plastic band that tells the print head its position-and ensuring the waste ink pads or maintenance box are not full. In laser printers, the transfer belt and fuser unit must be kept free of debris to prevent "repetitive defects." High hardware efficiency directly correlates to consistent results on your CMYK test pages.
Regularly printing a test page, even when the printer seems fine, prevents the ink from drying in the nozzles and keeps the mechanical parts moving. This is especially important for printers that use pigment-based inks, which are prone to settling. By monitoring the "Duty Cycle" and "Expected Life" of parts like the pickup rollers and separation pads, you can perform scheduled replacements. This proactive management ensures that when you need a high-stakes print, the hardware is primed to deliver perfect CMYK accuracy without delay or technical failure.


Comments