Maintaining optimal output quality in inkjet systems requires a systematic approach to diagnostic imaging. This technical guide explores the Print Head Test Page, a critical tool for identifying nozzle clogs, misalignment, and density variations. By executing a standard nozzle check, users can evaluate the integrity of piezoelectric or thermal firing elements across the CMYK spectrum. Furthermore, precise print head alignment and calibration patterns address issues like bidirectional banding and vertical registration errors. Understanding these diagnostic charts allows for targeted maintenance, ensuring the ink delivery system maintains consistent drop placement and color accuracy for professional-grade results.
Print Head Diagnostic Patterns
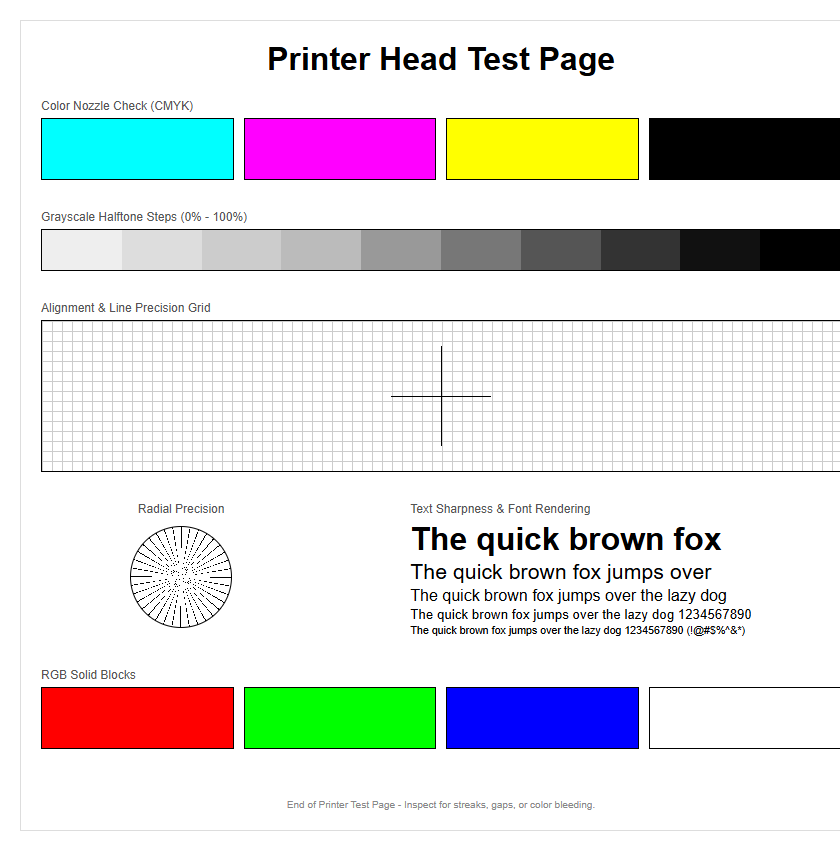
Print head diagnostic patterns serve as the primary visual roadmap for identifying mechanical and fluidic failures within an inkjet system. These patterns typically consist of a structured grid or a series of fine, interlaced lines that correspond to specific groups of nozzles on the print head. By examining these patterns, users can pinpoint exactly which color channel or physical section of the head is underperforming. A standard diagnostic page includes CMYK color blocks and thin vertical bars designed to reveal "banding" or white gaps, which indicate that the ink is not being ejected uniformly across the substrate.
- Nozzle Grids: Used to detect individual firing failures in the piezoelectric or thermal elements.
- Interlaced Bars: Designed to check the timing and synchronization of the print head carriage movement.
- Solid Tint Blocks: Essential for identifying "starvation," where the ink supply cannot keep up with high-speed demand.
Technical precision in these patterns allows for the detection of "deflection," where ink droplets are fired at an incorrect angle. This often results in a blurry output or "ghosting" effects. Regular analysis of these diagnostic patterns ensures that small issues are caught before they escalate into permanent hardware damage.
Inkjet Nozzle Performance Check
The nozzle performance check is a critical maintenance routine that verifies the functional integrity of every microscopic aperture on the print head surface. During this process, the printer executes a specific "staircase" pattern, where each "step" represents a single nozzle firing a droplet of ink. If the resulting staircase is continuous and sharp, the print head is considered fully operational. However, missing steps or broken lines signify that certain nozzles are either blocked by dried ink or have suffered an electrical failure.
| Pattern Feature | Indicator of Success | Sign of Failure |
|---|---|---|
| Staircase Lines | Perfectly unbroken diagonal | Missing segments or white gaps |
| Color Purity | Uniform hue without mixing | Contamination or "bleeding" |
| Edge Definition | Crisp, sharp boundaries | Fuzzy edges or ink spray |
To maintain high-fidelity output, this check should be performed after periods of inactivity. Thermal inkjet heads are particularly prone to "kogation," where ink residue bakes onto the heating elements, while piezo heads may suffer from air bubbles trapped in the manifold. Recognizing these performance indicators early allows for targeted cleaning cycles, preserving the longevity of the expensive print head assembly.
Color Accuracy Test Standards
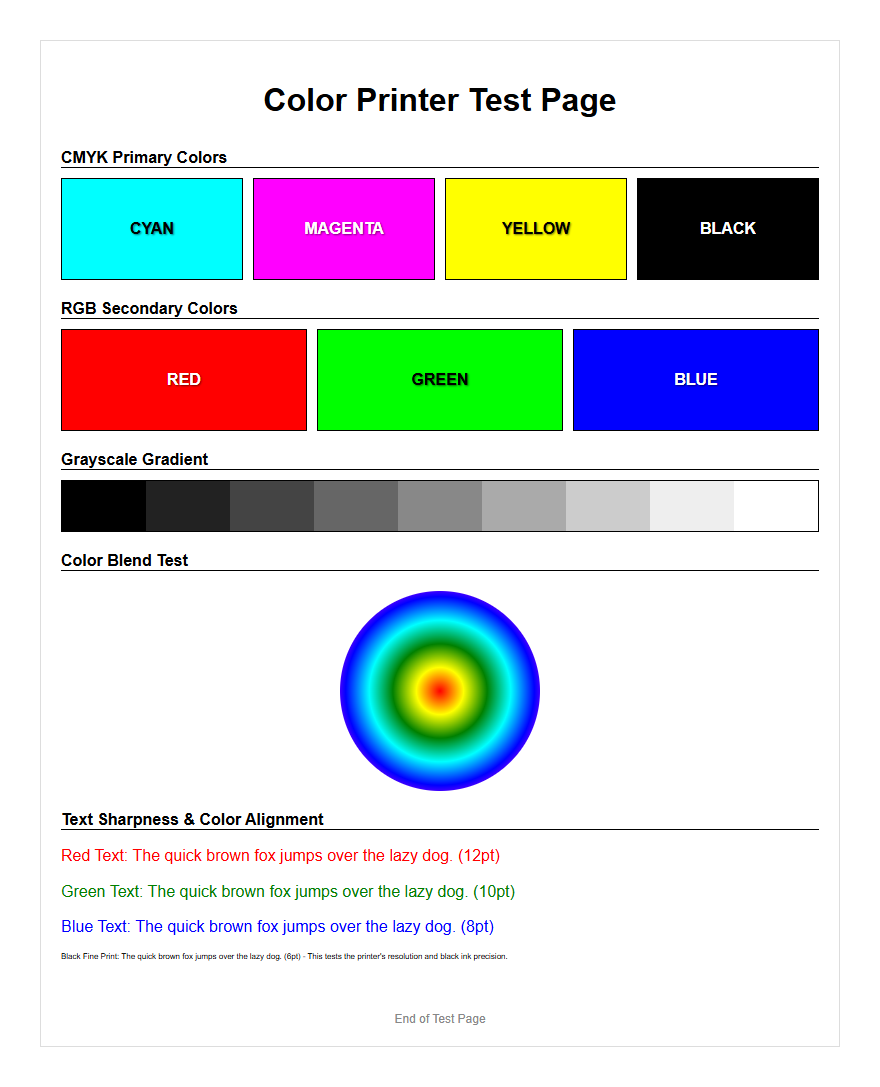
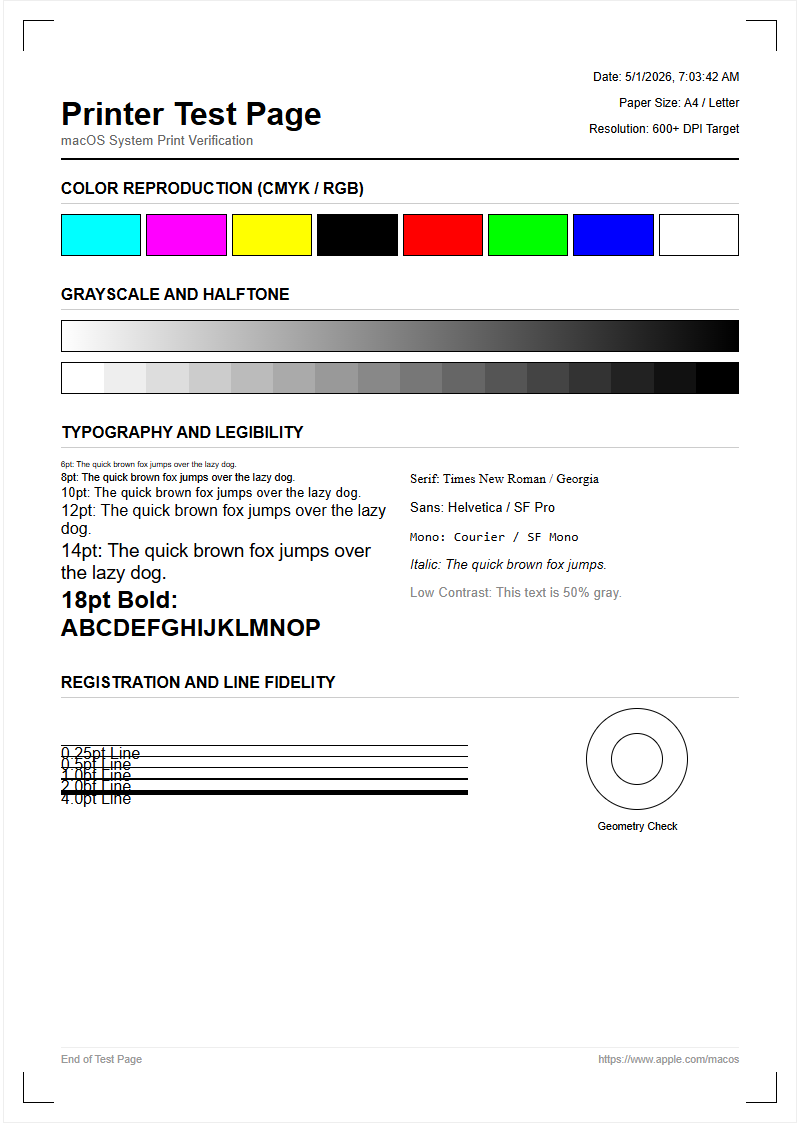
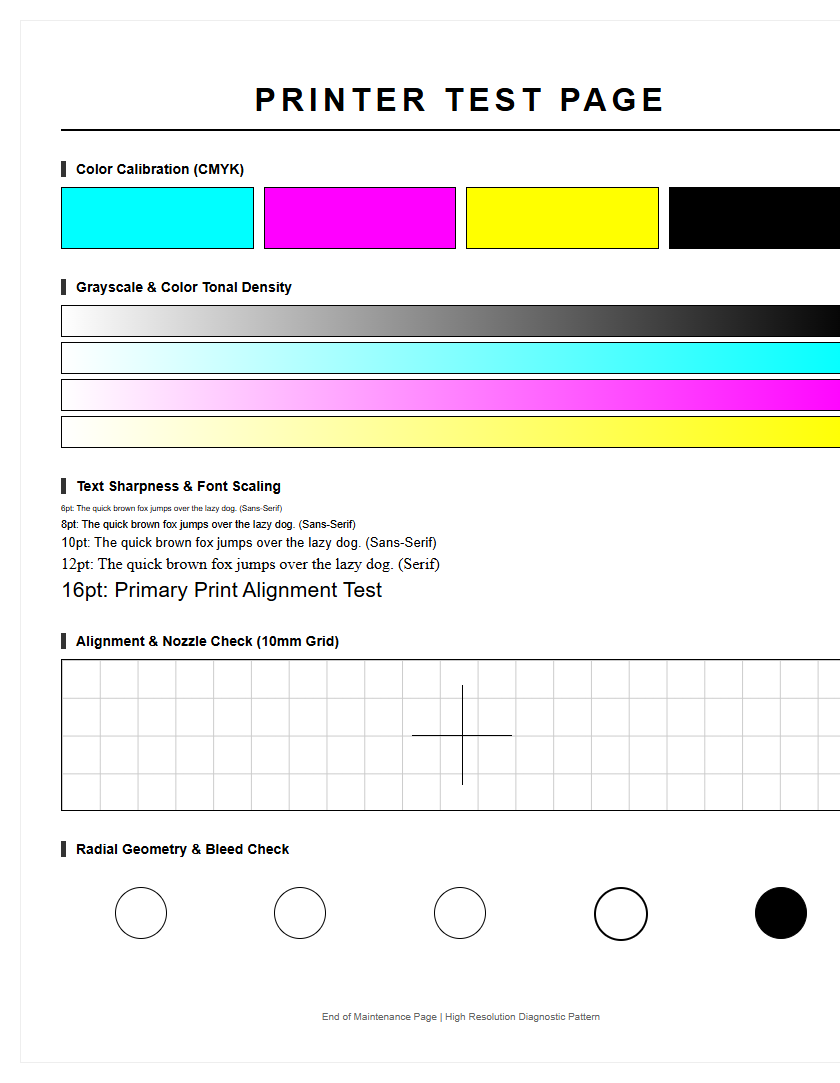
Color accuracy test standards are essential for ensuring that the digital values in a file translate perfectly to the physical medium. A professional test page utilizes standardized color swatches, often mapped to the ICC (International Color Consortium) profiles, to evaluate the printer's gamut. This section of the test page focuses on the transition between primary colors (Cyan, Magenta, Yellow) and the depth of the Black channel. It also evaluates "neutrality" through a series of gray patches; any color cast in the gray ramp indicates a calibration error in the ink mixing ratio.
- Primary Swatches: Testing the maximum saturation levels of C, M, Y, and K.
- Gradient Ramps: Ensuring smooth transitions without "stepping" or "posterization" in the mid-tones.
- Secondary Overlays: Checking how Red, Green, and Blue are formed by overlapping primary droplets.
Evaluating these standards requires consistent lighting, often 5000K (D50), to avoid metamerism, where colors look different under varying light sources. If the test page shows a deviation in the "Delta E" value-the mathematical difference between the intended color and the printed color-it indicates that the print head voltage or ink viscosity may be out of spec.
Resolving Inkjet Output Issues
Resolving output issues begins with a systematic analysis of the test page to differentiate between software configuration errors and mechanical print head failures. Common artifacts such as "horizontal banding" are frequently caused by clogged nozzles or improper media feed calibration. Conversely, "vertical banding" often points toward a dirty encoder strip or an obstruction in the print head's path. By utilizing a comprehensive test print, users can determine if the issue is systemic across all colors or isolated to a single cartridge manifold.
When streaks appear, the first step is usually a "head cleaning" or "power flush" to purge air and debris. If the test page continues to show drop-outs after multiple cleanings, the issue may be "ink starvation," caused by a failing pump or a pinched delivery tube. It is vital to use the test page as a "before and after" benchmark to ensure that the cleaning cycles are actually effective and not just wasting expensive consumables. Advanced users also look for "satellites"-tiny unintended droplets-which suggest the print head is firing at a frequency that is incompatible with the current ink viscosity.
Black Ink Density Evaluation
Black ink density, often referred to as Dmax, is the measure of the darkest possible black a printer can produce. A dedicated density evaluation section on a test page consists of multiple black patches, ranging from light charcoal to deep jet black. This test is crucial for text clarity and photographic contrast. In many professional systems, there is a distinction between "Photo Black" (dye-based) for glossy media and "Matte Black" (pigment-based) for porous paper. The test page helps verify if the correct ink type is being utilized for the detected media.
- Rich Black Calibration: Testing the combination of CMY underlays with the K channel to achieve maximum depth.
- Text Sharpness: Evaluating 2pt to 12pt font sizes to check for ink "wicking" or spreading.
- Grayscale Linearity: Ensuring that the black ink scales down to light gray without introducing unwanted color tints.
Low density often indicates a "starved" print head or an expired ink cartridge where the pigment has settled at the bottom. Conversely, excessive density can lead to "bronzing," an undesirable metallic sheen on the surface of the print. Monitoring these levels ensures that high-contrast documents remain professional and legible.
Printer Alignment Verification Steps
Printer alignment is the process of synchronizing the movement of the print head carriage with the paper feed mechanism and the firing timing of the nozzles. A misalignment results in blurry images, jagged text, or "overlap lines" where the print head passes meet. The alignment verification section of a test page usually features a series of numbered boxes containing vertical and horizontal lines. The user must identify which box shows the most perfectly centered lines, indicating the optimal "lead" or "lag" for the nozzle firing sequence.
- Bi-Directional Alignment: Synchronizing the ink drops fired when the head moves left-to-right with those fired right-to-left.
- Vertical Alignment: Ensuring that the different rows of nozzles on the print head are perfectly stacked.
- Paper Feed Adjustment: Calibrating the "step" distance of the roller to prevent white lines between passes.
Modern printers often use an optical sensor to read these patterns automatically, but manual verification remains the gold standard for high-end graphic arts. If the lines in the alignment pattern are consistently skewed, it may indicate a mechanical issue with the drive belt or a warped carriage rail that requires professional servicing.
Identifying Clogged Print Nozzles
Clogged nozzles are the most common culprit behind poor print quality, caused by dried ink residue, dust, or air bubbles within the print head capillaries. Identifying these clogs via a test page involves looking for specific "voids" in the nozzle check pattern. A "solid" clog results in a completely missing color channel, whereas a "partial" clog manifests as intermittent horizontal white lines across a solid block of color. Identifying the type of clog is essential for choosing the correct recovery method, such as a soft prime or a deep ultrasonic cleaning.
| Clog Symptom | Possible Cause | Recommended Action |
|---|---|---|
| Single White Line | Individual Nozzle Blockage | Standard Cleaning Cycle |
| Entire Color Missing | Air Lock or Empty Damper | Ink Charge / Power Flush |
| Deflected Lines | Debris on Nozzle Plate | Manual Wipe of Head Surface |
Persistent clogs that appear in the same location across multiple test pages suggest "permanent" nozzle damage, often due to physical abrasion or electrical burnout. However, if the clogs "migrate" or change position, the issue is likely air in the lines or "foaming" ink, which requires a different approach than simple cleaning, such as de-gassing the ink supply.
Maintaining Peak Printer Performance
Maintaining peak printer performance requires a proactive approach centered around the regular generation of test pages. Print heads are designed to be used; long periods of dormancy are the leading cause of hardware failure. By printing a diagnostic page at least once a week, the user ensures that ink continues to flow through the microscopic channels, preventing the volatile solvents in the ink from evaporating and leaving behind solid deposits. This "exercise" keeps the capping station moist and the wiper blades supple.
- Environmental Control: Keep the printer in a humidity-controlled area (40-60%) to prevent ink from drying on the nozzle plate.
- Firmware Updates: Ensure the printer's firing algorithms are optimized for the specific ink batches being used.
- Media Matching: Use the correct "Media Type" setting to ensure the print head height (platen gap) is adjusted correctly.
Routine maintenance also includes checking the "waste ink tank" or maintenance cartridge levels. A full waste tank can lead to back-pressure issues, which negatively impact the print head's ability to clear itself during cleaning cycles. Consistent monitoring of these technical factors via the test page results in a significant reduction in total cost of ownership and downtime.
Analyzing Ink Flow Consistency
Ink flow consistency refers to the ability of the delivery system to provide a steady, pressurized stream of ink to the print head during high-speed operation. Analyzing this on a test page involves looking at large, solid-fill areas. If the color starts out vibrant at the beginning of the page but fades or "thins out" toward the bottom, the system is suffering from a flow restriction. This is often caused by clogged ink filters, failing dampers, or a malfunction in the Continuous Ink Supply System (CISS) pressure pump.
Technical analysis of flow consistency also examines the "drop volume." Modern print heads use "variable droplet technology," where the size of the ink drop changes based on the detail required. A test page with fine halftones can reveal if the small-drop nozzles are failing while the large-drop nozzles remain clear. This "selective failure" can cause graininess in highlights even when solid colors look acceptable. Checking the ink lines for air bubbles during the test print is also a vital diagnostic step, as air is compressible and absorbs the firing energy of the piezo element, preventing the ink from ejecting properly.
Professional Print Quality Assessment
A professional print quality assessment is a comprehensive final check that goes beyond simple nozzle health to evaluate the entire imaging chain. This involves analyzing the "screening" or "dithering" patterns, which are the mathematical arrangements of dots used to create the illusion of continuous tone. A high-quality test page will include microscopic text, concentric circles (to check for moiré), and high-resolution photographic samples. The goal is to verify that the RIP (Raster Image Processor) and the print head are working in perfect harmony.
- Resolving Power: Ability to distinguish between very close parallel lines without "filling in."
- Tone Reproduction Curve: Ensuring that the shadows have detail and the highlights aren't "blown out."
- Ink Adhesion: Checking if the ink is properly cured or dried on the surface without "mottling."
For professionals, this assessment is the final gatekeeping step before a production run. It ensures that the printer meets ISO standards for color consistency across multiple jobs. By maintaining a library of these assessment pages, technicians can track the "wear and tear" on a print head over its lifecycle, predicting exactly when a replacement will be necessary based on the gradual degradation of fine-detail resolution.


Comments