Achieving precise output requires mastering printer margin alignment, a process critical for professional document production. This guide explores the systematic use of calibration patterns to identify hardware variances and registration offsets to correct them. By analyzing test sheets, users can quantify mechanical tolerances and adjust the print engine's X and Y coordinates. We delve into fine-tuning the leading edge and side margins to eliminate skew and ensure duplex consistency. Understanding these technical nuances allows for seamless integration between software layouts and physical media, ensuring your firmware settings accurately reflect the intended geometric output without hardware-induced drift.
Understanding Printer Margin Standards
Every printer operates within a physical constraint known as the non-printable area. This "dead zone" is dictated by the hardware's mechanical design, specifically the grip rollers that feed the paper through the chassis. Most modern inkjet and laser printers require a minimum margin of approximately 3mm to 5mm to maintain traction. Understanding these hardware limitations is crucial when diagnosing margin errors. If your document layout ignores these boundaries, the printer driver may force a shift or clip the content, leading to unintended alignment issues. Furthermore, different page description languages, such as PCL 6 or PostScript, handle these coordinate systems differently. While a GDI driver might rely on the Windows operating system to define the printable area, a PostScript driver often utilizes a strictly defined hardware boundary. Recognizing the interplay between the logical page in your software and the physical page handled by the feed mechanism is the first step toward achieving professional-level print accuracy and ensuring that your layout remains consistent across different hardware platforms.
Troubleshooting Misaligned Print Borders
When print borders appear skewed or slanted, the root cause is often mechanical rather than digital. Misalignment usually stems from the paper path components, where the media is not entering the fuser or print head assembly at a perfectly perpendicular angle. This phenomenon, known as "paper skew," can cause the top margin to appear wider on one side than the other. To address this, users should inspect the following components:
- Paper Tray Guides: Ensure the lateral guides are snug against the media stack without bowing the paper.
- Feed Rollers: Accumulation of paper dust or toner can cause uneven friction, leading to slippage during the intake cycle.
- Registration Sensors: These optical sensors detect the leading edge of the paper; if they are obscured, the "Top of Form" timing will be off.
If these physical checks do not resolve the issue, a software-based calibration may be necessary to compensate for internal gear wear. Adjusting the "X-axis" and "Y-axis" offsets in the printer properties allows the hardware to recalibrate its starting position for every print job, effectively neutralizing minor mechanical variances.
Measuring Layout Symmetry Accuracy
Achieving perfect symmetry requires precise measurement of the "gutters" and external margins on a standardized test page. A symmetry test involves printing a series of fine-line grids that extend to the absolute edges of the printable area. By using a metric ruler, you can measure the distance from the edge of the physical paper to the first printed line on all four sides. In an ideal setup, the left and right margins should be identical to within 0.5mm. Any deviation beyond this indicates a "horizontal registration" error. This measuring process is essential for tasks like duplex printing, where margins must align perfectly on both sides of the sheet for professional binding. If the symmetry is inconsistent, check the "Center on Page" settings in the print dialogue. Often, the software calculates the center based on the printable area rather than the physical paper size, leading to a shifted appearance. Verifying the coordinate mapping between the document's pixels and the printer's dots per inch (DPI) ensures that the geometric integrity of your layout is preserved during the rasterization process.
Calibrating Header and Footer Spacing
The vertical alignment of headers and footers is governed by the Top of Form (TOF) and Bottom of Form (BOF) parameters. These settings dictate exactly when the print head begins depositing ink after the leading edge of the paper is detected. If the header is too close to the edge, the printer may be failing to account for the "leading edge margin" required for stable paper transit. Calibration involves adjusting the vertical offset in the printer's firmware. The following table illustrates common vertical spacing issues and their likely technical causes:
| Symptom | Likely Technical Cause | Recommended Action |
|---|---|---|
| Header Clipped | Insufficient TOF Offset | Increase Top Margin in Driver |
| Footer Overlap | Paper Length Mismatch | Check Media Size Settings |
| Vertical Compression | Stepping Motor Slippage | Clean Feed Rollers |
By systematically adjusting these offsets, you ensure that the text blocks remain within the "safe zone" of the page. This is particularly important for official documents or branded letterheads where consistent positioning of logos and footer information is mandatory for corporate compliance.
Correcting Uneven Side Margins
Uneven side margins are frequently caused by a mismatch between the software's "Logical Page" and the printer's "Physical Page." To correct this, you must first determine if the shift is constant across all applications. If the left margin is consistently wider than the right, the printer's horizontal home position needs recalibration. This can be achieved through the following steps:
- Access the "Advanced" or "Maintenance" tab in the printer driver.
- Print a "Margin Alignment Test Page" to identify the numerical offset.
- Enter the correction value (usually in millimeters or points) into the "Horizontal Offset" field.
- Perform a test print to verify the adjustment.
This process adjusts the "X-offset" of the print carriage or laser scanner. In duplexing units, side margins must also be synced between the front and back of the page. If the margins are uneven only on the second side, the "duplex registration" setting is the primary suspect. Fine-tuning these parameters ensures that when pages are flipped, the text blocks perfectly overlay one another, preventing a "see-through" effect that occurs with thin paper stocks.
Optimizing Page Scaling and Centering
Scaling issues often masquerade as margin problems. When a printer is set to "Fit to Page," it automatically shrinks or expands the document to fit within its predefined printable area. This frequently results in margins that appear much larger than intended. To maintain layout integrity, it is vital to select "Actual Size" or "100% Scaling" in the print settings. This forces the printer to use the exact coordinate system defined in the document. However, if the document's margins are smaller than the printer's hardware capabilities, the content will be clipped. Centering accuracy depends on the printer's ability to translate the document's digital center point to the physical center of the paper. This involves the "Raster Image Processor" (RIP) calculating the total width of the media and subtracting the combined margins. If the paper width is incorrectly identified-such as using Letter size paper while the software expects A4-the centering will be offset by several millimeters. Always ensure that the "Media Size" in the printer properties matches the physical paper loaded in the tray to avoid these scaling artifacts.
Standard Paper Size Alignment Guides
Alignment guides vary significantly between international paper standards. The most common discrepancy occurs between the North American "Letter" size (8.5 x 11 inches) and the international "A4" size (210 x 297 mm). Because A4 is narrower and longer than Letter, a document designed for one but printed on the other will suffer from severe margin misalignment. Printers use specialized sensors to detect paper dimensions, but these can be overridden by manual settings. Consider the following factors for alignment:
- Aspect Ratio: A4 has a 1:-2 ratio, whereas Letter does not, causing scaling shifts if "Auto-Rotate and Center" is enabled.
- Tray Tensioners: Side guides must be locked into the specific detents for the chosen paper size to prevent lateral movement.
- Driver Profile: The PPD (PostScript Printer Description) file must be set to the correct region to default to the appropriate margins.
Utilizing the alignment guides etched into the paper tray helps ensure the paper enters the path perfectly straight. When these guides are ignored, the resulting "margin walk" can cause text to gradually drift toward the edge of the page over a long print run.
Verifying Print Head Positioning
For inkjet technology, margin alignment is heavily dependent on the precision of the print head carriage movement. The carriage moves back and forth along a stabilizer bar, guided by a transparent "encoder strip." This strip contains microscopic markings that the printer's optical sensor reads to determine its exact horizontal position. If the encoder strip is contaminated with ink mist or grease, the printer may lose track of the print head's location, resulting in jagged margins or "ghosting." Verifying the position involves running a "Bi-directional Alignment" test. This utility prints a series of vertical lines at varying intervals. The user must identify which lines are the straightest, indicating the most accurate timing for ink droplet ejection. This calibration ensures that the margins on both the left-to-right and right-to-left passes are perfectly synchronized. In laser printers, a similar verification is required for the "LSU" (Laser Scanner Unit) to ensure the beam is hitting the drum at the precise start-of-scan (SOS) point. Regular maintenance of these internal tracking systems is the only way to guarantee long-term alignment accuracy.
Resolving Cut Off Text Issues
Cut off text is the most common symptom of a "Margin Violation." This occurs when the document's internal margins are smaller than the printer's physical "Non-Printable Area" (NPA). When the print data reaches the NPA, the printer's firmware simply stops rendering, resulting in a hard clip. To resolve this, you must analyze the "Clipping Path" in the document's metadata. If you are using a "Borderless" print setting, be aware that the printer will slightly "overspray" or "over-expand" the image beyond the paper edges to ensure total coverage. This can lead to important text near the edge being lost. For standard documents, the safest approach is to maintain a "Safety Margin" of at least 6mm. Additionally, check for "Gutter" settings in word processing software, which add extra space to one side for hole-punching or binding. If a gutter is applied but the printer is not aware of it, the opposite margin will be pushed into the NPA, causing the text on that side to be cut off. Adjusting the "Page Setup" to reflect the printer's actual hardware limits is the most effective permanent fix.
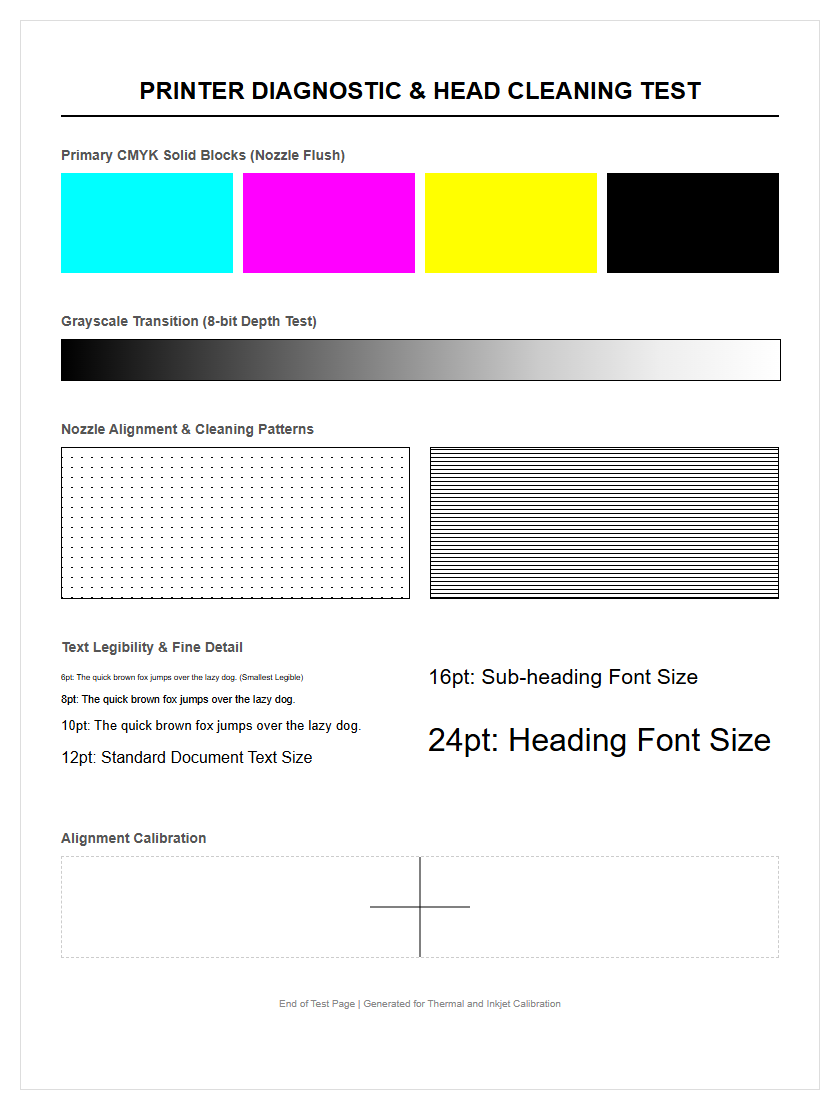
Manual Alignment Pattern Instructions
Manual alignment is a fail-safe method to calibrate your printer when automatic sensors fail. This process involves a feedback loop between the printed output and the user interface. When you initiate a manual alignment from the maintenance menu, the printer generates a specialized "Alignment Grid." This grid consists of multiple numbered patterns, each with slight variations in vertical and horizontal offsets. To complete the calibration, follow these steps:
- Examine the printed patterns closely, looking for the set where the lines are most perfectly aligned without any gaps or overlaps.
- Identify the corresponding number or letter associated with the most accurate pattern.
- Enter these values into the printer's control panel or the computer's driver software.
- The printer will then update its internal "stepping motor" logic to apply these corrections to all future jobs.
By providing this manual input, you are essentially "zeroing" the coordinate system. This is particularly effective for correcting "micro-banding" or margin drift that occurs as mechanical components age. Regularly performing this manual check ensures that the printer's digital brain remains perfectly synced with its physical movements.

Comments