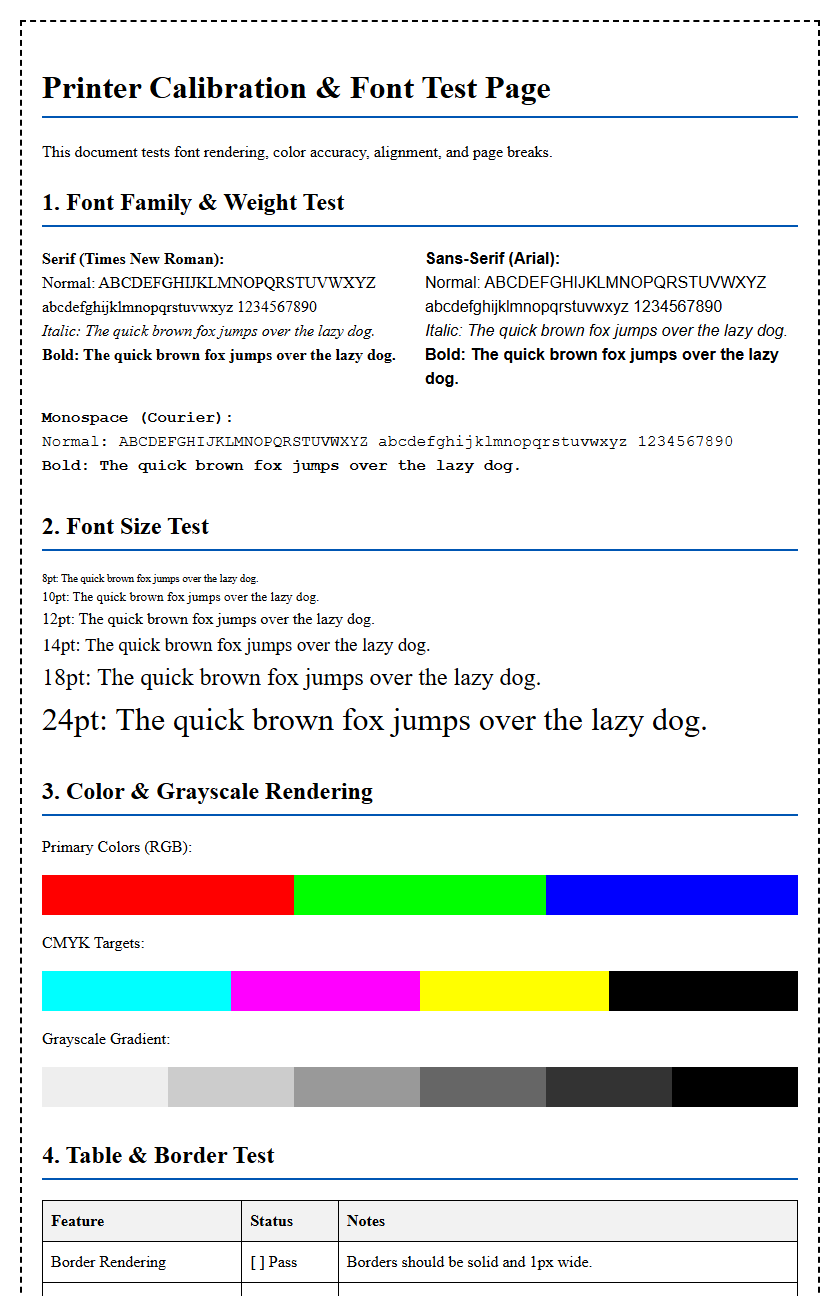
Interpreting a printer test page is essential for maintaining high-fidelity output and diagnosing hardware health. By analyzing the CMYK (Cyan, Magenta, Yellow, and Key) blocks, you can assess nozzle density and printhead alignment. A successful nozzle check should display uniform, unbroken patterns across all color channels; any visible banding or horizontal gaps suggest localized clogging or air in the ink delivery system. While the digital fuel gauge monitors estimated cartridge levels, the physical test pattern confirms actual droplet placement and saturation. Monitoring these diagnostic grids ensures consistent chromatic accuracy and helps prevent premature printhead wear from ink depletion or debris.
Understanding Printer Ink Indicators
Modern printing systems utilize sophisticated internal sensors and integrated circuit (IC) chips to communicate supply status to the user interface. These indicators provide a digital representation of the remaining pigment or dye within the reservoir. In inkjet technology, the printer monitors the duty cycle and droplet count-often measured in picoliters-to estimate how much fluid has been expelled through the piezoelectric or thermal print head nozzles. Understanding these levels is crucial for maintaining color accuracy and preventing hardware damage.
When reviewing your printer's control panel or status monitor, you will encounter various icons representing the CMYK (Cyan, Magenta, Yellow, and Key/Black) color model. A low-ink indicator doesn't always signify an empty cartridge; rather, it often serves as a predictive warning based on standardized page coverage metrics. High-density graphics consume significantly more volume than standard text documents. Factors influencing these indicators include:
- Cartridge chip memory resets and read/write errors.
- Evaporation rates within the capping station.
- Self-cleaning cycles that purge ink to prevent nozzle desiccation.
- Firmware-based consumption algorithms versus physical float sensors.
Monitoring Current Cartridge Levels
Tracking your supply levels involves a combination of software-based bidirectional communication and hardware status lights. Most manufacturers provide a dedicated utility suite that displays real-time graphics of your ink volume. This software queries the printer via the USB or network interface using SNMP (Simple Network Management Protocol) to retrieve the current state of the consumables. Relying on these visual gauges ensures that you are never caught off guard during high-priority print jobs.
| Indicator Type | Description | Action Required |
|---|---|---|
| Full/Optimal | Reservoir contains 80-100% capacity. | No action; continue standard operations. |
| Low Warning | Supply is below 15-20% threshold. | Procure replacement cartridges immediately. |
| Depleted/Empty | Sensor detects insufficient fluid for firing. | Replace cartridge to prevent print head overheating. |
It is important to note that secondary colors are often depleted faster if your print settings are not optimized. Monitoring these levels through the system tray or the printer's onboard LCD allows for precise resource management and helps avoid "ghosting" effects caused by ink starvation during the middle of a print cycle.
Signs of Depleted Ink Supply
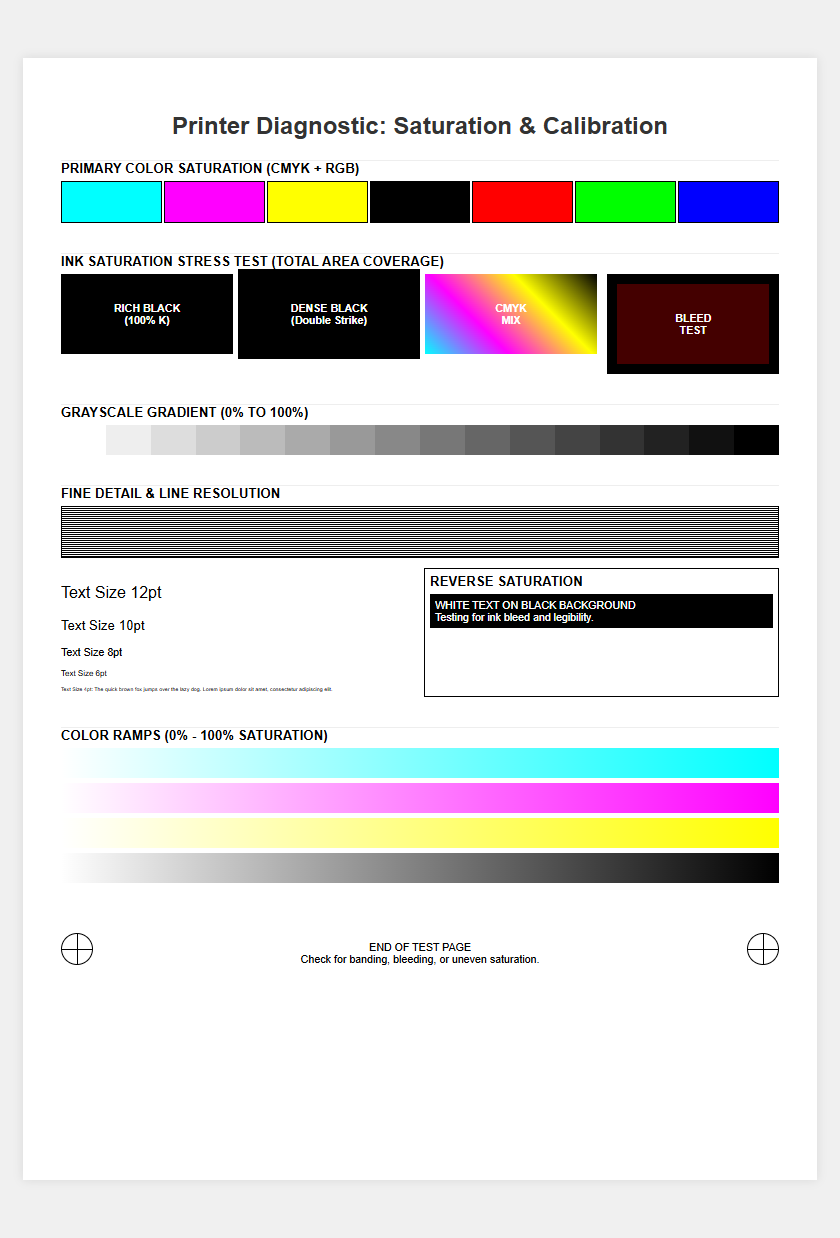
Physical evidence on a test page is often the most reliable method for identifying a failing ink supply, regardless of what the digital software reports. When a cartridge approaches the end of its functional life, the print head fails to receive a consistent flow of fluid, leading to several mechanical and aesthetic issues. The most common symptom is "banding," where horizontal or vertical white lines appear across solid blocks of color. This occurs because specific micro-nozzles are no longer firing due to air pockets or lack of pressure within the delivery system.
Other signs include significant color shifting, where a photograph might appear excessively pink or green because one primary color in the CMYK spectrum is exhausted. You may also observe "fading," where the optical density of the black text drops from a rich charcoal to a light gray. If you notice "spotting" or inconsistent saturation, the cartridge's internal sponge may be drying out, or the thermal resistors may be struggling to vaporize the remaining ink. Recognizing these visual cues early can prevent you from wasting expensive photo paper on unusable output.
Evaluating Print Saturation and Clarity
A printer test page serves as a diagnostic tool to evaluate the saturation and clarity of the current ink output. Saturation refers to the intensity and purity of the colors, while clarity pertains to the sharpness of the edges and the absence of bleeding. High-quality output requires a precise balance of ink drop volume and paper absorption. If the ink level is low, the saturation will diminish, resulting in a "washed out" appearance that lacks the professional vibrance required for marketing materials or high-resolution photography.
- Print a "Nozzle Check" pattern to see if every orifice is delivering ink correctly.
- Examine the "Color Block" section for uniform density across the entire square.
- Analyze small font sizes (4pt to 6pt) to check for "wicking" or blurring of characters.
- Review grayscale gradients to ensure smooth transitions without abrupt "stepping" or artifacts.
Clarity is also impacted by the viscosity of the ink. As a cartridge nears depletion, the remaining ink may become thicker due to solvent evaporation, leading to clogs that degrade the resolution, measured in DPI (Dots Per Inch). Maintaining high saturation levels is essential for achieving the full color gamut intended by the original digital file.
Performing Color Density Inspections
Color density inspections are technical evaluations designed to ensure the printer is laying down the correct amount of pigment per square millimeter. Using a test page, you can inspect the "Dmax" (maximum density) of the black ink and the secondary hues. These inspections are vital for professional workflows where color matching is critical. A density strip on a test page typically features a series of boxes ranging from 10% to 100% ink coverage, allowing the user to visually confirm that the printer is capable of producing deep, rich tones without streaking.
If the 100% density block looks translucent or contains visible striations, it indicates that the ink delivery system is failing to maintain the necessary flow rate. This could be due to a low ink level or a vacuum issue within the cartridge. During this inspection, pay close attention to the "halftone" patterns; if these tiny dots are inconsistent, the print head's timing or ink pressure is likely compromised. Regularly performing these inspections helps in calibrating the printer's internal color profiles, ensuring that the "what you see is what you get" (WYSIWYG) standard is maintained throughout the life of the consumables.
Manual Check of Ink Reservoirs
While digital sensors provide convenience, a manual inspection of the ink reservoirs is often necessary, especially for Continuous Ink Supply Systems (CISS) or EcoTank models. These printers feature external, translucent tanks that allow for direct visual verification of fluid levels. Manual checks eliminate the guesswork associated with "estimated" levels provided by software drivers, which can sometimes be misled by third-party chips or resetters. To perform a manual check, ensure the printer is on a level surface and observe the "Min" and "Max" fill lines etched into the reservoir casing.
- Identify the color of each tank (Cyan, Magenta, Yellow, Black).
- Check for sediment or "sludge" at the bottom of the tanks, which can indicate expired ink.
- Look for air bubbles in the supply tubes that connect the tanks to the print head.
- Ensure the air vent plugs are properly seated to maintain correct atmospheric pressure.
For standard cartridges, a manual check may involve gently shaking the unit to feel the weight of the liquid or checking the "vent hole" for dried residue. However, be cautious not to touch the copper contact points or the nozzle plate, as oils from skin or physical abrasion can permanently damage the sensitive electronics.
Extending Cartridge Longevity Strategies
To maximize the utility of every milliliter of ink, users should implement specific maintenance and usage strategies. Cartridge longevity is not just about how much you print, but how the printer is maintained between jobs. One of the most effective ways to preserve ink is to prevent the print head from drying out. This is achieved by keeping the printer powered on or in "Sleep Mode," which allows the device to perform periodic "maintenance spit" cycles that keep the nozzles hydrated and clear of obstructions.
Additionally, choosing the correct media type in the print dialog box significantly affects consumption. If you select "Plain Paper" while using "Glossy Photo Paper," the printer may apply an incorrect volume of ink, leading to waste. Consider the following strategies for efficiency:
- Use "Draft Mode" for internal documents to reduce ink volume by up to 50%.
- Avoid frequent "Deep Cleaning" cycles unless necessary, as these purge large amounts of ink.
- Print at least once a week to maintain fluid dynamics within the micro-channels.
- Store spare cartridges in a cool, dark place to prevent chemical breakdown and evaporation.
Troubleshooting Streaks and Faded Text
Streaks and faded text are primary indicators that the ink level is either critically low or the delivery path is obstructed. Streaks, often referred to as "nozzle drop-outs," occur when specific nozzles on the print head are blocked by dried ink or air. This results in missing lines across the page. Faded text, on the other hand, usually points to a systemic lack of ink volume reaching the heating elements or the piezoelectric crystals. Before replacing a cartridge, it is wise to run a standard "Print Head Cleaning" utility from the maintenance menu.
If the test page still shows "ghosting" or erratic character formation after cleaning, the issue may be "cavitation," where air bubbles have entered the print head. In such cases, a "Power Flush" might be required, though this consumes a significant amount of ink. If the supply is confirmed to be high but fading persists, check the "media settings" to ensure the printer isn't in an "Ink Save" or "Toner Save" mode, which artificially limits the output density. Persistent streaks on a full cartridge often indicate that the capping station is dirty and needs manual cleaning with distilled water.
Assessing Supply Status via Settings
Accessing the supply status through the operating system's settings is the most common way to check ink levels without printing a physical page. On Windows, this is typically found under "Devices and Printers" within the Control Panel, where right-clicking the device icon reveals "Printing Preferences" or "Printer Properties." Within these menus, a "Maintenance" or "Services" tab usually contains the "Status Monitor." This utility provides a graphical interface showing the percentage of remaining ink and often includes the estimated page yield remaining based on current usage patterns.
For macOS users, the information is located in "System Settings" under "Printers & Scanners." Selecting the specific printer and clicking "Options & Supplies" will display a "Supply Levels" tab. It is technically beneficial to compare these software readings with the physical output of a test page. Sometimes, the firmware might report a cartridge is "Empty" to protect the print head from dry-firing, even if a small amount of fluid remains. Understanding these settings allows you to override certain "End of Life" warnings if your printer supports a "Continue" mode, though this should be done with caution to avoid hardware damage.
Optimizing Output for Ink Conservation
Optimizing your printer output for ink conservation involves adjusting the software configuration to prioritize efficiency over absolute quality. The "Draft" or "Economy" mode is the most effective setting for this purpose; it reduces the DPI and utilizes a more sparse "dithering" pattern, which uses less ink while keeping text legible. Another technical approach is to utilize "Grayscale" printing. By forcing the printer to use only the Black (K) cartridge, you preserve the more expensive Cyan, Magenta, and Yellow inks, which are often mixed even when printing seemingly black text in "Color" mode.
Furthermore, font selection plays a surprising role in ink conservation. "Eco-fonts" or lighter typefaces like Calibri and Arial consume less ink than bold, serif fonts like Times New Roman or Impact. Some advanced drivers also offer a "Toner/Ink Darken" slider; moving this to a lower value can significantly extend the life of a cartridge. Finally, always preview documents before printing to eliminate "widows and orphans" or unnecessary blank pages, ensuring that every drop of ink expelled contributes to the final, necessary output. This holistic approach balances technical performance with cost-effective resource management.

Comments