Utilizing diagnostic test pages is a practical approach to proactive printer maintenance and troubleshooting. These specialized documents help you evaluate the internal media path, identifying issues within the pickup rollers and separation pads before hardware failure occurs. By analyzing print quality patterns and registration markers, you can pinpoint where debris accumulation or a reduced friction coefficient might cause frequent paper jams or skewing. These diagnostic reports provide a clear overview of the feed mechanism's health, including the state of the fuser assembly and transfer rollers. Regularly running these tests ensures consistent paper traction and optimal alignment for high-quality, reliable output.
Common Signs of Dirty Printer Rollers
Identifying the early symptoms of contaminated rollers is essential for preventing long-term hardware damage. The most frequent indicator of dirty paper feed rollers is a consistent failure to pick up paper, often accompanied by a loud grinding noise as the hardware attempts to gain traction. When paper dust, lint, and residual oils accumulate on the rubber surface, the friction coefficient drops significantly, leading to "paper skew" where the page enters the printer at an angle. This misalignment results in crooked text and margins that fail to match the digital layout.
Furthermore, users may experience "multi-sheet feeding," where the separation pad and rollers fail to isolate a single sheet, pulling through a stack simultaneously. If you notice vertical streaks or repeated smudges at regular intervals down the length of a printed page, this typically indicates that the rollers are transferring debris or excess toner back onto the media. Monitoring these mechanical behaviors allows for proactive maintenance before a complete "load paper" error or system stall occurs during critical high-volume print jobs.
Essential Supplies for Roller Maintenance
Proper maintenance requires specific tools designed to clean sensitive components without leaving behind residue or causing chemical degradation. Using the wrong solvents can dry out rubber, leading to cracking and permanent loss of elasticity. To ensure the longevity of your printer hardware, assemble a cleaning kit with the following items:
- Isopropyl Alcohol (90% or higher): Acts as an effective solvent for breaking down ink, grease, and toner without lingering moisture.
- Lint-Free Microfiber Cloths: Essential for wiping surfaces without introducing new fibers or static electricity into the paper path.
- Distilled Water: Used for a gentle preliminary wipe or when cleaning rollers that are sensitive to harsh alcohols.
- Cotton Swabs: Ideal for reaching recessed rollers and tight corners within the internal chassis.
- Canned Air (Duster): Useful for blowing out loose paper dust and debris before applying liquid cleaners.
- Rubber Rejuvenator: A specialized chemical spray that helps restore the grip and flexibility of aged or hardened rollers.
Always ensure that the cleaning agents are applied to the cloth or swab first, rather than being sprayed directly into the printer assembly to avoid short circuits.
Step by Step Paper Feed Roller Cleaning
Cleaning the paper feed rollers is a precise process that requires careful handling of the internal components to avoid damaging the drive gears. Follow these steps to restore mechanical traction:
- Power down the printer and unplug it from the electrical outlet to prevent any risk of shock or mechanical movement during cleaning.
- Remove the paper tray and any loose sheets to provide clear access to the bottom of the feed assembly.
- Locate the pickup rollers, which are typically D-shaped or circular rubber wheels located near the paper entrance.
- Dampen a lint-free cloth with a small amount of isopropyl alcohol or distilled water, ensuring it is not dripping wet.
- Wipe the rubber surface of the roller while manually rotating it. Ensure you clean the entire circumference to remove all accumulated glaze and dust.
- Inspect the separation pad-the small rubber or cork strip opposite the roller-and wipe it clean as well.
- Allow the rollers to air dry completely (usually 2 to 5 minutes) before reinserting the paper tray and powering on the device.
Regular execution of this routine prevents the buildup of "paper flour," a fine white powder that is the primary cause of slippage.
Solving Paper Jams with Proper Cleaning
A significant percentage of paper jams are not caused by mechanical failure but by the loss of grip due to environmental contaminants. When rollers become slick, they cannot maintain a consistent velocity for the paper as it moves through the fuser or carriage. This discrepancy triggers the printer's internal sensors to detect a "timing error," resulting in a paper jam notification. In laser printers, the buildup of toner particles on the exit rollers can cause the paper to wrap around the fuser assembly, creating a complex jam that is difficult to clear.
By maintaining a clean paper path, you ensure that the friction required to pull the media against the resistance of the separation mechanism remains constant. Cleaning the rollers effectively resets the "traction baseline," allowing the printer to accurately time the movement of each sheet. This preventative measure is especially vital when using heavy cardstock or glossy photo paper, which require more torque and grip than standard 20lb bond paper to move through the internal curves of the machine.
How to Access Internal Printer Rollers
Accessing the rollers within a modern printer often requires navigating a series of latches and panels designed to protect the internal electronics. Most desktop units feature a primary access door at the rear, often referred to as the duplexer or rear jam clearance door. Removing this panel provides a direct view of the rollers responsible for flipping the page during double-sided printing. For enterprise-level machines, the rollers are often housed within the "Paper Feed Unit" or "Tray 1" assembly, which may require a latch release to slide forward.
In some inkjet models, you must initiate a "Maintenance Mode" via the control panel to move the print head carriage out of the way, exposing the internal star wheels and exit rollers. If the rollers are not immediately visible, check the underside of the top scanner lid or the toner cartridge cavity in laser models. Always refer to the service manual's "Service Map" to locate specific pickup, transfer, and feed rollers. Using a small flashlight can help identify the dark rubber components against the black plastic interior of the chassis.
Cleaning Techniques for Laser Printer Rollers
Laser printer rollers require a specialized approach due to the presence of toner, which is a fine plastic powder that can melt if exposed to high heat or certain chemicals. The most critical component to maintain is the transfer roller, a soft, often spongy roller located beneath the toner cartridge. Never touch the transfer roller with bare fingers, as skin oils can interfere with the electrostatic charge, leading to faded prints. Use a dry, lint-free cloth or a dedicated toner vacuum to remove excess powder.
The fuser rollers, which operate at high temperatures to bond toner to the paper, can accumulate "ghosting" debris. These should only be cleaned when the printer has cooled down for at least 30 minutes. Use a cloth lightly dampened with distilled water to wipe the fuser exit rollers. Avoid using flammable solvents like high-concentration alcohol near the fuser assembly, as the residual heat could potentially ignite vapors. Regularly cleaning these high-heat areas prevents the "baked-on" debris that causes repetitive spot defects on your printed documents.
Maintaining Inkjet Pickup Roller Performance
Inkjet printers are susceptible to a unique form of contamination known as "ink overspray." During borderless printing or high-saturation photo jobs, a fine mist of ink can settle on the pickup rollers, creating a sticky residue that attracts paper dust. This combination forms a hardened glaze that renders the rollers smooth and useless. To maintain performance, use a 50/50 mixture of distilled water and isopropyl alcohol to gently scrub the "D-shaped" pickup rollers located in the paper tray area.
Because inkjet rollers are often smaller and more delicate than their laser counterparts, it is important to apply minimal pressure. Excessive force can pop the rollers out of their plastic housings or misalign the drive gears. Additionally, check the "star wheels"-the tiny spiked metal wheels that guide the paper as it exits the printer. If these become clogged with ink, they can leave "pizza cutter" tracks down the center of your photos. A quick wipe with a damp cotton swab is usually sufficient to clear these delicate parts and ensure a clean, mark-free finish.
Preventing Rubber Degradation and Slippage
Rubber degradation is a natural process caused by oxidation and the evaporation of plasticizers, which are chemicals that keep the rollers soft and grippy. Over time, rollers can undergo "vulcanization," becoming hard, brittle, and smooth. To prevent this, avoid placing your printer in direct sunlight or near heat vents, as UV rays and high temperatures accelerate the drying process. Maintaining a consistent humidity level in the office environment also helps keep the rubber from becoming too dry or overly soft and "gummy."
If rollers have already begun to slip but show no signs of physical cracking, a "rubber rejuvenator" can be used. This chemical treatment slightly swells the rubber and restores its tackiness. However, this is often a temporary fix. For long-term reliability, it is recommended to replace the pickup roller tires every 50,000 to 100,000 pages, depending on the manufacturer's duty cycle ratings. Using high-quality paper with low dust content also significantly extends the life of the rubber by reducing the amount of abrasive particles the rollers must encounter during each print cycle.
Safety Precautions for Manual Roller Cleaning
When performing manual maintenance on printer rollers, safety for both the user and the device is paramount. Printers contain high-voltage power supplies and sensitive electronic components that can be damaged by electrostatic discharge (ESD) or liquid ingress. Follow these safety protocols to ensure a successful cleaning session:
| Precaution | Action Required |
|---|---|
| Electrical Safety | Always unplug the power cord and disconnect data cables (USB/Ethernet). |
| Chemical Handling | Use solvents in a well-ventilated area; avoid inhaling isopropyl vapors. |
| Mechanical Protection | Do not force rollers to turn against the motor; use the manual override if available. |
| Component Integrity | Never use abrasive pads or metal tools that could scratch the rubber or plastic. |
Additionally, ensure the printer is completely dry before reconnecting the power. If alcohol seeped into the gear train, it could dissolve the essential lubricants required for smooth operation. Wait at least ten minutes after cleaning before performing a test print to ensure all volatile vapors have dissipated, especially in laser printers where the fuser reaches ignition-level temperatures.
Verifying Results with a Printer Test Page
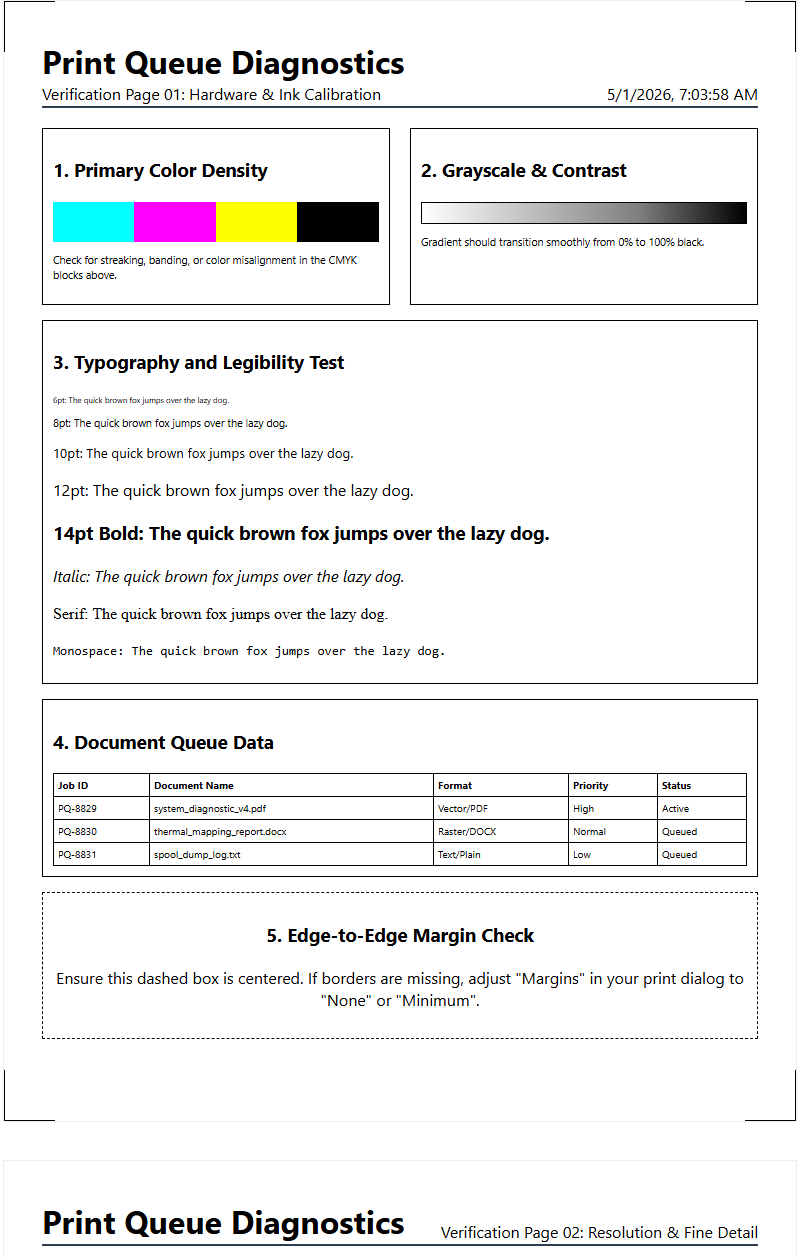
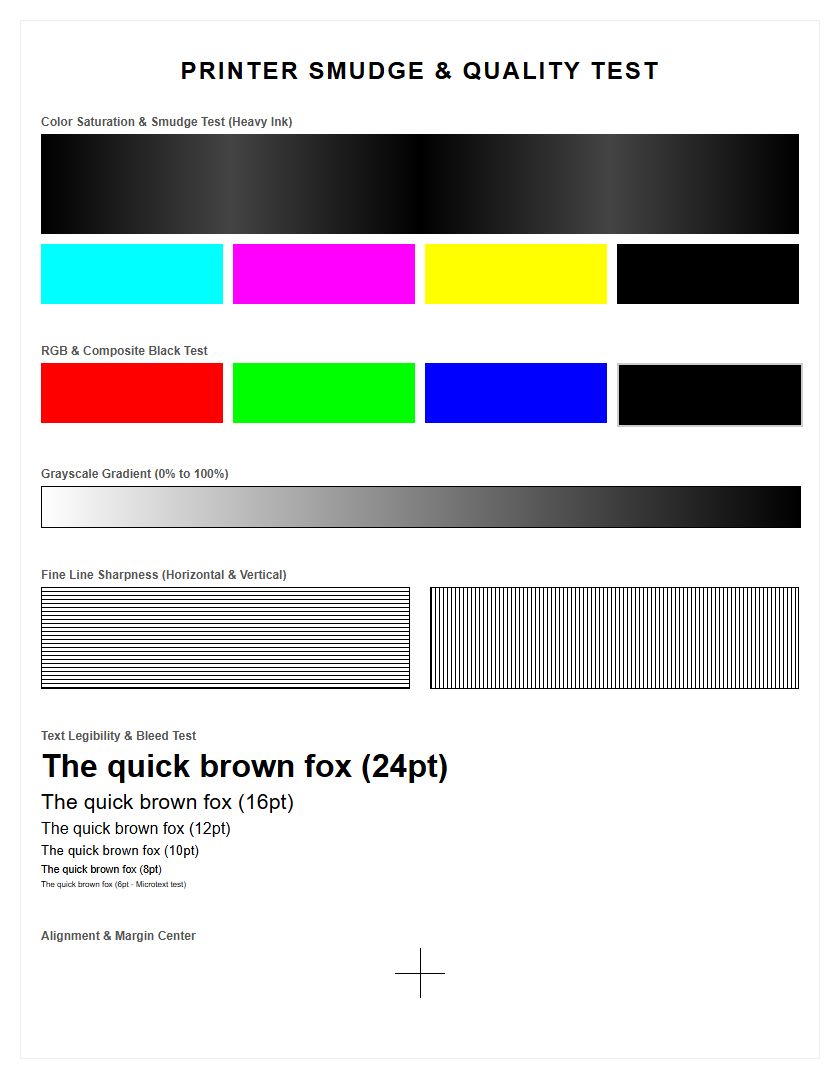
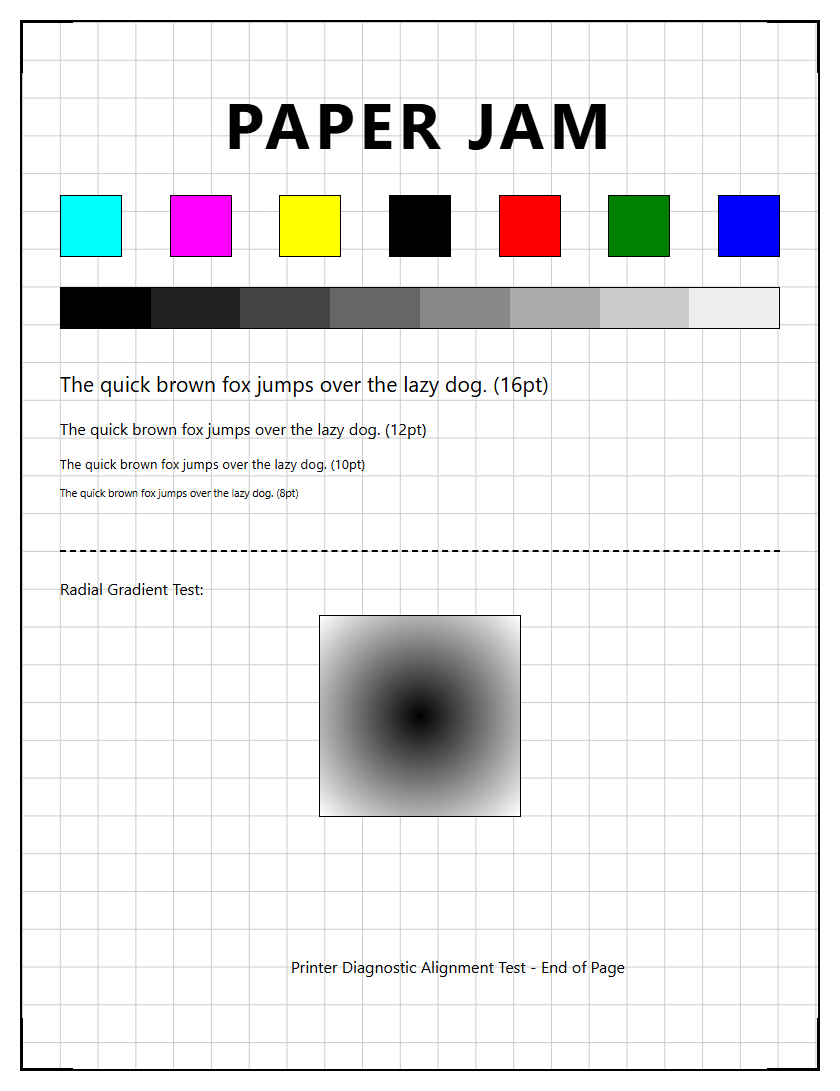
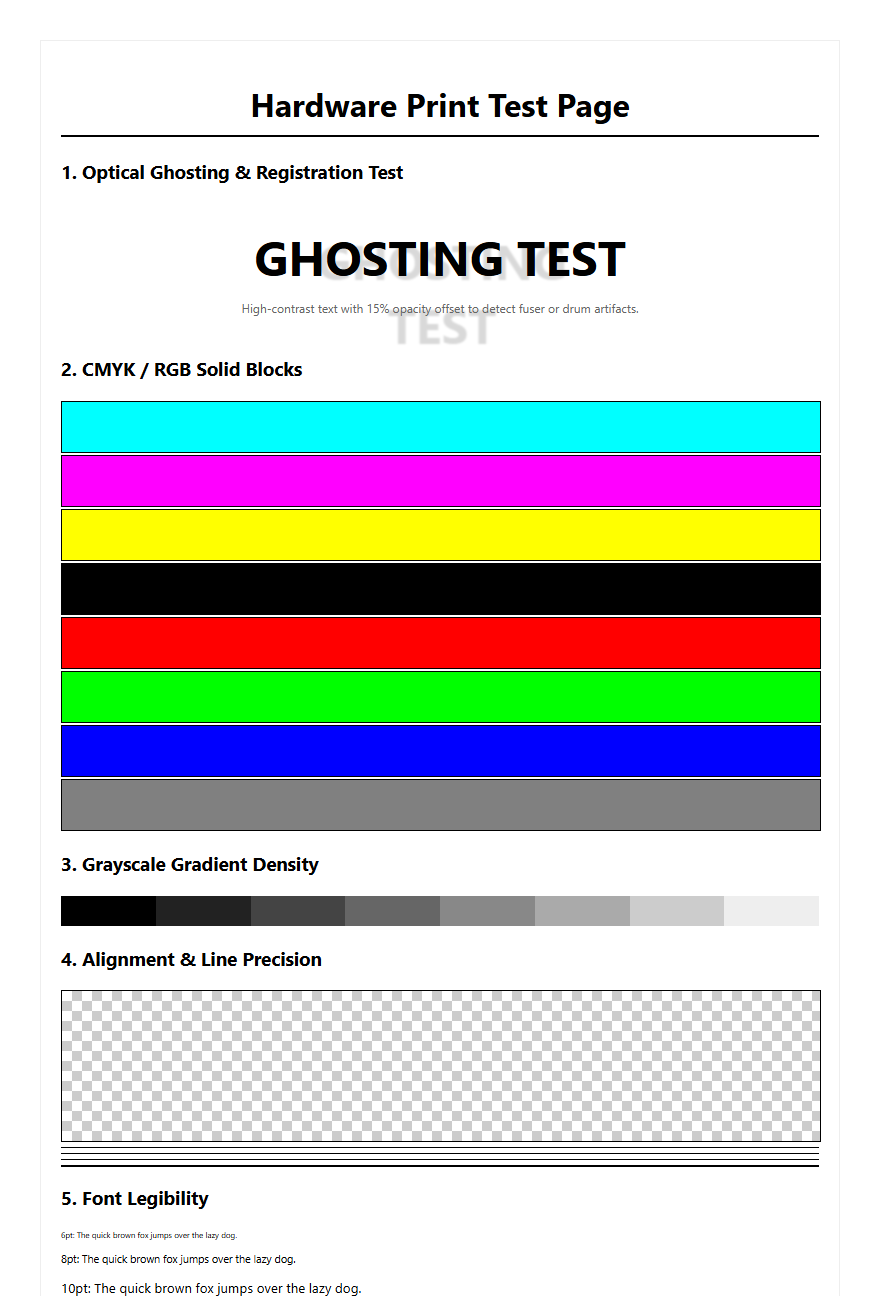
After the cleaning process is complete, the final step is validation through a printer test page. This diagnostic print serves as a benchmark to ensure that the mechanical and chemical cleaning was successful. A standard test page includes specific patterns designed to highlight feed issues. Look for the "Margin Alignment" section; if the borders are perfectly symmetrical, the rollers are pulling the paper straight and at the correct speed. If the text blocks are crisp without vertical dragging or "slurring," the friction on the feed rollers has been restored.
Pay close attention to the "Paper Path Diagnostic" results, which often list the total number of jams recorded by the system. Resetting the device and running a ten-page blank print test can also help "buff" the rollers and remove any microscopic fibers left behind by the cleaning cloth. If the printer test page prints without any "load paper" errors or skewed lines, the maintenance was successful. This verification process ensures that the printer is ready for high-stakes production, providing peace of mind that the hardware is functioning within its intended technical specifications.

Comments