To maintain peak performance on your Epson inkjet printer, regular execution of a nozzle check and print head alignment is essential. The nozzle check pattern identifies deficiencies in the piezo-electric firing mechanism, highlighting clogged nozzles that cause horizontal banding or color inaccuracy across the CMYK spectrum. Simultaneously, print head alignment calibrates the mechanical positioning of the carriage, ensuring precise ink droplet placement during bi-directional printing to eliminate blurred text. By utilizing the built-in maintenance utility to run these diagnostic test pages, you can effectively troubleshoot output issues and extend the lifespan of your hardware through systematic calibration and scheduled cleaning cycles.

Epson Printer Test Page Essentials
An Epson printer test page is a diagnostic tool designed to verify the communication between your computer and the hardware. It acts as a baseline for assessing the output quality of the Micro Piezo print head technology. When you initiate this page, the printer executes a sequence that checks for ink density, font clarity, and margin alignment across the printable area. This document typically displays the driver version, port configuration, and the current firmware status. Understanding these essentials helps in pinpointing whether a printing issue is software-related or a physical blockage within the ink delivery system.
For Epson users, the test page is the first line of defense against banding or color shifts. By examining the crispness of the black text and the saturation of the cyan, magenta, and yellow blocks, users can determine if the nozzles are firing correctly. It provides a standardized reference point that bypasses complex application settings, ensuring that the printer's raw capabilities are functioning within factory specifications. Regularly printing these pages can help identify early signs of hardware wear, ensuring that your high-resolution documents remain professional and clean.
Why Run a Printer Check
Regular printer checks are vital for maintaining the longevity of Epson's precision mechanics. Running a diagnostic test helps identify issues like air bubbles in the ink lines or particulate buildup on the print head before they ruin expensive photo paper. It is a proactive measure to ensure that the inkjet nozzles remain primed. If a printer sits idle for extended periods, the aqueous-based ink can dehydrate, leading to clogged channels. By triggering a check, you force a small amount of ink through the nozzles, which keeps the system lubricated.
- Identify Clogs: Detects partial or full nozzle blockages early.
- Save Consumables: Prevents wasting full-page prints on faulty output.
- Verify Connectivity: Confirms the handshake between the OS and the printer.
- Monitor Ink Levels: Provides a physical representation of remaining ink volume.
Furthermore, it aids in troubleshooting connectivity protocols like Wi-Fi Direct or Ethernet stability. Instead of wasting ink on high-resolution photos that may come out streaked, a simple test page consumes minimal resources to confirm readiness. This process saves both time and expensive consumables by catching mechanical discrepancies early.
Interpreting Color Calibration Sheets
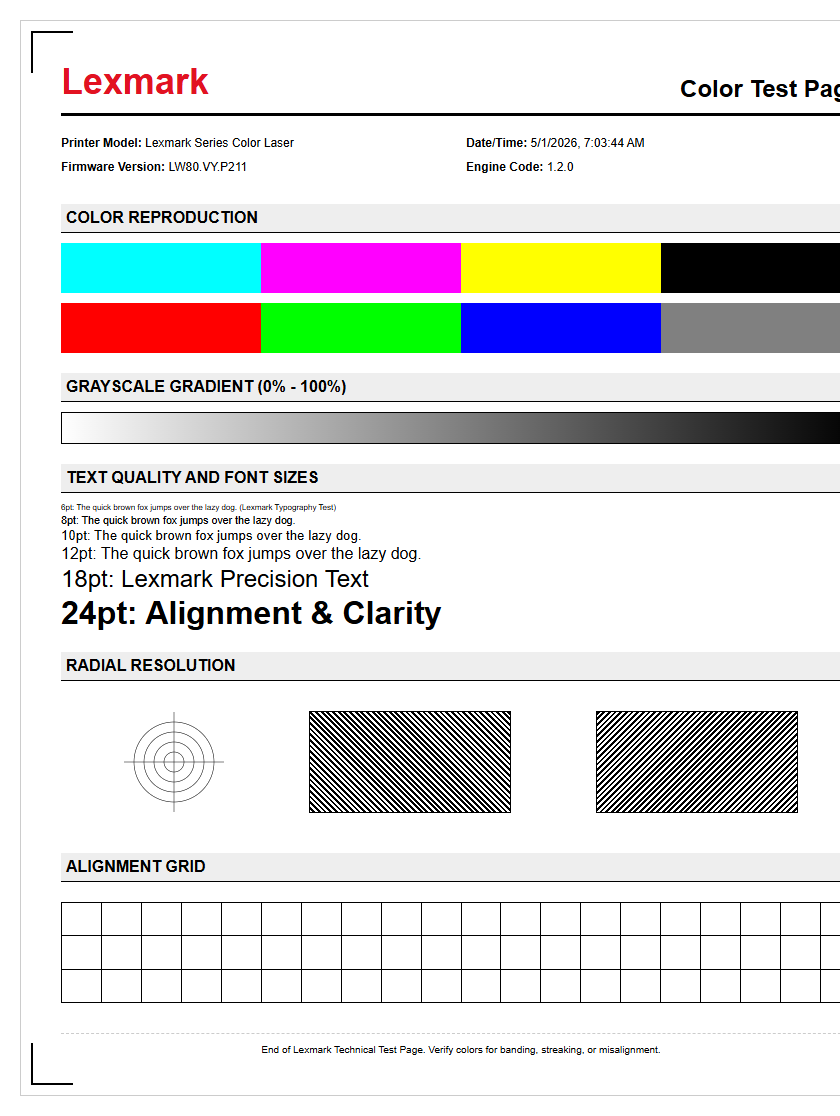
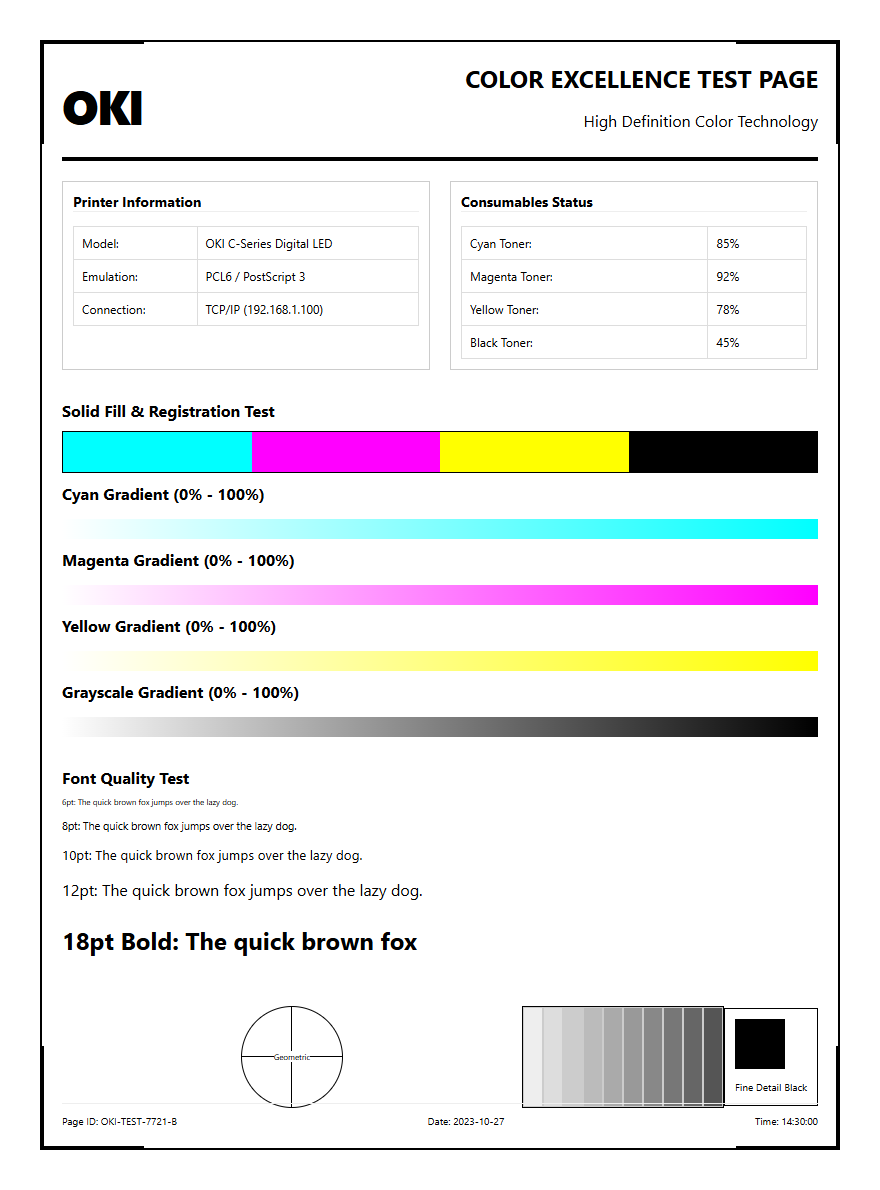
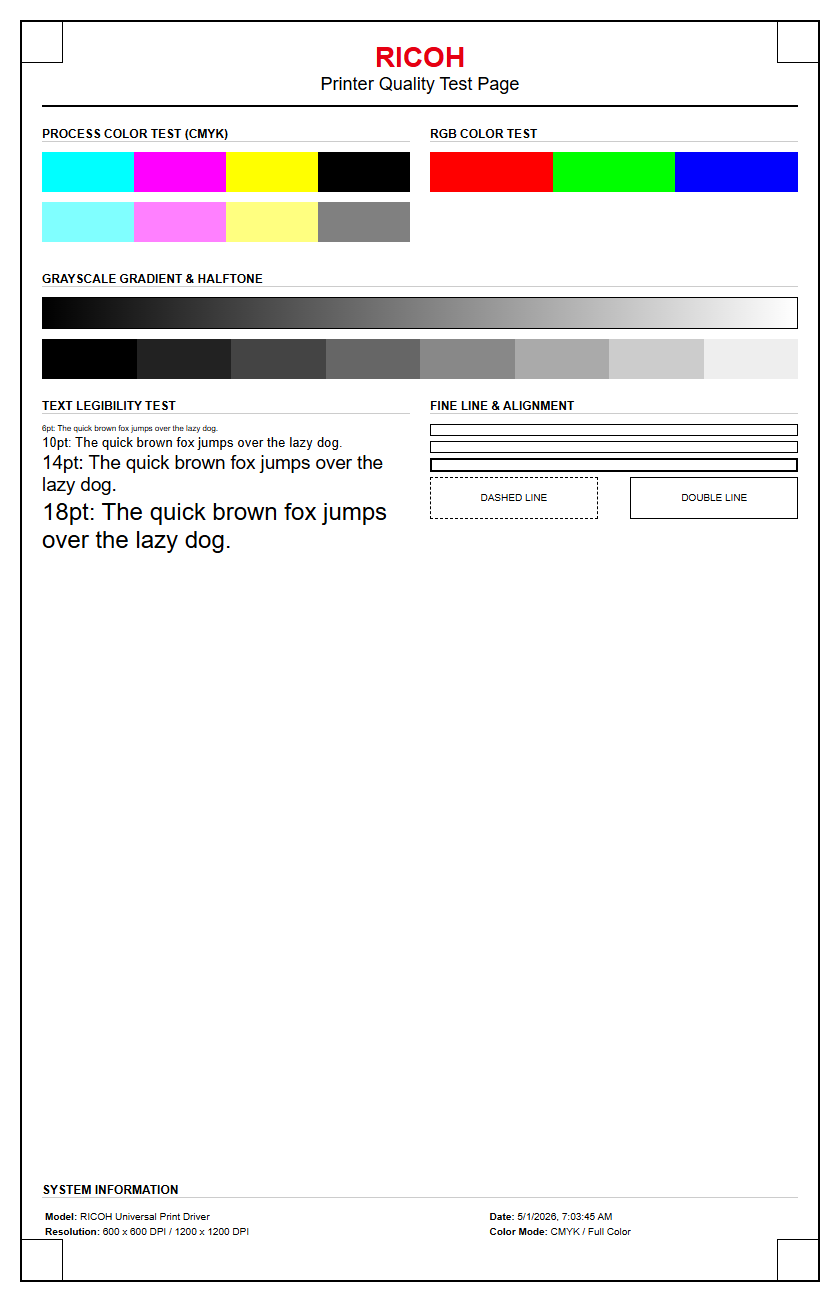
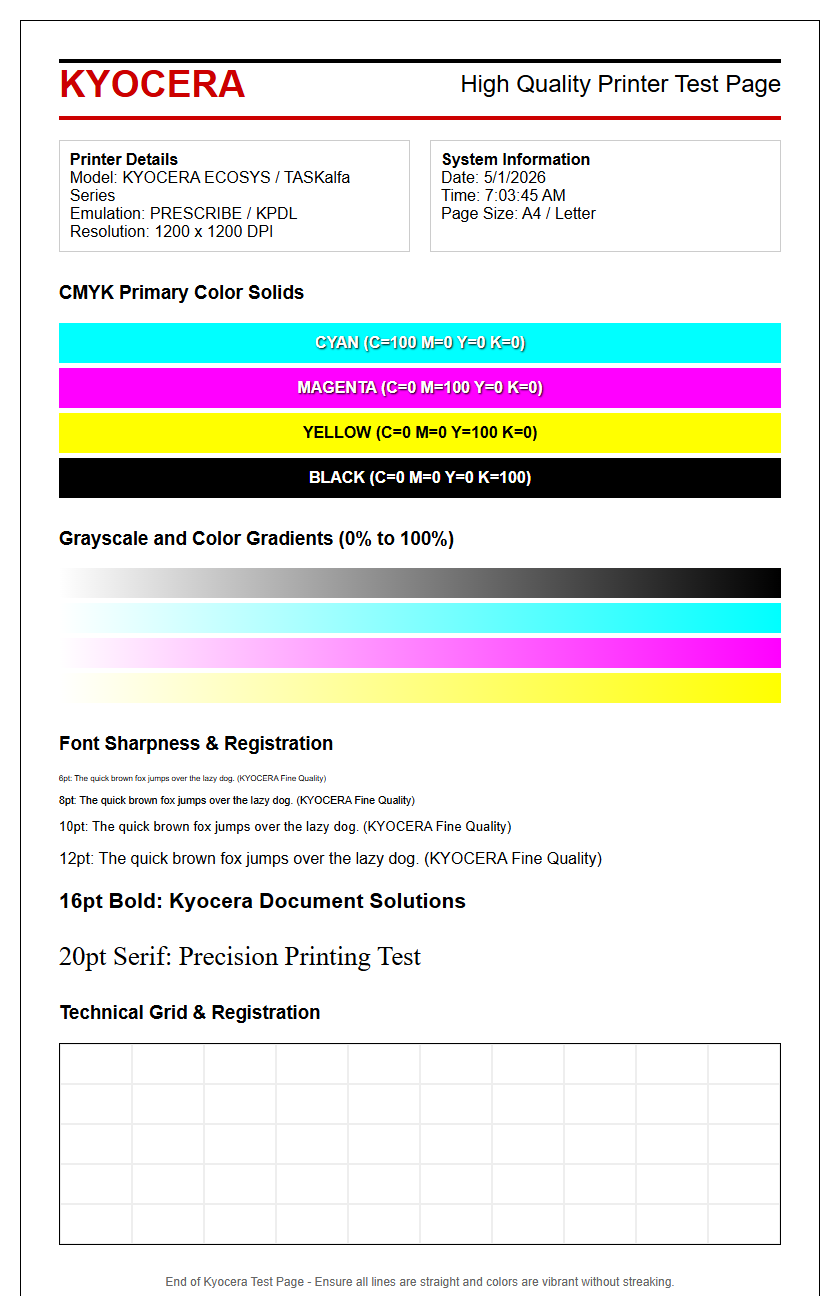
Interpreting an Epson color calibration sheet requires a keen eye for tonal transitions and color fidelity. These sheets usually feature gradients of Cyan, Magenta, Yellow, and Black (CMYK) to test the printer's ability to render smooth halftones. If you notice banding or horizontal lines across these blocks, it indicates a nozzle deflection or a partial clog. A successful calibration displays a seamless transition from light to dark without sudden jumps in saturation. You should also look for color bleeding, where one ink contaminates the adjacent block, often caused by high humidity or incorrect media settings.
| Observation | Possible Issue |
|---|---|
| White lines in color blocks | Clogged print head nozzles |
| Muddy or dark colors | Incorrect ICC profile usage |
| Vertical misalignment | Print head requires recalibration |
The goal is to ensure the primary colors are balanced and the grayscale remains neutral. If the gray blocks appear greenish or reddish, the color balance is off, necessitating a software adjustment or a head cleaning cycle to restore the correct ink flow and droplet size.
Windows Printing Preferences Guide
Accessing Epson diagnostic tools on Windows requires navigating through the Control Panel or the modern Settings app. Once you locate "Devices and Printers," right-clicking your Epson model allows you to enter "Printing Preferences." Here, the "Maintenance" tab serves as the primary hub for all testing utilities. This interface provides direct access to the Nozzle Check, Head Cleaning, and Print Head Alignment functions. It is essential to ensure that the "Status Monitor" is enabled, as it provides real-time feedback on ink levels and internal hardware errors.
Within the "Main" tab, users can toggle between different quality presets like "Draft," "Standard," or "High." For a true test page, always select "Standard" to see how the printer handles daily tasks. Advanced users can dive into the "More Options" tab to adjust color correction settings, such as "Automatic," "Custom," or "ICM" (Image Color Management). This dictates how the Windows GDI (Graphics Device Interface) handles the rendering process before sending the bitmap data to the Epson print spooler for final output.
macOS Printer System Settings
On macOS, managing an Epson printer is handled through the "System Settings" under the "Printers & Scanners" menu. Unlike Windows, the interface is more streamlined but hides the utility tools within the "Options & Supplies" sub-menu. Once there, the "Utility" tab allows users to launch the "Epson Printer Utility," which is the central software for hardware maintenance. This utility communicates via the CUPS (Common Unix Printing System) architecture to execute nozzle checks and alignment procedures accurately.
Mac users should ensure that the latest Epson driver is installed rather than relying on the generic AirPrint driver, as AirPrint often lacks the granular maintenance tools needed for deep diagnostics. When running a test page from macOS, the system verifies the handshake between the Mac's Quartz graphics engine and the printer's firmware. It is important to check the "Queue" for any stalled jobs that might interfere with the diagnostic command. By utilizing the specific Epson Utility app, users can also monitor maintenance box levels and access the "Power Cleaning" feature if the standard cleaning cycles fail to resolve output issues.
Epson Nozzle Pattern Analysis
The Epson nozzle check pattern is typically a series of staggered diagonal lines or "stair-steps" for each ink color. A perfect pattern shows solid, unbroken lines across the entire grid. If you observe gaps or missing segments in any of the color blocks, it confirms that specific nozzles are not firing. These gaps are the primary cause of horizontal banding in prints. Analyzing these patterns helps you determine which specific color channel is failing, allowing for targeted troubleshooting rather than broad cleaning cycles.
- Examine the Grid: Look for any missing segments in the diagonal lines.
- Identify the Color: Determine if the gap is in Cyan, Magenta, Yellow, or Black.
- Check for Deflection: Look for lines that are out of place or overlapping.
- Compare Results: Print a second pattern after a cleaning cycle to see improvements.
Performing this analysis before a large print job prevents wastage and ensures that the Micro Piezo actuators are vibrating at the correct frequency. If the pattern is consistently broken in the same spot, it may indicate a permanent nozzle failure or a more serious hardware obstruction.
Correcting Clogged Print Heads
When an Epson nozzle check reveals gaps, a print head cleaning cycle is the standard remedy. This process involves the printer using a pump to pull ink through the nozzles, hopefully dislodging any dried residue or air bubbles. However, excessive cleaning can deplete ink quickly and fill the maintenance box. If two or three standard cleaning cycles do not resolve the issue, it is recommended to let the printer sit for at least six to twelve hours. This "resting period" allows the ink to soften the clog naturally through chemical interaction.
For severe blockages, Epson provides a "Power Cleaning" or "Deep Cleaning" utility. This should be used sparingly as it consumes a significant volume of ink and places stress on the pump system. If software-based methods fail, users might need to inspect the "capping station"-the rubber seal where the print head rests-to ensure it is free of debris. Keeping the internal environment clean and using the printer at least once a week are the best ways to prevent the microscopic apertures from becoming obstructed by coagulated aqueous ink.
Print Head Alignment Steps
Print head alignment is necessary when you notice vertical misalignment, blurry text, or "ghosting" effects. This process ensures that the print head ejects ink at the exact micro-second required as it travels back and forth across the paper platen. Epson printers offer two types of alignment: Vertical Alignment, which corrects the straightness of vertical lines, and Horizontal Alignment, which fixes overlapping or gaps between the passes of the print head. Proper alignment is critical for maintaining high-definition detail.
During the alignment procedure, the printer will output a sheet with several numbered patterns. You must examine these patterns carefully and select the ones with the least amount of visible banding or the most solid fill. Entering these values into the utility software recalibrates the timing of the print head's movement. This is a critical step after moving the printer or changing paper thickness, as different media weights can affect the "platen gap" and the trajectory of the ink droplets. Regular alignment results in sharper edges and more professional-looking documents, ensuring bi-directional printing operates without distortion.
Ink Color Accuracy Testing
Achieving color accuracy on an Epson printer involves more than just unblocking nozzles; it requires a synergy between the ink, the paper, and the software's ICC profiles. An accuracy test involves printing a specialized target image containing skin tones, neutral grays, and highly saturated primary colors. By comparing the print to a calibrated monitor, you can identify if the printer is leaning toward "warm" or "cool" tones. This is essential for photographers and graphic designers who require color-critical output.
- Media Selection: Always match the driver setting to the physical paper type.
- ICC Profiles: Use specific profiles provided by paper manufacturers for better rendering.
- Environmental Factors: Note that lighting conditions (D50/D65) affect how you perceive printed color.
- Ink Quality: Genuine Epson inks ensure the spectral response matches the driver's logic.
If colors remain dull, checking the "Color Management" settings in your creative software to ensure it "Manages Colors" instead of the printer driver can often provide more precise results. This bypasses the printer's internal lookup tables for a more direct color translation.
Maintaining Peak Epson Performance
Sustaining peak performance for an Epson printer requires a combination of regular use and environmental control. Inkjet printers perform best in stable temperatures with moderate humidity; extreme dryness can accelerate ink clogging, while high humidity can cause paper curl and ink bleeding. It is essential to keep the firmware updated, as Epson frequently releases patches that improve ink consumption logic and mechanical efficiency. Additionally, always use the physical "Power" button to turn the device off rather than a power strip.
Using the power button allows the print head to return to its "home position" and cap itself, preventing the nozzles from being exposed to the air and drying out. Following these protocols ensures that the precision-engineered Micro Piezo heads continue to deliver high-resolution output without the need for costly repairs. Regularly clearing the paper path of dust and using genuine Epson consumables will extend the overall lifecycle of the hardware and maintain the high standard of print quality expected from the brand. Consistent maintenance is the key to avoiding sudden mechanical failures during critical print jobs.

Comments